

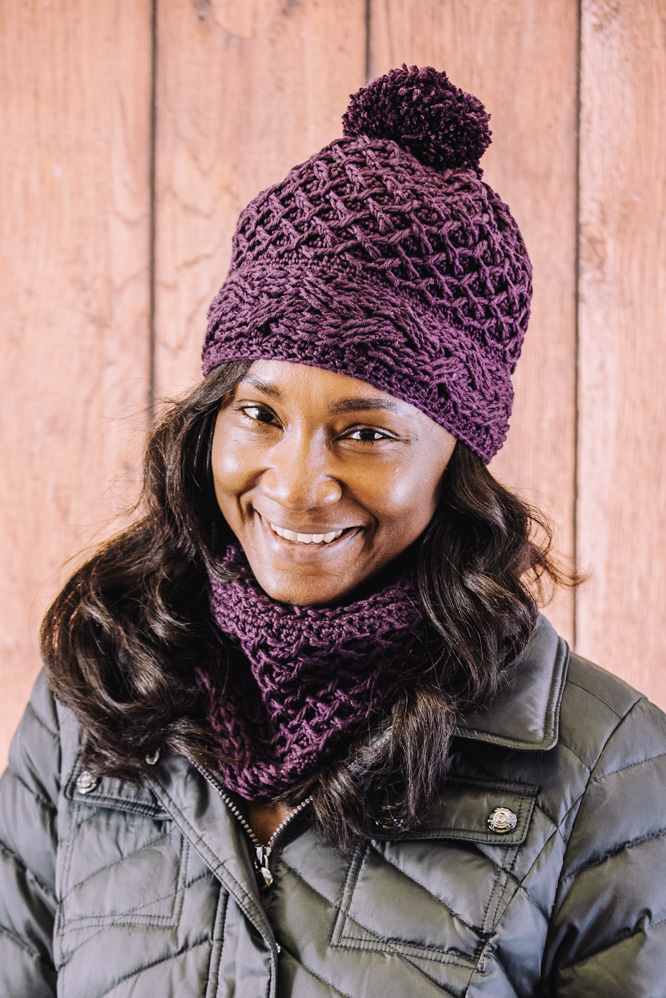
Lush, three-dimensional texture is the name of the game in this sweet hat and cowl set. Hat brim and cowl borders are worked sideways while the crossed lattice pattern is worked vertically. Complete with a pom pom that reminds us of a sugar plum, this is the set you should make this season.
Skill Level: Intermediate
Size:
Hat: Adult Small (Medium, Large), finished measurements 17½ (19¼, 21)” Brim circumference, 21 (22¾, 24¾)” Body circumference x 8½ (9, 9½)” height
Cowl: 22¾” circumference x 8¼” height
Hat shown in size Small
Gauge: 17 sc and 20 rows = 4” [10 cm] in Lattice patt after wet blocking
1 rep of Small Braid patt = 1¾” [4.6 cm] wide x 1¾” [4.6 cm] tall after wet blocking
1 rep of Large Braid patt = 2¼” [5.5 cm] wide x 1¾” [4.6 cm] tall after wet blocking
Materials
Yarn:
 Fibra Natura Dona (100% Extra Fine Superwash Merino; 306 yards [280 meters]/100 grams): 117 Blackberry, 4 (4, 5) balls for Hat; 3 balls for Cowl
Hook: US size 7 (4.5 mm)
Notions: Tapestry needle
Special Stitches
Large Braid Cable (worked over 11 sts)
Ch 12.
Row 1 (WS): Sc in second ch from hook and each ch across, turn.
Row 2 (RS): Ch 1, sc in first sc, fpdc in next 9 sc, sc in last sc, turn.
Row 3 and all WS rows: Ch 1, sc in each st across, turn.
Row 4: Ch 1, sc in first sc, fpdc in next 3 dc from 2 rows below, sk next 3 dc from 2 rows below, fptr in next 3 dc from 2 rows below, working behind fptr just made, fptr in 3 fpdc skipped from 2 rows below, sk 9 sc behind sts just worked, sc in last sc, turn.
Row 6: Ch 1, sc in first sc, fpdc in next 3 dc from 2 rows below, fpdc in next 6 tr from 2 rows below, sk 9 sc behind sts just worked, sc in last sc, turn.
Row 8: Ch 1, sc in first sc, sk next 3 dc from 2 rows below, fptr in next 3 dc from 2 rows below, working in front of tr just made, fptr in 3 skipped dc from 2 rows below, fpdc in last 3 dc from 2 rows below, sk 9 sc behind sts just worked, sc in last sc, turn.
Row 10: Ch 1, sc in first sc, fpdc in next 6 tr from 2 rows below, fpdc in next 3 dc from 2 rows below, sc in last sc, turn.
Rep Rows 3-10 for patt.
Small Braid Cable (worked over 8 sts)
Ch 9.
Row 1 (WS): Sc in second ch from hook and each ch across, turn.
Row 2 (RS): Ch 1, sc in first sc, fpdc in next 6 sc, sc in last sc, turn.
Row 3 and all WS rows: Ch 1, sc in each st across, turn.
Row 4: Ch 1, sc in first sc, fpdc in next 2 dc from 2 rows below, sk next 2 dc from 2 rows below, fpdc in next 2 dc from 2 rows below, working behind fpdc just made, fpdc in skipped 2 dc from 2 rows below, sk 8 sc behind sts just worked, sc in last sc, turn.
Row 6: Ch 1, sc in first sc, fpdc in next 6 dc from 2 rows below, sk 6 sc behind sts just worked, sc in last sc, turn.
Row 8: Ch 1, sc in first sc, sk next 2 dc from 2 rows below, fpdc in next 2 dc from 2 rows below, working in front of dc just made, fpdc in 2 skipped dc from 2 rows below, fpdc in last 2 dc from 2 rows below, sk 6 sc behind sts just worked, sc in last sc, turn.
Row 10: Ch 1, sc in first sc, fpdc in next 6 dc from 2 rows below, sc in last sc, turn.
Rep Rows 3-10 for patt.
Lattice (multiple of 4 sts + 1)
Row 1 (RS): Ch 1, sc in each sc across, join with sl st to beg sc, turn.
Row 2 (WS): Ch 1, sc in each sc across, join with sl st to beg sc, turn.
Row 3: Ch 1, sc in first 2 sc, *fpdc2tog over sc 2 sts to the right 2 rows below and 3 sc away to the left from first sc, sk sc behind fpdc2tog just worked, sc in next 3 sc; rep from * to last 2 sc, sc in last 2 sc, join with sl st to beg sc, turn.
Row 4: Ch 1, sc in each st across, join with sl st to beg sc, turn.
Row 5: Ch 1, sk next dc from 2 rows below, fpdc around next dc from 2 rows below, sk sc behind st just worked, sc in next 3 sc, *working in front of fpdc just made, fpdc2tog around skipped dc from 2 rows below and sk next dc and work through next dc from 2 rows below, sk sc behind st just made, sc in next 3 sc; rep from * to last sc, working in front of fpdc just made, fpdc around skipped dc from 2 rows below, join with sl st to beg dc, turn.
Row 6: Ch 1, sc in each st across, join with sl st to beg sc, turn.
Row 7: Ch 1, sc in first 2 sc, fpdc2tog first dc from 2 rows below and sk next dc and work through next dc from 2 rows below, sk sc behind st just worked, *sc in next 3 sc, fpdc2tog skipped dc from 2 rows below working behind last dc made and sk next dc and work through next dc from 2 rows below; rep from * to last 2 sc, sc in last 2 sc, join with sl st to beg sc, turn.
Row 8: Ch 1, sc in each st across, join with sl st to beg sc, turn.
Rep Rows 5-8 for patt.
Pattern Notes
The cabled brim is worked sideways. The hat body is worked upward from the side of the brim. The hat body is worked in joined rows.
The cowl borders are worked sideways. The cowl body is worked in joined rows.
Pattern
Brim
Ch 12.
Work Rows 1-10 of Large Braid Cable.
Rep Rows 3-10, 8 (9, 10) times, then rep Rows 3-9 once more. Do not turn at the end of the last row.
Brim Edging
Rotate work 90 degrees clockwise.
Row 1 (WS): Working along one long edge of Brim, ch 1, work 60 (66, 72) sc (approx. 3 sc for every 4 rows) along side of Brim, turn.
Row 2 (RS): Ch 1, fphdc around each sc across.
Fasten off, leaving 8” tail. Sew sides of Brim using mattress stitch, working around posts of stitches from each end so that the seam is as invisible as possible.
Hat Body
Join yarn with sl st to seam along unworked side of Brim.
Set-up Rnd (RS): Ch 1, work 81 (89, 97) sc along side of Brim (approx. 1 sc for every row), join with sl st to beg sc.
Row 1: Ch 1, sc in each sc around, increasing 8 sc evenly across, turn – 89 (97, 105) sc. Counts as Row 1 of Lattice patt.
Work Rows 2-8 of Lattice patt.
Rep Rows 5-8 of patt until piece meas 8½ (9, 9½)”, measuring from bottom/side edge of Brim, ending with RS row.
Next Row (WS): Ch 1, sc2tog around, ending with sc in last st, turn.
Fasten off leaving 10” tail. Pass tail through rem sc, pull taut.
Cowl
Lower Border
Ch 12.
Work Rows 1-10 of Small Braid Cable.
Rep Rows 3-10, 10 times, then rep Rows 3-9 once more. Do not turn at the end of the last row.
Lower Border Edging
Rotate work 90 degrees clockwise.
Row 1 (WS): Working along one long edge of Border, ch 1, work 97 sc (approx. 1 sc for every row) along side of Cowl, turn.
Row 2 (RS): Ch 1, fphdc around each sc across.
Fasten off, leaving 8” tail.
Sew sides of Cowl using mattress stitch, working around posts of stitches from each end so that the seam is as invisible as possible.
Main Cowl
Join yarn with sl st to seam along unworked side of Cowl.
Set-up Rnd (RS): Ch 1, work 97 sc along side of Cowl (approx. 1 sc for every row), join with sl st to beg sc.
Row 1: Ch 1, sc in each sc around. Counts as Row 1 of Lattice patt.
Work Rows 2-8 of Lattice patt.
Rep Rows 5-8 of patt until Lattice portion of Cowl meas 4”, ending with RS row.
Upper Border
Work as for Lower Border.
Upper Border Edging
Work as for Lower Border Edging.
Fasten off leaving long tail for seaming. Sew ends of Upper Border tog. Sew side of Border to last row of Main Cowl.
Finishing
Weave in ends and block. Make a 2½” pom-pom and sew to top of hat.
Have you received an answer from the designer yet. This is a confusing pattern in regard to the cowl. Are we supposed to chain 97 to start the cowl or are we supposed to first make the edge and that will provide the 97 stitches that we are to make the 97 sc along the length of the border?
WOW!! This set is Stunningly Beautiful ????
I am struggling with the cowl border. The # of chains for the cowl border and the # of chains for the small braid do not match. Without further instructions this it is difficult to follow.
Hello! I’ve reached out to the designer for advice and she or I will reply as soon as possible. Thanks! – Nicola, Editor
Is there a video or picture tutorial to help with brim of the hat and border or the cowl?