


The City Tweed Scarf uses three colors to create a go-to accessory that works for both men and women. The pattern is easily memorized so this can be a great project for crocheting in the car or while watching a movie on the couch. Two color options are shown and explained here, proving that this pattern works with a variety of color choices.
Skill Level: Easy
Size: 64” long and 6” wide, excluding fringe
Gauge: 14 dc and 14 rows = 4” [10 cm] in pattern after wet blocking
Materials
Yarn:
 Knit Picks City Tweed Yarn DK (55% merino wool, 25% superfine alpaca, 20% donegal tweed; 123 yards [112 meters]/50 grams): Featured Project, Option A: Lemon Curd (MC, 2 balls), Morning Glory (CC1, 2 balls), Tahitian Pearl (CC2, 2 balls); Inset Project, Option B: Coastal (MC, 2 balls), Porpoise (CC1, 2 balls), Desert Sage (CC2, 2 balls)
Hook: US size H/8 (5.0 mm) hook
Notions: Scissors for cutting ends and making fringe, ruler/tape measure – for measuring fringe
Pattern Notes
City Tweed Scarf is worked lengthwise with the foundation chain the length of the scarf. The foundation chain should be worked loosely or with a larger hook. Work Row 1 into either the back bump of the foundation chain or the top loop only. All color changes should begin as the last YO of the last dc of the previous row. Leave a 5–6” tail when changing colors. These tails will become part of the scarf fringe.
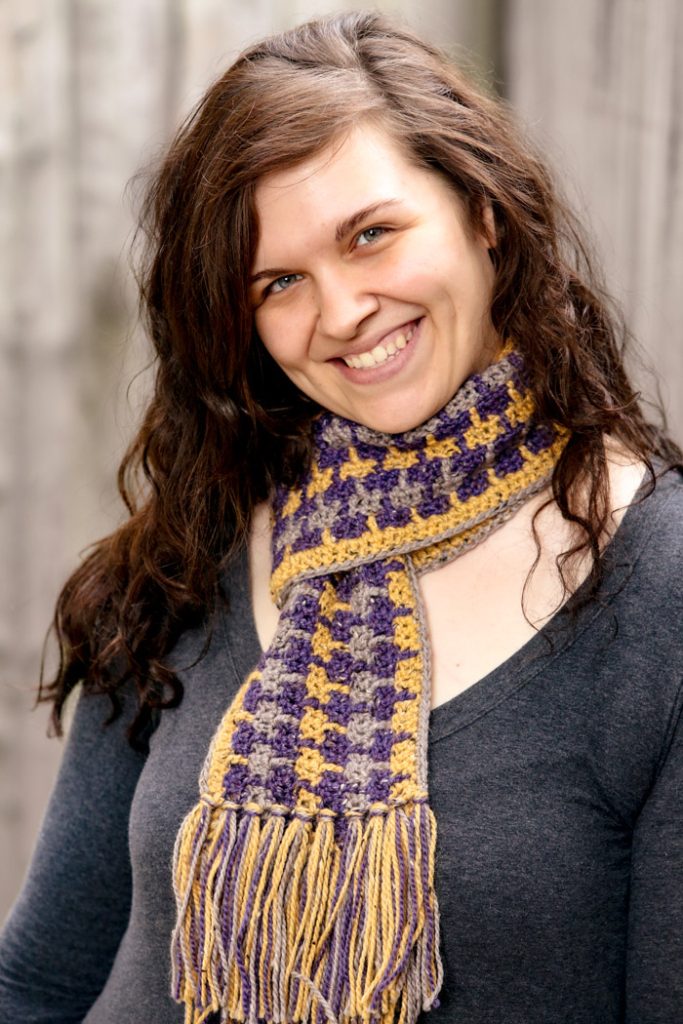
The pattern is written to include 2 different color sequences. Refer to the pictures of the gold/purple/grey scarf (option A) and the blue/teal/sage scarf (option B) to see which combination you prefer. Any differences in the instructions for the two options are noted within the pattern.
Pattern
With MC, loosely ch 226 (multiple of 4 + 2), leaving a 6” tail. The tail will be worked into fringe later.
Row 1 (RS): With MC, sc in 2nd ch from hook, 1 sc in next ch, *ch 1, sk 1 ch, 1 sc in next 3 ch; rep from * across to last 3 chains, ch1, sk 1 ch, sc in last 2 chains, turn. (225 sts including chain sts)
Row 2 (WS): Ch 3 (counts as dc, here and throughout), sk first sc, dc in next st, *ch 1, sk ch from previous row, dc in next 3 sts; rep from * across, ending with 2 dc instead of 3 dc, changing to CC1 at last yo of last dc, turn. (224 sts at end of this row and all rows)
Row 3: With CC1, ch 1, sc in next 2 dc, work 1 tr around first ch st from 2 rows below, *sc in next dc, ch 1, sk 1 dc, sc in next dc, 1 tr around next ch st from 2 rows below; rep from * across to last 2 sts (turning chain counts as a st), sc in last 2 sts, turn.
Row 4: Ch 3, sk first sc, dc in next 3 sts, *ch 1, sk ch from previous row, dc in next 3 sts; rep from * across to last 4 sts, dc in last 4 sts, changing to CC2 at last YO of last dc, turn.
Row 5: With CC2, ch 1, sc in next 2 dc, *ch 1, sk 1 dc, sc in next dc, 1 tr around skipped ch st from 2 rows below, sc in next dc; rep from * across to last 3 sts (turning ch counts as a st), ch 1, sk 1 dc, sc in last 2 sts, turn.
Row 6: Ch 3, sk first sc, dc in next st, *ch 1, sk ch from previous row, dc in next 3 sts; rep from * across, ending with 2 dc instead of 3 dc, changing to CC1 (option A) or MC (option B) at last YO of last dc, turn.
Rows 7-8: With CC1 (option A) or MC (option B), work same as rows 3-4, switching to MC (option A) or CC1 (option B) at color change.
Rows 9-10: With MC (option A) or CC1 (option B), work same as rows 5-6, switching to CC1 (option A) or CC2 (option B) at color change.
Rows 11-12: With CC1 (option A) or CC2 (option B), work same as rows 3-4, switching to CC2 (option A) or MC (option B) at color change.
Rows 13-14: With CC2 (option A) or MC (option B), work same as rows 5-6 switching to CC1 (for both options) at color change.
Rows 15-16: With CC1 (for both options), work same as rows 3-4, switching to MC (option A) or CC2 (option B) at color change.
Row 17: With MC (option A) or CC2 (option B), work same as row 5.
Row 18: Option A: With MC, ch 3, sk first sc, dc in each st across, change to CC2 on last dc, turn OR Option B: With CC2, work same as row 6, switching to MC at color change.
Row 19: Option A: With CC2, ch 1, sc in each st across. Fasten off leaving 6” tail. OR Option B: With MC, work same as row 3.
Option B Only
Row 20 (WS): Ch 3, sk first sc, dc in each st across. Do not change color.
Row 21 (RS): Ch 1, sc in each st across.
Fasten off leaving 6” tail.
Option A Only
With RS facing, join CC2 to beg foundation chain and sc in each ch across. This creates a matching row of sc to the other finished edge.
Fasten off.
Finishing
Do not weave in any ends. Wet block the Scarf and pin out to desired dimensions. When the scarf is completely dry, attach fringe to each end, incorporating all the end tails into the fringe.
(See instructions below for making fringe).
Cutting the Fringe Strips
Using a ruler or tape measure, cut approximately 62 lengths of yarn measuring 12” long from your leftover yarn – some from each color. This will allow 4 strands of yarn per “fringe unit”. These units will be doubled over resulting in a final count of 8 ends per unit.
There is one fringe unit attached to each color stripe at each end, so the option B scarf will have 10 fringe units per end and the option A scarf will have 9 fringe units per end.
However, remember that you are utilizing the tails left from crocheting the scarf, so on one end of the scarf you already have 2 strands per color stripe (except for the very first and last stripes). For those fringe units you will only need to add 3 of your cut strips of yarn to make up the difference. You can mix the colors in each fringe unit or you can make the fringe units the same color as the stripe where it is attached – your choice.
Making the Fringe Units
Take 4 strands of the 12” lengths of yarn (unless you are working on the end with 2 tails per stripe – in that case use 3 strands).
Place a crochet hook into the space at the end of each color stripe, working from back to front. Fold all 4 strands of yarn in half around the hook and pull that multi-strand loop through. Stop pulling on the loop as soon as you have enough room to insert all 8 loose ends into the loop (remember to add in any tails at this point). Then gently snug it up by pulling on all the ends.
After all the fringe is in place, trim the ends to even up the edges and make all of the fringe the same length.