


This luxurious headband is created by crocheting around a hair elastic for a comfortable easy fit. The simple Tunisian crochet stitch is easy and does not require a special hook. The seamless, one-piece design can be made with any chenille or velvet yarn. Great for gifting, this quick project is reversible and has a unique plush texture on each side.
Skill Level: Easy
Size: 2.25 x approx. 21.5” circumference
Gauge: 18 sts and 12 rows = 4” [10 cm]
Materials
 Yarn: Bernat Velvet (100% Polyester; 315 yards [288 meters]/300 grams): 2017 Terra cotta rose or 161032 Velveteal (1 ball)
Hook: US size H/8 (5 mm)
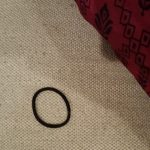
Notions: Tapestry needle, elastic hair tie (approx. 1.5 to 2” diameter)
Pattern Notes
The pattern starts with 30 single crochet around a hair elastic. Ten stitches are picked up to form the band using rows of Tunisan crochet. Ten stitches on the opposite side of the hairband are crocheted into to close the circle for a stretchy, comfortable fit.
Pattern
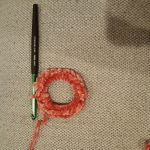
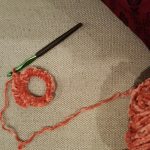
Make a slipknot onto hook. Insert hook into the center of the circle of elastic, yo, pull through the slip knot. Sc 30 around the elastic, sl st to beg of rnd.
Row 1: To start the rows of Tunisian simple stitch (tss), insert hook into the top 2 lps of next st, yo, repeating across 10 sts to gather a total of 11 lps on the hook. For the reverse pass, yo, draw the hook through 2 lps 10 times.
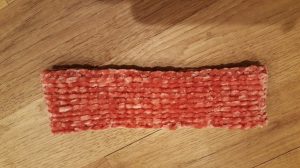
Rows 2-52 (or until reaching a length of 18” from the elastic): Tss 10; for the first st of each forward pass, insert hook under the vertical bar to the left of the bar on the right edge of the band, for the last st, insert hook under the vertical bar on the left edge of the band. Reverse pass as in Row 1.
-
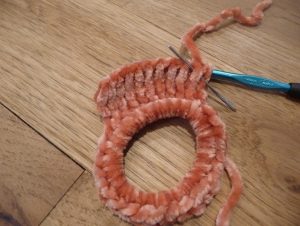
- Insert hook here for first tss
-
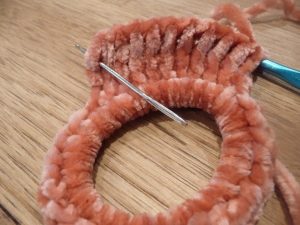
- Insert hook here for last tss of each row
Row 53: Finish off the row of Tunisian sts: insert hook under the next vertical bar and sl st 10 times.
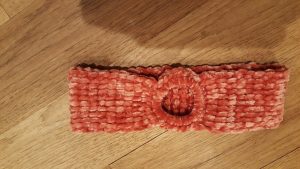
Bring the end of the band around to the elastic to make a circle with the back side of the band facing outward. Sl st in first st on working edge of band. Insert hook in 6th sc on the elastic on the opposite side of band, sl st. Sl st across to join the rem sts of band to sc on elastic.
Fasten off.

Finishing
Weave the ends into the first row of the band, not into the sc on the elastic.
Louise Sharadin
I have not had a chance to work on any Tunisian crochet items, but I really want to try it and learn from my mistakes. These items are so beautiful I’m wiling to learn this type of crocheting. I know I can learn this. Thanks for putting this on out where a lot of people can see it.
I’m not familiar with tunisian crochet but hope to learn. In the instructions before Row 53, it says “Insert hook here for first tss” and then it says “Insert hook here for last tss of each row” but it doesn’t show anywhere to insert hook. Could you please elaborate on where to insert the hook? Thank you!
Hello!
Sorry that the photos referred to in the instructions aren’t showing! For the placement of the first stitch of that row, insert the hook behind the vertical bar that is the second vertical bar from the right edge of the work (i.e., not on the right edge, but the first vertical bar to the left of the edge bar). For the final stitch, insert the hook under the vertical bar that is all the way on the left, it will be the one on the edge. Best of luck with Tunisian crochet! Once you get the hang of it, projects can work up a lot quicker and Tunisian has wonderful unique textures on each side.
Hi! At the end of the forward pass in Row 1, there are 11 loops on the hook. To start the reverse pass, yarn over and draw through the first two loops that are on the far left side of the hook. This drops the first stitch off the loop down toward the rest of the work. There should now be 10 loops on the hook. Yarn over and pull the yarn through the first two loops on the left side of the hook, leaving 9 loops on the hook. Repeat the yarn over and pull through process a total of ten times; after the tenth draw-through of the yarn, only the working loop should be left on the crochet hook.
I hope that helps!
Do you have a video for this pattern? I am not understanding the reverse pass instructions. Thank you
Hi Laurie, At the moment we do not have a video, but it’s a great idea! I’ve reached out to the designer to see if she has any tips for the reverse pass instructions. Stay tuned!