


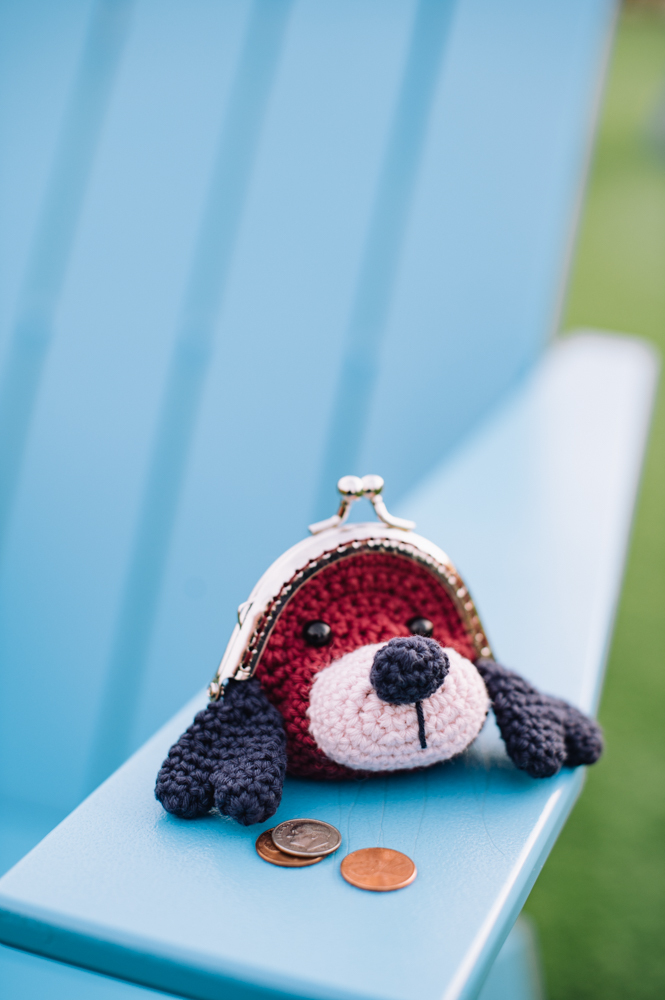
A sweet gift idea for yourself or your bestie, this puppy coin purse features a classic metal clasp and safety eyes. The nose and ears are three-dimensional and adds to the cuteness!
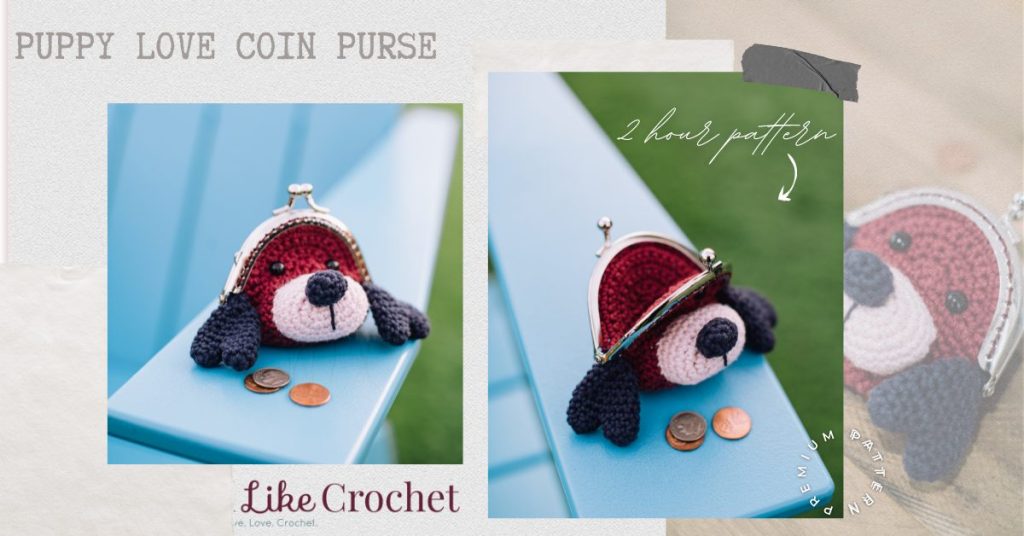
Time: 2 Hour Pattern
Skill Level: Easy
Size: 3” x 5” (7.5 cm x 13 cm)
Gauge: 3 sc = 0.5” [1.5 cm]
Materials
 Yarn: Rico Design Ricorumi DK (100% cotton; 63 yards [57.5 meters]/25 grams): 030 Burgandy (A, 1 ball), 008 Rose (B, 1 ball), 036 Navy Blue (C, 1 ball).
Hook: US size 3 mm
Notions: Tapestry needle, scissors, stitch markers, one 3.5” x 2.4” [9 cm x 6.3 cm] purse clasp, 2 small black shank buttons (or safety eyes), small amount of toy stuffing
Pattern Notes
This pattern is worked in the amigurumi style (unless specified), in a spiral without slip stitching or turning chains.
Pattern
Purse Uppers (make 2)
The beginning ch 1 does not count as a st.
With A, make a magic ring.
Row 1: 3 sc into magic ring, turn. (3 sc)
Row 2: Ch 1, 2 sc in each st across, turn. (6 sc)
Row 3: Ch 1, *sc in next st, 2 sc in next st, rep from * across, turn. (9 sc)
Row 4: Ch 1, *sc in next 2 sts, 2 sc in next st, rep from * across, turn. (12 sc)
Row 5: Ch 1, *sc in next 3 sts, 2 sc in next st, rep from * across, turn. (15 sc)
Row 6: Ch 1, *sc in next 4 sts, 2 sc in next st, rep from * across, turn. (18 sc)
Row 7: Ch 1, *sc in next 5 sts, 2 sc in next st, rep from * across, turn. (21 sc)
Row 8: Ch 1, *sc in next 6 sts, 2 sc in next st, rep from * across. (24 sc)
Fasten off one of the purse uppers and weave in ends. For the second purse upper, continue to the purse bottom.
Purse Bottom
In the next section you will work, in continuous rnds, along the end of each row of each purse upper to join both pieces together;
Rnd 1: Work 1 sc into each row-end along the first purse upper skipping the center rows (14 sc) then continue with 1 sc into each row-end along the second purse upper also skipping the center rows. (28 sc)
Rnd 2: *Sc in next 3 sts, 2 sc in next st, rep from * around. (35 sc)
Rnd 3: *Sc in next 4 sts, 2 sc in next st, rep from * around. (42 sc)
Rnds 4–7: Sc around.
Rnd 8: *Sc in next 5 sts, sc2tog, rep from * around. (36 sc remain)
Rnd 9: *Sc in next 4 sts, sc2tog, rep from * around. (30 sc remain)
Rnd 10: *Sc in next 3 sts, sc2tog, rep from * around. (24 sc remain)
Rnd 11: *Sc in next 2 sts, sc2tog, rep from * around. (18 sc remain)
Rnd 12: *Sc in next st, sc2tog, rep from * around. (12 sc remain)
Rnd 13: Sc2tog around. (6 sc remain)
Fasten off and, using the yarn tail, sew up the last 6 sts.
Muzzle
With B, ch 6.
Rnd 1: Sc in 2nd ch from hook, sc in next 3 ch, 3 sc in the last ch, sc in the next 3 sts along opposite side of foundation ch, 2 sc in last ch. (12 sc)
Rnd 2: 2 sc in first st, sc in the next 3 sts, 2 sc in the next 3 sts, sc in next 3 sts, 2 sc in last 2 sts. (18 sc)
Rnd 3: 2 sc in first st, sc in next 5 sts, 2 sc in next 4 sts, sc in next 5 sts, 2 sc in last 3 sts. (26 sc)
Rnds 4–5: Sc around.
Fasten off but leave long yarn tail for sewing to purse.
Stuff muzzle.
Nose
With C, make magic ring.
Rnd 1: 6 sc into magic ring. (6 sc)
Rnd 2: *Sc in next st, 2 sc in next 2 sts, rep from * around. (10 sc)
Rnd 3: Sc around.
Rnd 4: *Sc in next 3 sts, sc2tog, rep from * around. (8 sts remain)
Fasten off but leave long yarn tail for sewing to muzzle.
Stuff nose.
Ear Bottoms (make 4)
Ears are not stuffed.
With C, make a magic ring.
Rnd 1: 8 sc in magic ring. (8 sc)
Rnds 2–3: Sc around.
In the next section you will work, in continuous rnds, to join two ear bottoms tog to make one ear:
Rnd 4: Work 1 sc into each st along the first ear bottom (8 sc) then continue with 1 sc into each st along the second ear bottom. (16 sc)
Rnd 5: *Sc in next 2 sts, sc2tog, rep from * around. (12 sc remain)
Rnds 6–7: Sc around.
Rnd 8: *Sc in next st, sc2tog, rep from * around. (8 sc remain)
Rnd 9: Sc2tog around. (4 sc remain)
Fasten off and, using the yarn tail, sew up the last 4 sts, leave yarn tail for sewing ears onto the purse.
Finishing
Attach the purse to the purse clasp.
Attach the nose to the muzzle using the tail end to add a little line for the mouth underneath the nose on one side of the purse.
Attach the muzzle to the purse over Rnds 2–10.
Attach two shank buttons to the purse on either end of Row 5.
Attach the ears to the side of the head at the bottom ends of the purse clasps to finish.
Weave in all ends.
This is adorable
I’m going to make my Dandie Dinmont Terrier’s nose extra long so it can hold a roll of bills. Either that or the bills will stand up in his big head and the coins will go to his nose.
Love it. I would have to make the nose not so big for my Shih-Poo. Lol. She has a short nose. Plus she is white with medium brown. She’s so cute.
Hi I don’t get how you work for the purse bottom,a bit confused can anybody help please?
How do we get a paper copy to take to the craft store or work on away from home?
Hello Melinda! You are welcome to save this pattern by copying and pasting into a word document or by printing the pattern via the printer icon on the left hand side of your screen. Hope this helps! – Nicola, Editor
So cute unfortunately I don’t have handy a purse clasp.
Thanks ????
When I get a purse clasp I’ll give it a shot.
So very cute though.
Thanks ????
You can get the clasp at Michaels or Amazon