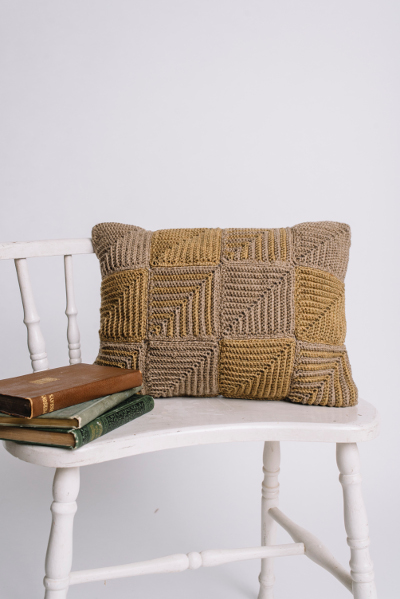
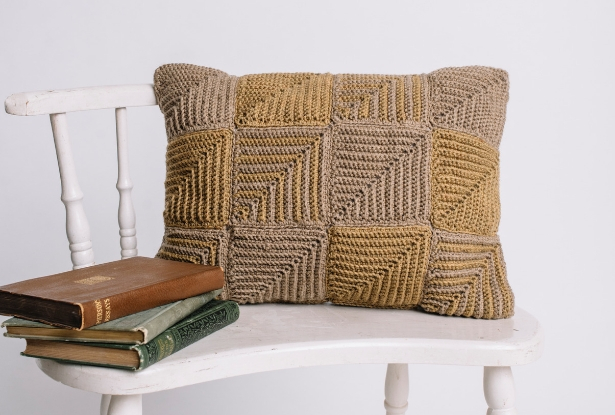
Mitered squares in muted tones come together to make a pillow worthy of your thrifted vintage chair in your reading room. Classic to crochet, this pillow brings back visions of yesteryear.
Skill Level: Easy
Sizes: 16” wide x 12” tall
Gauge: Mitered Square = 4” [10 cm].
Materials
 Yarn: Cascade Yarns 220 Superwash (100% Superwash Wool; 220 yards [200 meters]/100 grams): 1917 Vinci (CA, 2 (3, 3, 3, 4) balls), 870 Straw (CB, 2 (2, 2, 2, 3) balls)
Hooks: Size US F/5 (3.75 mm)
Notions: Stitch markers, tapestry needle, 16 x 12” pillow form
Pattern Notes
This pillow is made from solid and striped mitered squares.
Use similar colors for a subtle plaid effect or high contrast colors for a bolder look.
Exact gauge is not critical for this project. Squares should measure 4” when finished.
Pattern
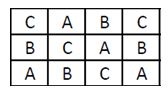
Make 8 Solid Mitered Squares in CA, 8 Solid Mitered Squares in CB, and 8 Striped Mitered Squares.
Solid Mitered Square
Ch 2.
Row 1: Turn, sk 1 ch, sc in next ch. (1 st)
Row 2: Turn, ch 1, 3 sc in first st. (3 sts)
Row 3: Turn, ch 1, sc in first st, 3 sc in next st, place marker in second sc in previous st, sc in last st. (5 sts)
Row 4: Turn, ch 1, sc in first st and each st to marked center st, 3 sc in marked center st, place marker in second sc in previous st, sc in each st across. (7 sts, 2 sts inc’d)
Rows 5-22: Rep Row 4 (43 sts) or until Mitered Square meas 4” / [10 cm].
Do not fasten off. Do not remove stitch marker.
Edging Row (RS): Turn to work along unworked edge, ch 1, sc in side of each row across to foundation ch, turn, 3 sc in unworked side of first st, turn, sc in side of each row across unworked edge. Fasten off.
Striped Mitered Square
Follow instructions for Solid Mitered Square, using CA for foundation ch through Row 2, changing to CB in last yo of final sc. Change colors at the end of every second row in last yo of final sc of row. Carry unworked colors up side of square. Complete final row and Edging Row in same color. Fasten off.
Finishing
Assembly
Following layout diagram, arrange squares, positioning squares with right sides up and stitch markers at same side. With right sides together, thread tapestry needle with CA and seam squares together in rows with mattress stitch. Seam rows together with mattress stitch. After rows are seamed, seam three edges closed with mattress stitch. Turn right side out. Insert pillow form and seam final edge.