


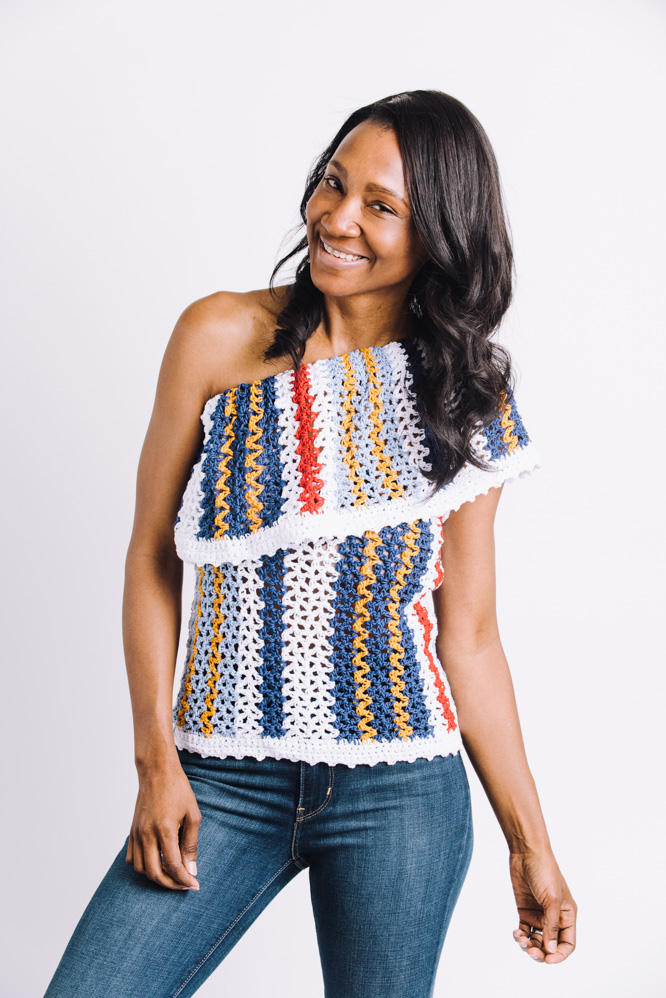
Alix is a fun top that is crocheted in two pieces with elastic bands for optimal sizing. Put the first piece on like a tube top and then attach the top piece where you see fit using simple seaming methods!
Skill Level: Easy
Sizes: XS (S, M, L, XL, XXL) Finished bust 33 (36, 39, 42, 45, 48)”
Gauge: 12 dc = 4” [10 cm] and 12 rows V stitch = 7” [18 cm]
Materials
 Yarn: Lion Brand 24/7 Cotton (100% Cotton; 186 yards [170 meters]/100 grams): #100 White (MC, 2 (2, 3, 3, 3, 3) skeins), #110 Navy (A, 1 (1, 2, 2, 2, 2) skeins), #107 Sky (B, 1 (1, 1, 1, 2, 2) skeins), #158 Goldenrod (C, 1 (1, 1, 1, 1, 2) skeins), #113 Red (D, 1 (1, 1, 1, 1, 1) skein)
Hook: US size 8/H (5.00 mm)
Notions: Tapestry needle, scissors, 2 (2, 3, 3, 3, 3) yards 0.5” elastic, safety pin for help weaving elastic through casings
Special Stitches
V-stitch (V-st): (dc, ch 1, dc)
Pattern
Tube Top Body
Row 1: Beg at side seam, with MC, ch 35 (37, 39, 39, 41, 43), sc in 2nd ch from hook and every ch across. (34 (36, 38, 38, 40, 42) sc)
Row 2: Ch 3 (counts as first dc), sk first sc, [sk next sc, make V-st in next sc] 12 (13, 14, 14, 15, 16) times, sk 1 sc, dc in rem 8 sc.
Row 3: Ch 3 (counts as first dc), sk first dc, dc in next 7 dc, V-st in next 12 (13, 14, 14, 15, 16) V-sts, ending with sk last dc of V-st, dc in last dc.
Rows 4-5: Work same as Row 3, changing to A in last 2 lps of last st.
Rows 6-7: Work same as Rows 3 with A, changing to MC in last 2 lps of last st.
Rows 8-51 (56, 60, 65, 70): Cont to work same as Row 3, changing colors in sequence as follows:
Color Sequence
4 rows MC
2 rows A already worked
2 rows MC
2 rows B
1 row C
2 rows B
1 row C
2 rows B
2 rows MC
2 rows D
2 rows MC
2 rows A
1 row C
2 rows A
1 row C
2 rows A
Rep Color Sequence as needed to obtain the right number of rows.
Fasten off. Sew end of last row and beg ch edge of first row of sc to form side seam of tube.
Tube Top Finishing
Sew end of last row to beg ch edge of first sc row to form side seam.
Bottom Edging
Rnd 1: Attach MC in side seam with RS facing with sl st, ch 1, sc evenly around entire bottom edge, sl st to join at end of rnd.
Rnd 2 (WS): Ch 1, turn, sc in every sc around, ending sl st to join.
Rnds 3-4: Rep Rnd 2, working on RS, then WS.
Rnd 5 Rnd (Picot): Ch 2, turn, with RS facing, [sl st in 2nd ch from hook, sk 1 sc, sl st in next 2 sc] around, ending with sl st into first st.
Fasten off.
Turn dc at top edge over to the inside and sew down, forming elastic casing, leaving an opening at side seam. Thread elastic through casing, adjust to fit top of chest, sew ends together securely when fit above upper bust snugly. Sew casing opening closed.
Faux Sleeve/Ruffle
Row 1: With MC, ch 25, sc in 2nd ch from hook and every ch across. (24 sc)
Row 2: Ch 3 (counts as first dc), sk first sc, [sk next sc, make V-st in next sc] 7 times, sk 1 sc, dc in rem 8 sc.
Rep patt above as for Tube Top, repeating Color Sequence, working for 75 (84, 90, 97, 105) rows.
Faux Sleeve/Ruffle Finishing
Sew end of last row to beg ch edge of first sc row to form seam.
Bottom Edging
Rnd 1: Attach MC in side seam with RS facing with sl st, ch 1, sc evenly around entire bottom edge, sl st to join at end of rnd.
Rnd 2 (WS): Ch 1, turn, sc in every sc around, ending sl st to join.
Rnds 3-4: Rep Rnd 2, working on RS, then WS.
Rnd 5 Rnd (Picot): Ch 2, turn, with RS facing, [sl st in 2nd ch from hook, sk 1 sc, sl st in next 2 sc] around, ending with sl st into first st. Fasten off.
Elastic Casing
Turn dc at top edge over to the inside and sew down, forming elastic casing, leaving an opening at side seam. Thread elastic through casing and sew ends together securely when fit above upper bust snugly. Sew casing opening closed.
Sew together in the same manner as the tube top. Tack the top at side seam.
Wear with ruffle above the opposite shoulder.