


Imagine this: you grab your favorite pair of jeans and discover there’s a huge rip in them – and not the kind that could pass for the on-trend distressed jeans either. What do you do? It’s time to toss them, right? The answer isn’t as straightforward as you might think.
Imagine this: you grab your favorite pair of jeans and discover there’s a huge rip in them – and not the kind that could pass for the on-trend distressed jeans either. What do you do? It’s time to toss them, right? The answer isn’t as straightforward as you might think.
Rather than bidding your old jeans adieu why not turn to the popular movement that’s picking up steam: crochet upcycling. Upcycling clothes is not only a popular look in the stores; it’s a fast-growing trend among craft enthusiasts. Why? It’s stylish, simple to DIY and also offers an affordable means for refreshing and repairing old pieces of clothing that you once loved to wear. Got holes in your jeans or worn-out pockets? Cover them with delicate crochet patches! Found an old shirt that you haven’t worn in years? Transform it into an autumn necessity by replacing the sleeves with cozy sweater ribbing. Even something as simple as adding fringe to an old jean jacket will help upgrade an old piece into a must-have item.
Before You Begin: Choosing the Right Yarn
One of the most important things you can do before starting any upcycling project, is to consider the material of the piece you’re upcycling. Depending on the weight of the fabric, the type of yarn you will need will vary and selecting the wrong type could result in an unsuccessful pairing. But don’t worry — determining the correct yarn is relatively simple. Essentially, you need to make sure the weight of the fabric you’re upcycling is equal to the yarn weight you’re using to patch it. For example, if the piece you want to upcycle is composed of lighter fabrics, like cotton or cotton blends, you need to use a lightweight yarn like fingering or sock weight. On the flip side, clothing made of thicker material (like flannel) is best modified with sport or DK-weight patches. Denim, which is particularly thick, can easily be transformed into a mixed-media sweater using a worsted weight yarn which will add style and warmth.
Once you’ve figured out the weight you need, you’ll also need to determine the right materials. This is where looking at the washing instructions for the original garment can be incredibly useful. If the piece you’re working on is dry clean only, the yarn choices are vast. However, most pieces you’re likely to upcycle will be machine washable. In these cases, choose a cotton-based yarn as often as possible. If the area you are patching needs to flex (like an elbow or knee patch, as an example), try and find a yarn with a bit of nylon. This will help allow the material to stretch more easily.
Now that you know the basics for choosing the right type of yarn for your project, let’s dive into two of the most popular ways to upcycle clothes with crochet: panels and patches.
Crocheting Your Own Shirt Panel
Getting Started
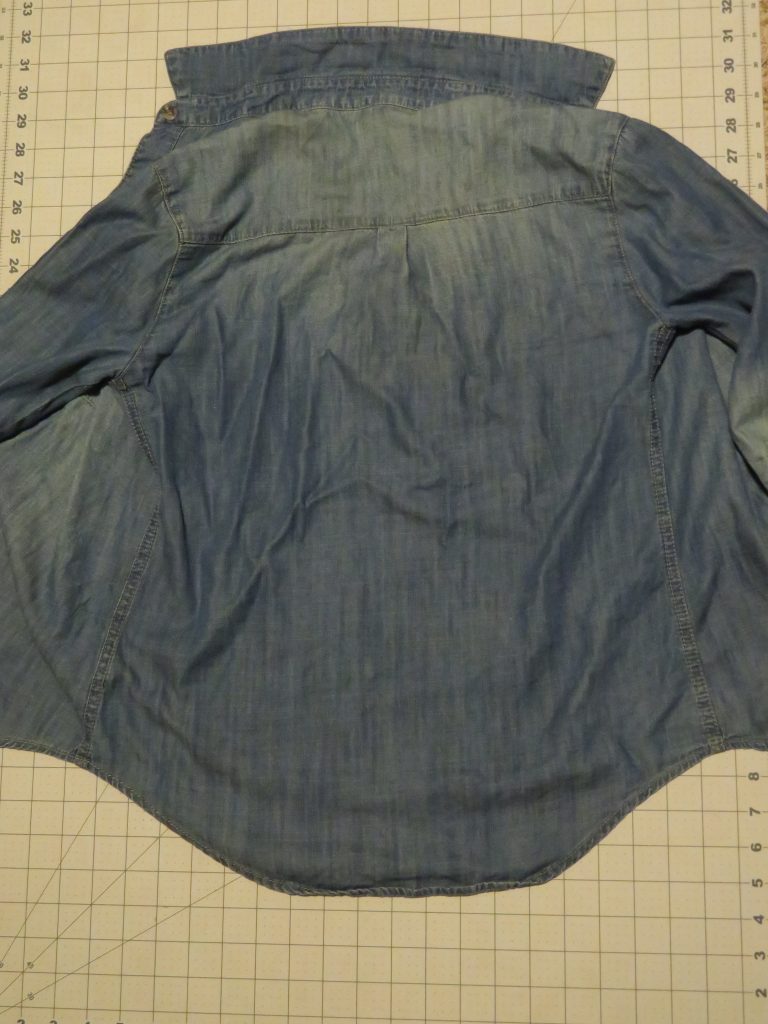
One of the most dramatic and trendy upcycling projects today is to replace the back panel of a shirt or jacket with a new crocheted panel. When selecting a shirt to upcycle, make sure to find one with a flat back and a straight seam running between the shoulders (like the one shown below). This will decrease the amount of shaping the piece will require. In this particular example, I’m using a button-up chambray shirt.
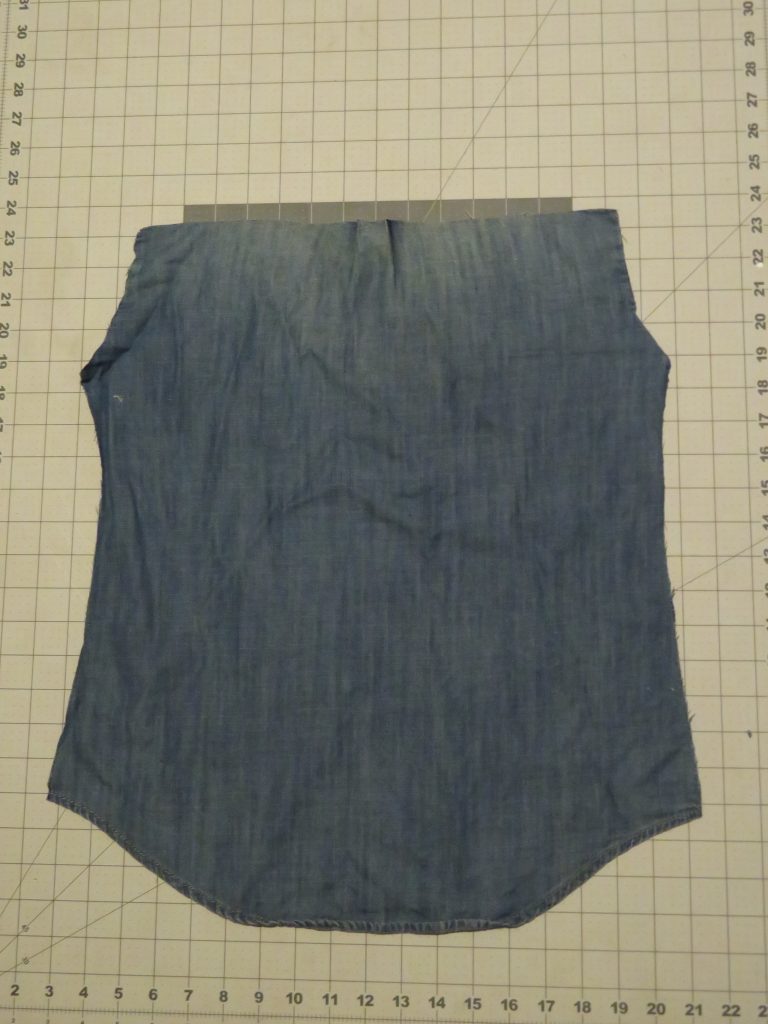
Once you have your shirt, locate the section you want to replace and cut along the inside of the seam, making sure the seam itself is still attached to the shirt once you’re finished cutting. Now, take the panel you just cut out from the shirt and use it to create a template for your new crochet panel. When you measure the cut-out piece, add ¾ inches to each side. This extra portion will need to be sewn into the original clothing. In the case of this shirt, a seam allowance will be added to only three sides.
Creating the Panel
For this specific project, we’ll be creating a filet crochet panel. Filet crochet is created using blocks that make up a grid. The grid is formed by repeating [dc, ch-2] and chain in factors of 3 + 5. To create your own unique designs within the filet grid, you will use 2 dc in some of the empty ch-2 spaces or “blocks,” thus filling in the block. Done in a specific order, these filled blocks will create an image ― in this case, flowers.
This particular filet crochet pattern is 19 blocks (or 58 stitches) wide. If you need to adjust the width to fit your specific cut-away piece’s measurements, just add [dc, ch 2] on each side evenly until the piece measures the width required. In order to get the best results, creating a gauge swatch is vitally important. Measurements for the new crochet panel need to be precise so the fit of the shirt is not compromised.
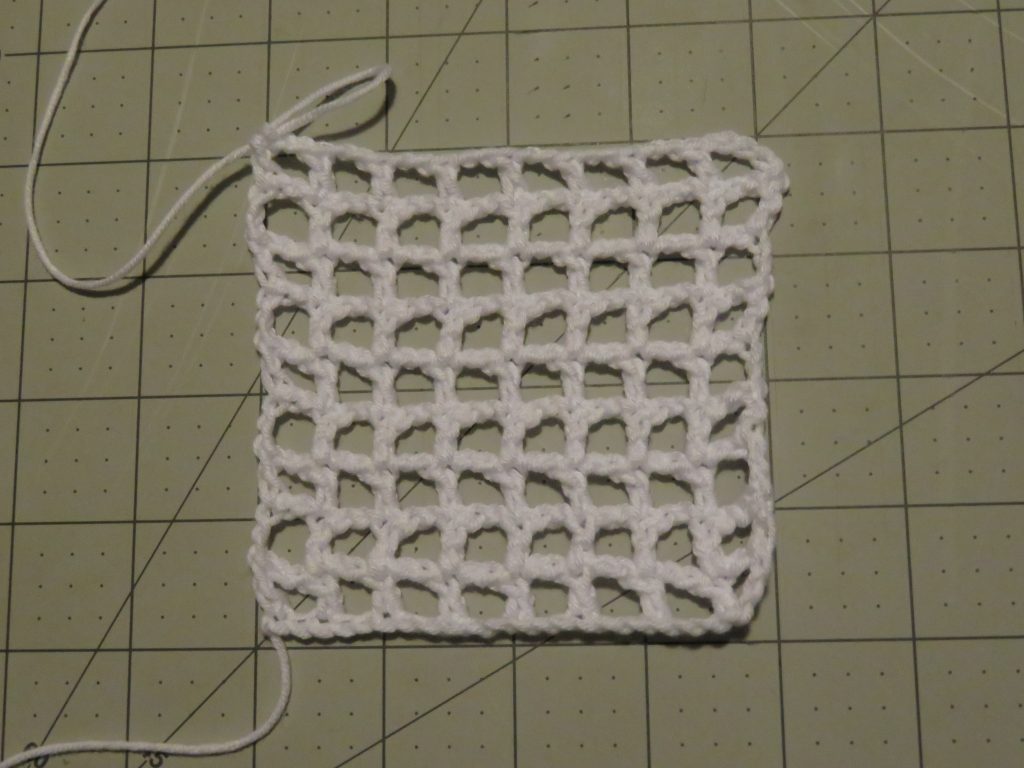
The gauge swatch for this project was 8 blocks x 9 rows and measured 4 x 4 inches. This number is convenient because 2 blocks will equal 1 inch of width, making the math a little easier. The top edge (starting edge) with seam allowances is 16 inches long, so the starting row needs to consist of 33 blocks or 104 chains. Since the flower pattern needs 19 blocks across, 14 blocks will need to be added in order to center it in the new panel. That leaves 7 blocks on either side of the flower pattern at the starting row.
As the edges of the panel increase out 1.5 inches on each side over the first several rows, one block is added to each side until it reaches 10 blocks on either side of the flower pattern. This leaves a total of 49 blocks across at the widest point of the new panel. It also tapers in one space on either side for the last 4 inches near the bottom to create the rounded edge of the panel.
Using some graph paper, the gauge swatch measurements and the measurements from the cut away panel, the pattern for your design can be written out in its entirety to make it easier to follow.
As the new crochet panel is created, periodically hold it against the cut away panel to make sure the size is correct and adjust if necessary.
Sewing the new panel into the shirt can be done with a machine or by hand. If you use a sewing machine, make sure to use a ball-point needle. This will ensure that the needle goes in between the strands of yarn without tearing them. Sew the new panel to the inside of the seam edge of the shirt, taking care to overlap the edge using the seam allowance.
Crocheting Patches for Clothing
If you’re not quite ready to replace a shirt panel, making crochet patches is a great place to start. Patching pieces with crochet is a simple process which requires little accuracy in terms of size and there are multitudes of crochet styles to choose from — a patch can be anything from a granny square to free-form scrumbles! Since patching doesn’t require any fabric removal from the original garment, the only thing you need to do is make sur your crochet piece is larger than the hole you wish to cover. Once you make a patch in the correct size and in a style you like, just sew the new patch directly over the space that needs the repair.
If you don’t have any holes in your clothing, but want to add a nice refresh, patching is still a great option. Take any bland article of clothing or accessory and give it a much-needed face lift with a little yarn and a sewing needle! And don’t feel limited to the contents of your closet! The local second-hand store is a great source for potential new projects to upcycle at an affordable price. For my Floral Refresh Project on the next page features a scarf I found at my local thrift store. All it needed was a little crochet boost and now it’s one of my favorite spring accessories!
So whether you’re wanting to create a boutique-style accessory without breaking the bank or are simply looking to repair a well-loved article of clothing, consider turning to crochet upcycling. It’s one of my new favorite things!
I would like to do this to some jeans
She refers to a scarf on the next page. Where is the next page? Next takes me to the next article, am i missing where to click?