


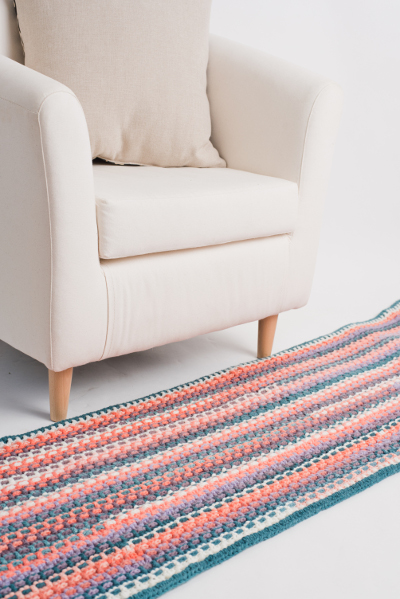
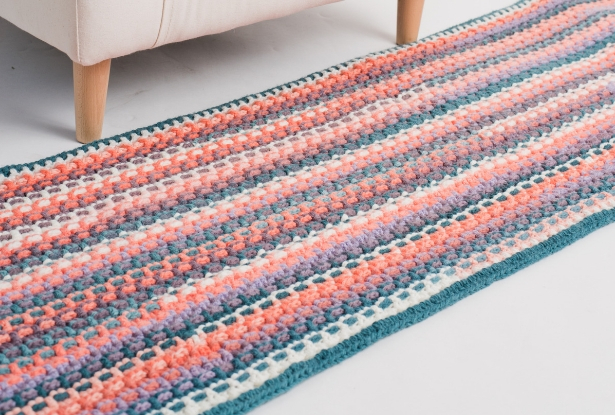
This rug is created using a 3-weight yarn that is tripled to make it cushy and quick to crochet. You’ll love how effortlessly this design fits into your home.
Skill Level: Easy
Size: approx. 20” x 64” rug
Gauge: 12 sts and 10 rows =4” [10 cm]
Materials
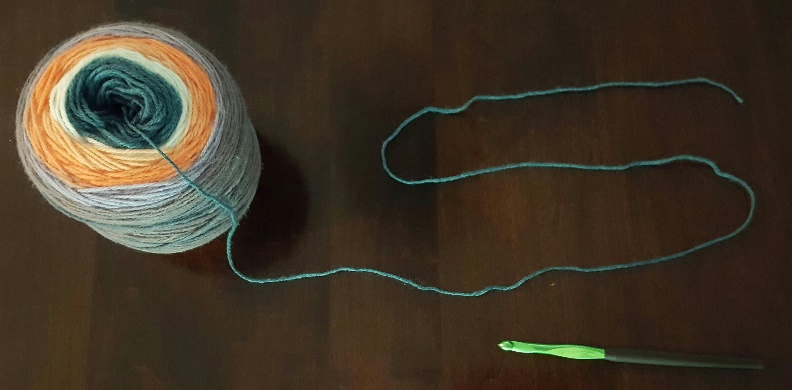
 Yarn: Lion brand Mandala (100% Acrylic; 590 yards [539 meters]/150 grams): 201 Pegasus (8 cakes)
Hook: US size K-10.5 (6.5 mm).
Notions: Tapestry needle
Special Stitches
Extended hdc: Yo, insert hook into st, yo, pull up a lp, pull through the first lp on hook, yo, pull through all 3 lps on hook.
Foundation half double crochet (Fhdc): *Ch 3, yo, insert hook into first ch, yo, pull up a lp (3 lps on hook), yo, pull through first lp on hook to create the first ch st (optional: pinch this stitch between the thumb and forefinger of your non-hook hand to hold it open and make it easier to work into; it is the space below the first and 2nd lps on the hook), yo, pull through all 3 lps on the hook to complete the first foundation hdc st, yo, insert hook into the ch st you were pinching to begin the second foundation hdc; rep from * to complete 202 hdc.
Pattern
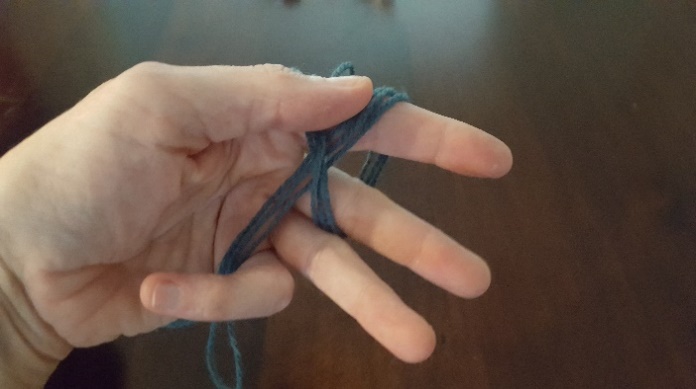
Begin by making the yarn into an S-shape.
Pinch the center of the S to pick up 3 strands of yarn.

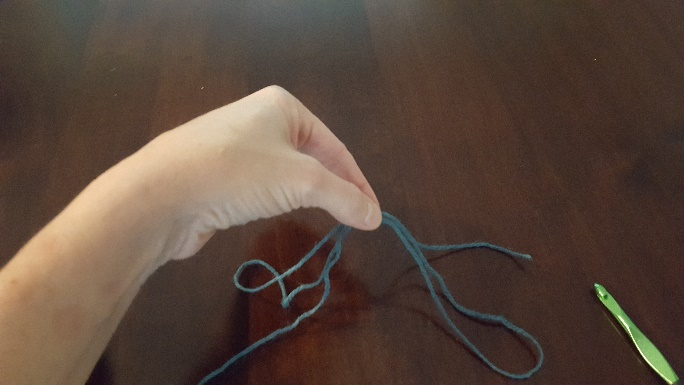
Make a slipknot onto your crochet hook, wrapping all 3 strands together.
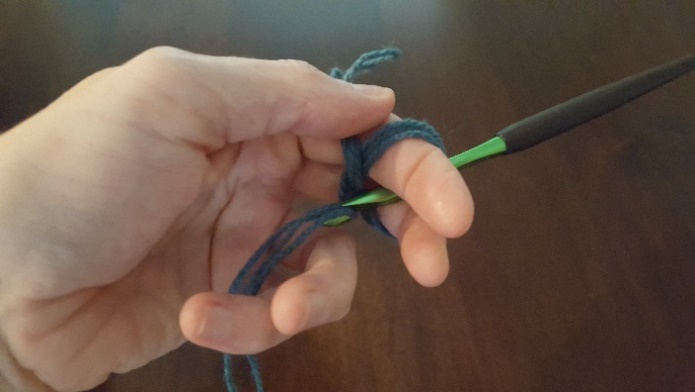
Placing your fingers through the lp of yarn, pick up the single strand of yarn coming from the cake and pull it through the lp.
Pull a length of yarn off of the cake to make a long lp.
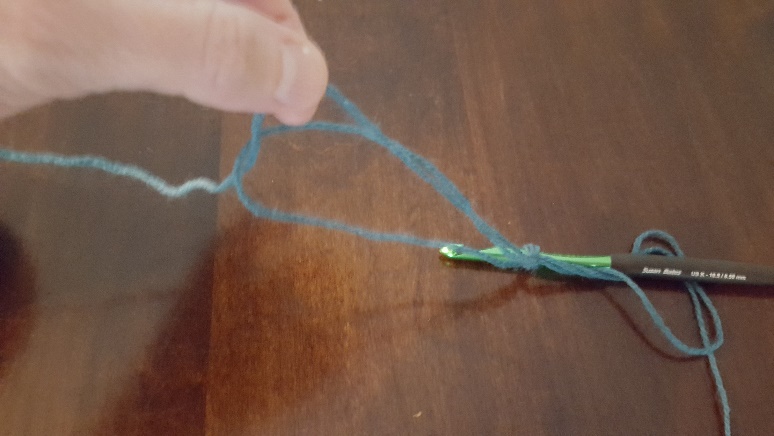
Then, pull the 3 strands of yarn together so that the single strand winds off of the cake to join the new long lp.
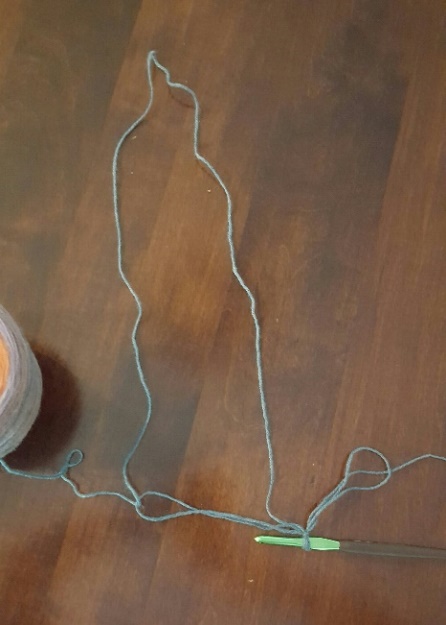
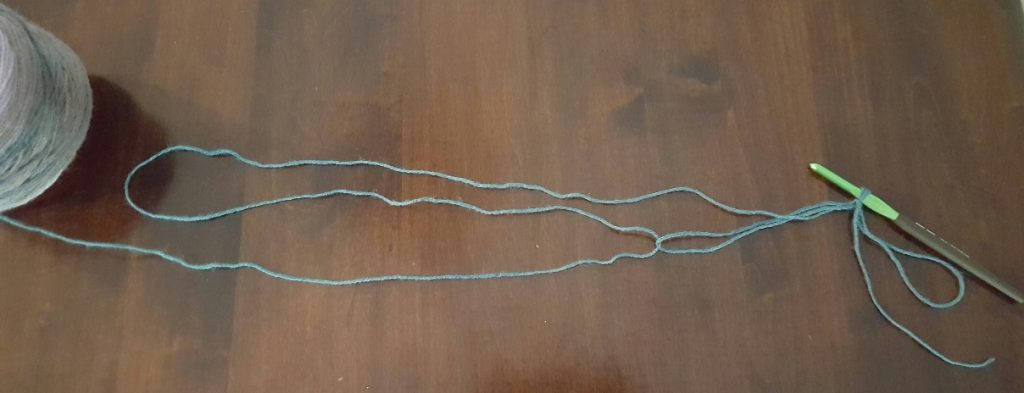
You can begin to crochet using all 3 strands.
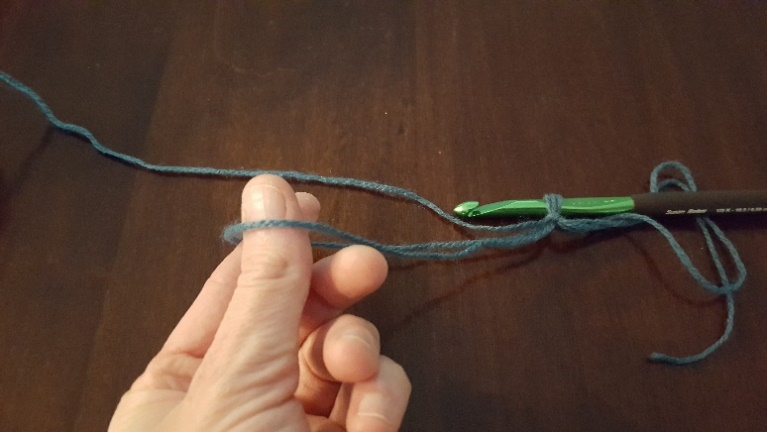
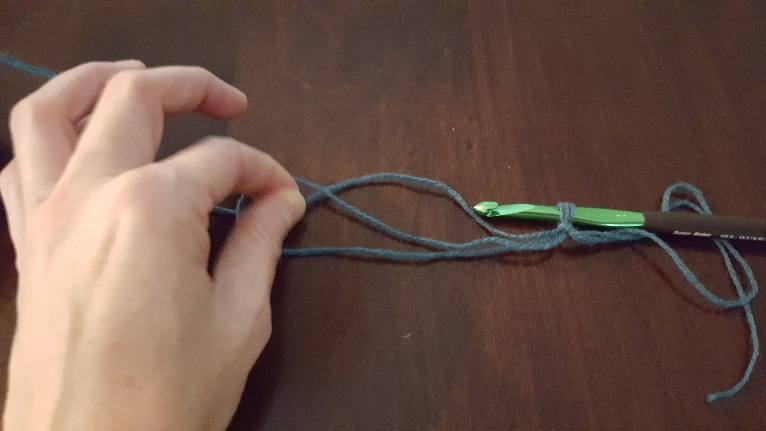
Continue this chaining method when you reach the end of a lp; pull the single strand through the end of the lp to make a new long lp, and allow the single strand to pull off of the cake as you crochet along.
Row 1: Fhdc 202. Alternatively, ch 204, hdc into 3rd ch from hook until end.
Row 2: Turn, create a standing dc (or ch 3) to begin the next row, *ch 1, sk next st, dc in next st; rep from * to end of row.
Row 3: Turn, create a standing dc (or ch 3), dc in first st, dc in ch-1 sp, *dc in next st, dc in ch-1 sp; rep from * to end of row, placing the final dc in the top of the standing dc (or ch 3).
Rows 4-46: Turn, create a standing dc (or ch 3), fpdc around the first st of the row below, fpdc around the next st, bpdc around the next st, *(fpdc around next st) twice, bpdc around next st; rep from * to end of row, ending with the final dc in the top of the standing dc (or ch 3).
Row 47: Rep Row 2.
Row 48: Turn, create a standing hdc (or ch 2), *extended hdc in next st, extended hdc in ch-1 sp; rep from * to end of row, ending with final extended hdc in the top of the standing dc (or ch 3).
Fasten off.
Finishing
Weave in ends. Enjoy your cushy rug!
Me as well, love to see a video
Can look up Navajo ply, it’s just done without spinning the yarn … easy to think of it as one long single crochet loop.
https://youtu.be/-Vj0gVpFCGc?si=blb4PQdvTOnJX7V6
Here is a YT. video.
Enjoy your project!
I’ve been looking for the perfect thing for Mandalla that is not too complicated. Yay! Thankyou.
Glad to hear it!
Absolutely, you can use a chunky or super chunky yarn instead. It will provide the cushiness that it strives to achieve.
Could 1 strand of chunky yarn be used instead of 3 strands of light weight?
Isla Rug…i was wondering is there a video on how to do the three yarn method described above?
I agree. I would love to see a video. I am a visual learner.