


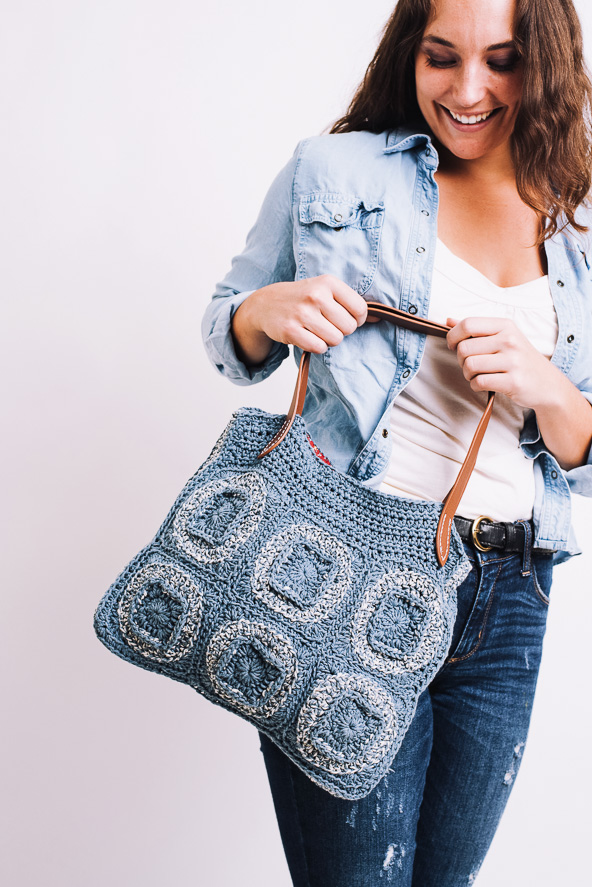
This modern shoulder bag is super versatile and a great year-round accessory. Inspired and pieced together like patchwork jeans, this spacious bag includes leather handles and a magnetic clasp closure, making it a must-have bag for any season.
Skill Level: Easy
Size: (13.75” / [35 cm] wide x 11” / [28 cm] high
Gauge: 3 sts = 1” [2.5 cm] in hdc
Materials
 Yarn: Wool and the Gang Billie Jean (100% Cotton; 148 yards [135 meters]/100 grams):
Raw Denim (A, 2 balls), Dirty Denim (B, 1 ball)
Hook: US size 7 (4.5 mm)
Notions: Tapestry needle, Brown Leather Shoulder Bag Handbag Strap [60 cm], cotton fabric for lining, magnetic bag clasp (optional)
Abbreviations
bpsc – back post single crochet
bphdc – back post half double crochet
bpdc – back post double crochet
blo – back loop only
Pattern Notes
All ch(s) are counted in this pattern.
Ch 3 at the start of a rnd counts as dc.
Pattern
Blocks (make 12)
Rnd 1: With A, make a magic ring (adjustable ring), ch 3, 15 tr in ring, sl st to the top of beg ch-3 to join. (16 sts)
Rnd 2: Ch 3, 4 dc in the same st as the beg ch, dc in next 3 sts, (5 dc in next st, dc in next 3 sts) 3 times, sl st to the top of beg ch-3 to join. Fasten off A. Mark 3rd st of one of the 5 dc corners. (32 sts)
Rnd 3: Join B with sl st to marked st, (bpsc in 3rd st, bphdc in next st, bpdc in next 3 sts, bphdc in next st, bpsc in next st, sl st in next st) 3 times, sl st to beg sl st to join. (32 sts)
Rnd 4: Ch 3, dc in next 2 sts, 2 dc in the next, (dc in next 3 sts, 2 dc in the next) repeat seven times, sl st to the top of beg ch-3 to join. Fasten off B. (40 sts)
Rnd 5: Working in BL only, join A with sl st to the corresponding corner of the sl st of Rnd 3, ch 3, 4 dc in same st, (dc in next st, hdc in next st, sc in next 5 sts, hdc in next st, dc in next st, 5 dc in next st) 3 times, sl st to top of the beg ch-3 to join. (56 sts)
Fasten off. Weave in ends
Joining
Make two panels of 2 squares down and 3 squares across by whip-stitching each of your squares together, working through BL only.
Finishing
Each Panel
Row 1: Join A in BL only, with sl st to the top right-hand edge of one panel, ch 1 (does not count as a st here or throughout), hdc in the same st as beg ch-1, (hdc in the next 13 sts, work 3 hdc together over the corner st, the join and the next corner st on the next square) twice, hdc in the rem 13 sts, turn. (42 sts)
Rows 2-7: Ch 1, hdc in each st along, turn.
Row 3: Turn your work to the right so you are working down the row edges and the edges of your blocks, ch 1, hdc in the end of each row (Rows 2 to 7), then working in BL only, *hdc in next 13 sts, work 3 hdc together over the corner st, the join, and the next corner st on the next square*, hdc in next 13 sts, 5 hdc in corner; rep from * to * twice more, hdc in next 13 sts, 5 hdc in corner; rep from * to * once more, hdc in end of each row. (119 sts)
Fasten off and weave in ends
Bag Gussets
On Panel 1
Turn your work so you are crocheting down the side of the panel from left to right.
Rnd 1: Join B to first st, fpdc in the same st, fpdc in each st around until end. (119 sts)
Fasten off. Weave in ends.
On Panel 2
Join B to top corner so you are crocheting down the side of the panel from left to right, and rep Rnd 1.
Finishing
Making sure that the bag sides are the right-side facing, line up the sts of both gussets and sl st them together with A.
Add a fabric lining and magnetic bag clasp to finish off your bag (optional).
Attach Straps to each side of the bag working through the bag and fabric lining to make sure they are fastened securely.
Weave in any rem ends.