


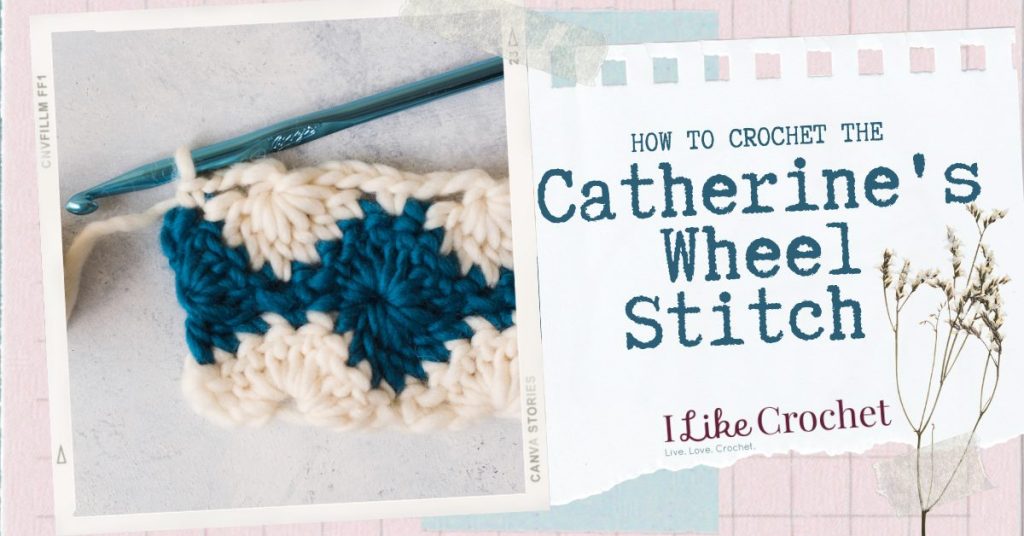
The Crochet Catherine’s Wheel stitch is a fun one to add to your crochet tool box. Did you know it was named after spinning fireworks of the same name? This striking stitch features rows of interlocking rounds that look like wheels, making it a great way to highlight and play with different color combinations.
While the Catherine’s wheel stitch is considered to be intermediate, it uses basic crochet stitches paired with increases and decreases. The round parts of the stitch are created using a mix of double crochet half circles and decreases. Ready to get started?
Catherine’s Wheel Stitch Crochet Tutorial
Ch 25 (multiple 6 sts +1)
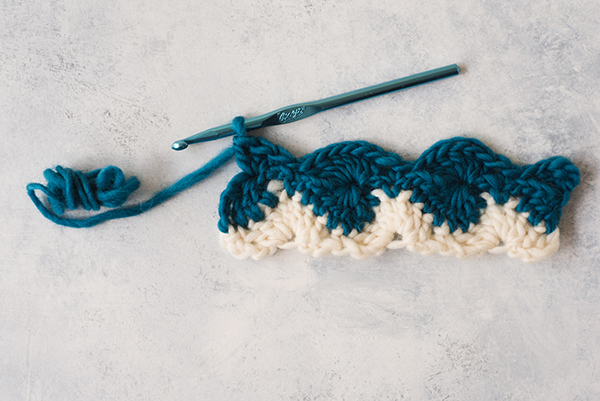
Rnd 1:
Ch 1, sc in 2nd ch from hook and each ch across. (24 sc)
Rnd 2:
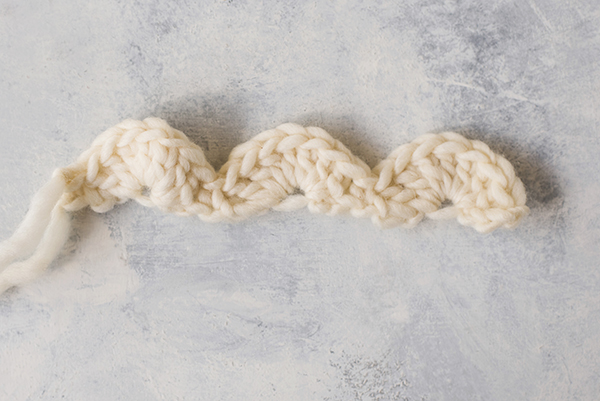
Ch 1, *sk next 2 sc, 7 dc in next st, sk next 2 sts, sc in next st; rep from * around, join with sl st. Change to MC, turn.
Rnd 3:
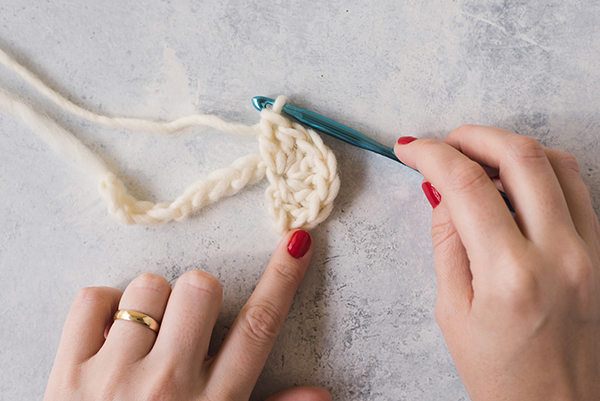
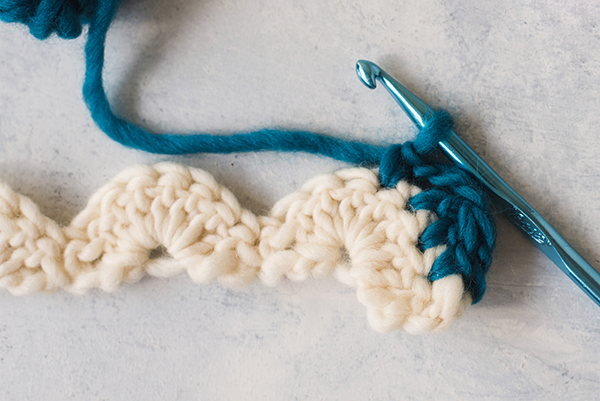
Ch 3 (count as first dc)
Step 1: Yo, insert hook in next st, yo, pull through just 2 loops as if working a dc halfway, instead of completing a dc, *yo, insert hook in the next st and work another ½ dc; rep from * once more (4 loops on hook), your work should look like this:

Get this special collection of 3 FREE baby blanket patterns from I Like Crochet right now!
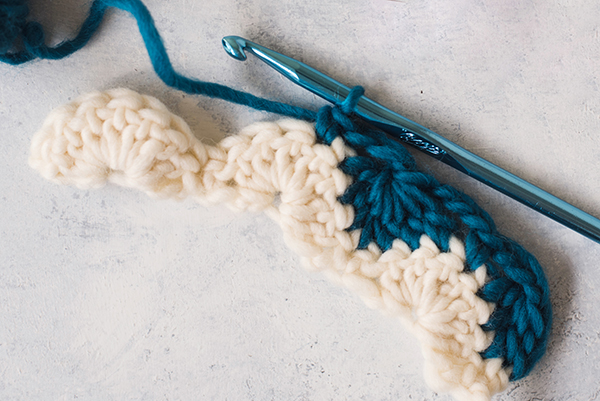
Step 2: Yo, pull through all 4 loops creating ¼ of a Catherine’s Wheel, ch 1 to create the “eye” of the wheel, ch 2, sc in next st (this should be the middle dc of shell from the previous rnd).
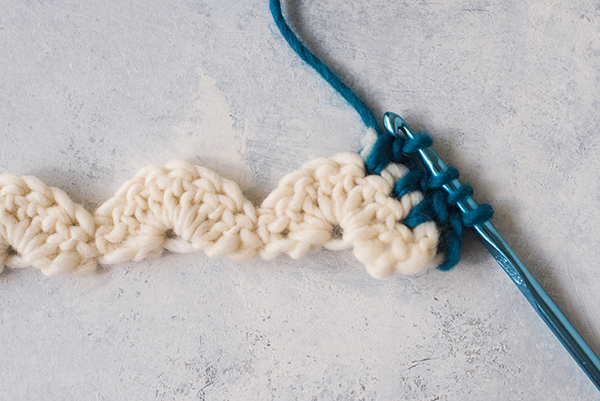
Step 3: Ch 3, *yo, insert hook in next st, work a ½ dc; rep from * over next 6 sts including the sc in between the 2 shells from the previous rnd (8 loops on hook), your work should look like this:

Step 4: Yo, pull through all 8 loops creating ½ of a Catherine’s Wheel, ch 1 to create the “eye” of the wheel, ch 2, sc in next st, (this should be the middle dc of the shell from the previous rnd).
Step 5: Rep Step 3 and then Step 4 all the way around until there are 3 sts remaining. In these 3 sts, work ½ dc as you did to start the rnd creating the ¼ Catherine’s Wheel, yo, pull through 4 loops, but instead of chaining to create and “eye,” simply sl st into the eye of the first ¼ Catherine’s Wheel created, turn.
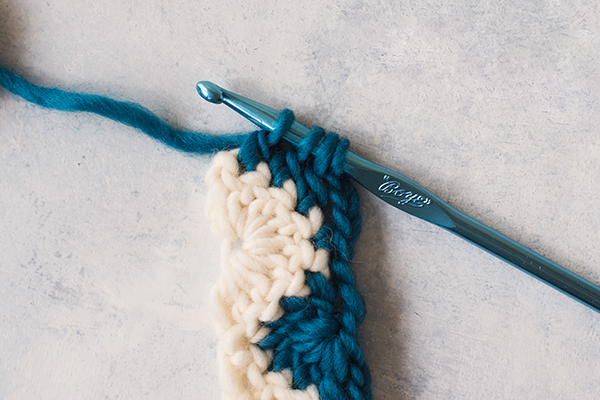
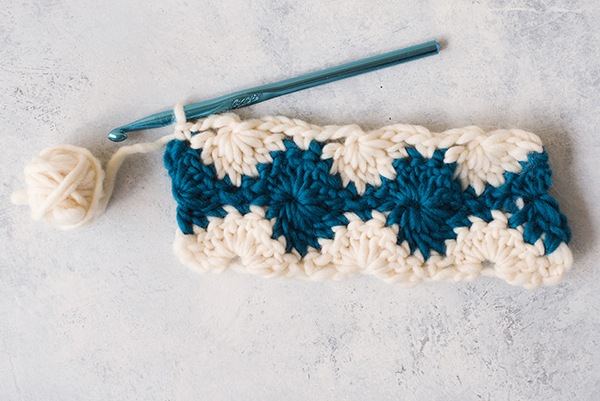
Rnd 4:
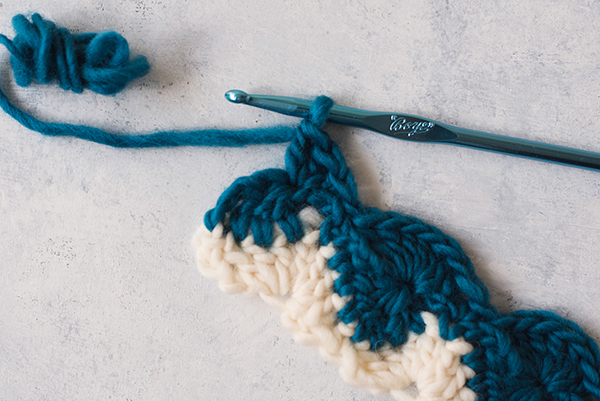
Ch 3 (counts as first dc), in the same “eye” dc 3 times creating ¾ of a Catherine’s Wheel, *sc in the sc from the previous rnd, sk chains and work dc 7 times in the “eye” of the next ½ Catherine’s Wheel creating a full wheel; rep from * all the way around to the ¾ Catherine’s Wheel, dc 3 times in that eye, sl st in beg ch-3, completing the wheel, turn.
Get this special collection of 3 FREE baby blanket patterns from I Like Crochet right now!
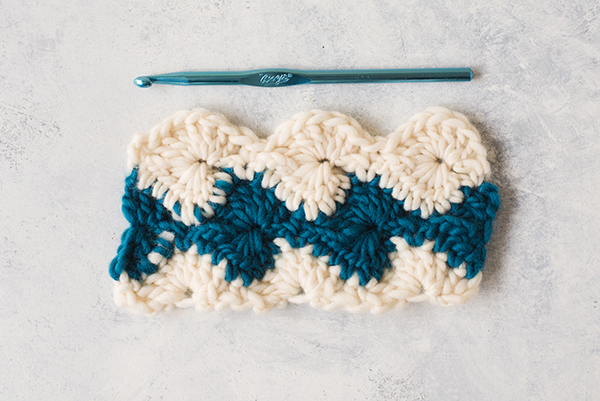
Rnd 5:
Change to CC, ch 3, *yo, insert hook in next st, work a ½ dc; rep from * over the next 6 sts including the sc in between the 2 shells from the previous rnd, yo, pull through all 8 loops creating ½ of a Catherine’s Wheel, ch 1 to create the “eye” of the wheel, ch 2, sc in next st, (this should be the middle dc of the shell from the previous rnd). Continue in this fashion all the way around the base of the garment, end with a sc in the same st at start of rnd, turn.
Rnd 6:
*Sk chains and work dc 7 times in the “eye” of the next ½ Catherine’s Wheel creating a full wheel, sc in the sc from the previous rnd; rep from * all the way around, sc in the same st at start of rnd, turn.
If you think you’re ready to try it out, try this adorable pattern for the Baby Twilight Ghost Sweater!
I loved this stitch. I plan to make lap robes for nursing homes with this pattern for a change. I try to make different stitched lap robes for these wonderful people.
Thank you so much for sharing this stitch with us.
These instructions seem to be for working this stich in the round, as for the linked baby sweater. It seems like the last part of rounds 3-6 needs to be modified if making a flat fabric.