


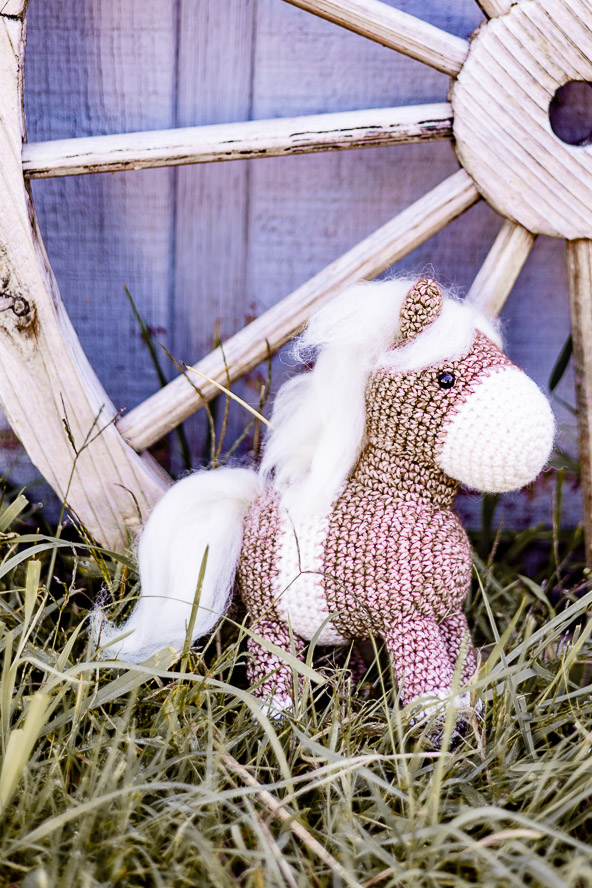
Tilly is a sweet little pony amigurumi that will capture the hearts of adults and children alike. With a soft mane that seems to blow in the breeze and a big kissable nose, Tilly is the pony of everyone’s dreams.
Time: 1 Day Pattern
Skill Level: Easy / Intermediate
Size: 8” high x 6.5” (20 cm x 16.5 cm)
Gauge: 5 sc = 1” / 2.5cm Specific gauge is not as important as making close, tight stitches that do not stretch to show holes between sts.
Materials
Yarn: Scheepjes StoneWashed (78% Acrylic, 22% Wool; 142 yards [175 meters] / 50 grams): 822 Brown Agate (CC1, 1 ball), 801 Moon Stone (CC2, 1 ball), 803 Black Onyx (CC3, 1 ball),
Hook: US size D/3 (3 mm)
Notions: Tapestry needle, Scissors, Stitch markers, 2 x 8mm black safety eyes, Toy stuffing. Optional: Cream colored roving yarn for mane
Pattern Notes
This pattern is worked in the amigurumi style (unless specified). Rounds are worked in a continuous spiral, use a stitch marker to indicate beginning of rounds.
Magic ring: is also known as a Drawstring Ring or Magic Loop and is often used as a start for working amigurumi. To use a magic ring in crochet, you’ll make the first round of stitches into an adjustable loop. Then, simply pull the yarn tail to close up the loop nice and tight. If you are not familiar with this technique you could substitute with a ch 2 and then work in the second ch from the hook.
Head
Rnd 1: With CC2, make a magic ring (adjustable ring), work 6 sc into the ring (6 sts).
Rnd 2: Work 2 sc in each st around (12 sts).
Rnd 3: *Sc in next st, 2 sc in next st; rep from * around (18 sts).
Rnd 4: *Sc in next 2 sts, 2 sc in next st; rep from * around (24 sts).
Rnd 5: *Sc in next 3 sts, 2 sc in next st; rep from * around (30 sts).
Rnds 6 – 9: Sc in each st around.
Fasten off YARN CC2, attach YARN CC1 to the top of any st;
Rnds 10 – 12: Sc in each st around.
Rnd 13: *Sc in next 4 sts, 2 sc in next st; rep from * around (36 sts).
Rnd 14: *Sc in next 5 sts, 2 sc in next st; rep from * around (42 sts).
Rnds 15 – 17: Sc in each st around.
Rnd 18: *Sc in next 5 sts, sc2tog; rep from * around (36 sts).
Rnd 19: *Sc in next 4 sts, sc2tog; rep from * around (30 sts).
Rnd 20: *Sc in next 3 sts, sc2tog; rep from * around (24 sts).
Add eyes between rows 12 -13 approx. 10 sts apart
Start to stuff and continue to stuff as you go;
Rnd 21: *Sc in next 2 sts, sc2tog; rep from * around (18 sts).
Rnd 22: *Sc in next 1 sts, sc2tog; rep from * around (12 sts).
Rnd 23: *Sc2tog; rep from * around (6 sts).
Fasten off but leave a long yarn tail, use yarn tail to sew up remaining stitches.
Neck
Leave long yarn tail before starting;
With CC1; Ch 24, sl st in the first st to form a ring;
Rnd 1: Sc in each st around (24 sts).
Rnds 2 – 4: Sc in each st around.
Fasten off but leave a long yarn tail.
Ears (Make 2)
Ears are not stuffed;
Rnd 1: With CC1, make a magic ring (adjustable ring), work 6 sc into the ring (6 sts).
Rnd 2: *Sc in next st, 2 sc in next st; rep from * around (9 sts).
Rnds 3 – 5: Sc in each st around.
Rnd 6: *Sc in next 1 sts, sc2tog; rep from * around (6 sts).
Fasten off but leave a long yarn tail.
Body
Rnds 1 – 5: With CC1, make as Head. (30 sts)
Rnd 6: *Sc in next 4 sts, 2 sc in next st; rep from * around (36 sts).
Rnd 7: *Sc in next 5 sts, 2 sc in next st; rep from * around (42 sts).
Rnds 8 – 10: Sc in each st around.
Rnd 11: *Sc in next 5 sts, sc2tog; rep from * around (36 sts).
Rnds 12 – 14: Sc in each st around.
Fasten off YARN CC1, attach YARN CC2 to the top of any st;
Rnds 15 – 19: Sc in each st around.
Fasten off YARN CC2, attach YARN CC1 to the top of any st;
Rnd 20: *Sc in next 5 sts, 2 sc in next st; rep from * around (42 sts).
Rnds 21 – 23: Sc in each st around.
Rnd 24: *Sc in next 5 sts, sc2tog; rep from * around (36 sts).
Rnd 25: *Sc in next 4 sts, sc2tog; rep from * around (30 sts).
Rnd 26: *Sc in next 3 sts, sc2tog; rep from * around (24 sts).
Start to stuff; continue to stuff as you go.
Rnd 27: *Sc in next 2 sts, sc2tog; rep from * around (18 sts).
Rnd 28: *Sc in next 1 sts, sc2tog; rep from * around (12 sts).
Rnd 29: *Sc2tog in next st; rep from * around (6 sts).
Fasten off but leave a long yarn tail, use yarn tail to sew up remaining stitches.
Legs
Rnd 1: With CC3, make a magic ring (adjustable ring), work 6 sc into the ring (6 sts).
Rnd 2: Work 2 sc in each st around (12 sts).
Rnd 3: Working in the back loop only; Sc in each st around.
Rnd 4: Sc in each st around.
Fasten off YARN CC3, attach YARN CC2 to the top of any st;
Rnds 5 – 6: Sc in each st around.
Fasten off YARN CC2, attach YARN CC1 to the top of any st;
Rnds 7 – 14: Sc in each st around.
Fasten off but leave a long yarn tail.
Stuff the legs.
Making up
Attach the ears on the top of the head (approx. Rnd 17, 7 sts apart).
Attach the top of the neck to the head (approx. from Rnd 11 onwards).
Attach the bottom of the neck to the front of the body (approx. from Rnd 6 onwards).
Attach two legs to the front of body (approx. Rnd 6 onwards, 2 sts apart).
Attach two legs to the back of body (approx. Rnd 19 onwards, 2 sts apart).
Mane and Tail:
Optional: Add strands of roving to the stitches to create the mane and tail, or measure out pieces of yarn at least approx. 5-inches (13-cm) in length. Fold two strands of yarn in half so that there’s a U-shaped bend on one side and four ‘tails’ on the other side. Insert your hook around a stitch where you want to add the hair on the head catch the bend of your yarn with your hook, pull the folded end of the yarn under the stitch and through the amigurumi, taking care not to pull the yarn all the way through. The ends of the yarn should remain on the opposite side of the stitch as the folded end. Open up the fold of the yarn so that you have a loop. Insert the tail ends of yarn into the loop. Pull the ends of the yarn tightly to cinch the loop down into a knot.
Repeat adding hair a st apart until you are happy with your pony’s mane and tail then trim as required.
How do I get the pattern.
Hi there! Once you are logged in, you should be able to see the above pattern. Please reach out to our customer service team for assistance! https://www.ilikecrochet.com/contact-us
– Nicola, Editor