


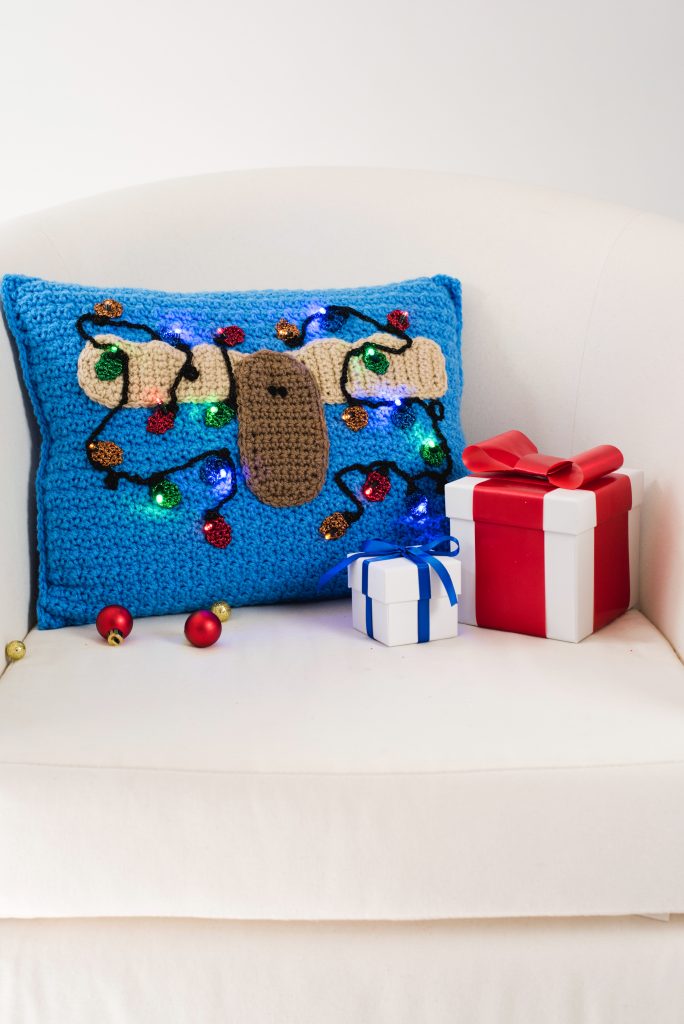
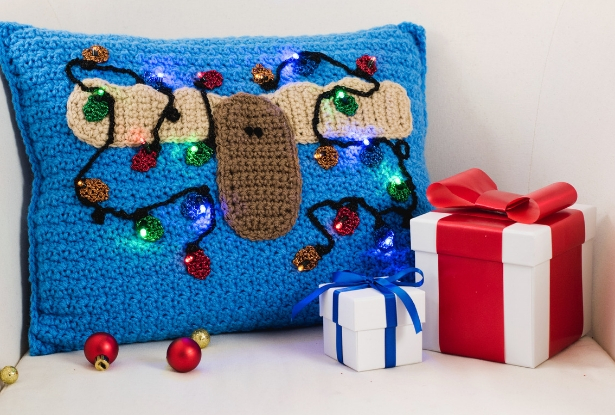
Light up the holidays (literally) with the battery-operated lights featured in the antlers of this merry moose pillow! Place it in a cozy corner or on a decorative shelf to create a welcoming holiday spirit for all guests to enjoy.
 Skill Level: Easy
Size: 16” wide x 12” high
Gauge: 10 (sc, dc) sts = 3” [7.62 cm] and 6 (sc, dc) rows = 2” [5 cm]
Materials
Yarn:
 Red Heart Super Saver (100% Acrylic; 364 yards [333meters]/198g): #334 Buff (C1, 1 skein), #360 Cafe Latte (C2, 1 skein), #885 Delft Blue (MC, 2 skeins), #312 Black (C3, 1 skein)
 Kreinik Metallic #32 Braid (100% Manufactured Fiber – Metallic; 5.5 yards [5 meter]/181 grams): #005 Black (C4, 4 spools), #008HL Green High Lustre (C5, 2 spools), #0021HL Copper High Lustre (C6, 2 spools), #0051HL Sapphire High Lustre (C7, 2 spools)#003HL Red High Lustre (C8, 2 spools)
Hook: US size H/8 (5mm), US size C/2 (2.75mm)
Notions: 1 set Darice #6203-28 DecoLights™ Teeny Bulb 20 LED Multi, battery operated light set, Fairfield Crafter’s Choice Pillow Insert 12″ x 16″, tapestry needle, 2 safety pins
Special Stitches
Single Crochet Decrease (sc2tog): Insert hook into indicated st, yo, pull up lp, insert hook into next st, yo, pull up st, yo, pull through all 3 lps on hook.
Pattern Notes
Weave in ends as work progresses.
To change color, insert hook in indicated st, yo, pull up lp, drop current color, yo with new color, pull through both lps on hook.
Designer Tips: If having difficulty inserting LED lights through bulbs, insert a large crochet hook between bulb’s stitches to enlarge an opening to insert LED light.
Pattern
Left Antler
Row 1: With larger hook and C1, ch 5, sc in 2nd ch from hook and in each ch across, turn. (4 sc)
Rows 2-3: Ch 1, sc in each st across, turn.
Row 4: Ch 1, 2 sc in first st, sc in each st across, turn. (5 sc)
Row 5: Ch 1, sc in each st across to last st, 2 sc in last st, turn. (6 sc)
Row 6: Rep Row 4. (7 sc)
Row 7: Rep Row 2.
Row 8: Ch 1, sc2tog over first 2 sts, sc in each st across, turn. (6 sc)
Row 9: Ch 1, sc in each st across to last 2 sts, sc2tog over last 2 sts, turn. (5 sc)
Row 10: Rep Row 8. (4 sc)
Row 11: Rep Row 2.
Row 12: Rep Row 5. (5 sc)
Row 13: Rep Row 4. (6 sc)
Row 14: Rep Row 5. (7 sc)
Row 15: Rep Row 2.
Row 16: Rep Row 9. (6 sc)
Row 17: Rep Row 8. (5 sc)
Row 18: Rep Row 2.
Row 19: Rep Row 4. (6 sc)
Row 20: Rep Row 5. (7 sc)
Row 21: Rep Row 4. (8 sc)
Row 22: Ch 1, sc2tog over first 2 sts, sc in each st across to last 2 sts, sc2tog over last 2 sts, turn. (6 sc)
Row 23: Rep Row 22, do not turn at end of row. (4 sc)
Edging Rnd: Ch 1 work 52 sc evenly spaced around Antler, increasing where necessary, join with sl st to first sc of rnd. Fasten off.
Right Antler
Rows 1-23: Rep Rows 1-23 same as for Left Antler, turn at end of Row 23.
Edging Rnd: Rep same as for Left Antler Edging Rnd. Fasten off.
Place both Antlers together with RS facing on a flat surface, matching Row 1 foundation ch together, use tapestry needle and C1 to whipstitch opposite side of foundation chs together.
Head
Row 1 (WS): Beginning at bottom of Head with larger hook and C2, ch 5, 2 sc in 2nd ch from hook, sc in each of next 2 chs, 2 sc in last ch, turn. (6 sc)
Row 2: Ch 1, 2 sc in first st, sc in each st across to last st, 2 sc in last st, turn. (8 sc)
Rows 3-16: Ch 1, sc in each st across, turn.
Row 17: Ch 1, sc2tog over first 2 sts, sc in each st across to last 2 sts, sc2tog over last 2 sts, turn. (6 sc)
Row 18: Rep Row 17, do not turn at end of row. (4 sc)
Edging Rnd: Ch 1 work 46 sc evenly spaced around Head, increasing where necessary, join with sl st to first sc of rnd. Fasten off.
Pillow
Row 1: With larger hook and MC, ch 57, sc in 2nd ch from hook, dc in next ch, (sc in next ch, dc in next ch) across, turn. (56 sts)
Row 2: Ch 1, sc in first st, dc in next st, (sc in next st, dc in next st) across, turn.
Rows 3-80: Rep Row 2.
Fasten off.
Battery Pack Pocket
Row 1: Beg at bottom edge with larger hook and MC, ch 13, sc in 2nd ch from hook, dc in next ch, (sc in next ch, dc in next ch) across, turn. (12 sts)
Rows 2-14: Ch 1, sc in first st, dc in next st, (sc in next st, dc in next st) across, turn.
Fasten off, leaving a 60” tail.
Light Bulbs (make 5 each in C5, C6, C7, and C8)
Row 1: With smaller hook, ch 2, 2 sc in 2nd ch from hook, turn. (2 sc)
Row 2 (RS): Ch 1, 2 sc in each st across, turn. (4 sc)
Rows 3-4: Ch 1, sc in each st across, turn.
Row 5: Ch 1, sc in first st, sc2tog over next 2 sts, sc in last st, change color to C4 on last st, turn. (3 sc)
Row 6: Working in back lp only, with C4, ch 1, sc2tog over first 2 sts, sc in last st, turn. (2 sc)
Row 7: Ch 1, sc2tog over next 2 sts. (1 sc)
Fasten off.
Light Bulb Cord (make 2)
Row 1: With smaller hook and C4, make a chain 30” long.
Fasten off.
Finishing
Assembly
- Fold Pillow in ½ lengthwise placing a st marker at each side of fold. Unfold work and center bottom of Antlers approximately 1.75” in from side edges and 1” above pins. Use C1 and tapestry needle to sew in place.
- Using photo as guide, center Head between Antlers and use C2 to sew in place.
- Fold a 1-yard length of C3 in half and thread ends through tapestry needle, use to create 2 French knots for eyes on front of Head where desired.
- Using photo as guide for color placement and working on Left Antler area, temporarily place 3 C5, 3 C8, 2 C7, and 2 C6 Light Bulbs RS facing on Pillow front. Place LED light cord under Pillow front, having Battery Pack at RS edge, push first 10 LED lights of strand from WS to RS up through Pillow and Light Bulbs. Turn on lights and change Bulb colors if necessary to match Light Bulb and LED light colors. Turn off light strand.
- Working from WS of Pillow, use MC to tack light strand in position to secure, being careful not to pierce light strand with needle.
- With RS facing, use a 10” length of matching bulb color to sew Light Bulbs into position. Rep Steps 4-6 to add 3 C7, 3 C6, 2 C5, and 2 C8 Light Bulbs to Right Antler area.
- Arrange Light Bulb Cord on front of Pillow using photo as guide for placement or as desired and use C4 to sew into position.
- Using MC, sew edges of Rows 1 and 80 of Pillow together to create back seam.
- Insert pillow form inside Pillow, arranging back seam if necessary, to center moose on Pillow front. Meet edges of one Pillow side together, working through both layers, join blue with a standing sc to first st, work sc evenly spaced across to seam side edge. Fasten off. Rep to work opposite side edge seam, making sure Battery Pack of light strand is on outside of pillow before finishing.
- Place Battery Pack near bottom right corner of Pillow back where cord extends at side edge and approximately 1.75” up from Pillow bottom edge. Position Battery Pack Pocket over Battery Pack with bottom edge even with base of side seam sc sts and use yarn tail to whipstitch along sides and bottom edges to Pillow, being careful not to pierce LED cord.
I love this pattern!!
i figured it out thanks
Were you able to print this pattern? If so, how?
Hi Robin! You should see a little printer icon on the left hand side of the screen. You can also likely use your browser’s print function too. Hope that helps! – Nicola, Editor
can we print the patterns thanks