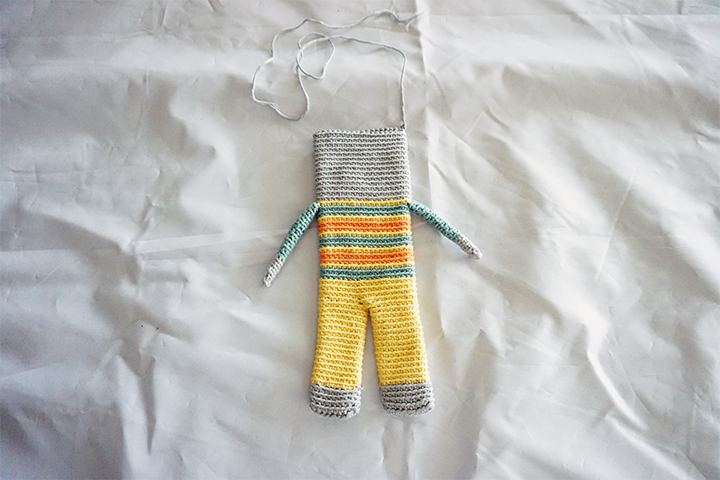
Want to make the Lavender bunnies? Wendy is here to give you some tips and tricks to making your pair perfect just in time for spring!
Legs
By crocheting around a chain, the legs get that nice rectangular look. Start with a chain and then keep crocheting around it until your rounds are done. To keep track of your rounds you can use a stitch marker in the last stitch or your round.
With MC, ch 10.
The last ch can be a bit tricky to see. If you’re not certain then count your stitches. At the end your chain needs to have 3 sc in the first and last ch and 1 sc in every other ch, both on the top and on the bottom of the ch.
Rnd 1: Sc in the 2nd ch from hook, sc in next 7 sts, 3 sc inc in the next st, work in the other side of ch, sc in next7 sts, sc inc in next st. (20 sc)
From round 2 you will start crocheting continuously in the round. Don’t forget to put a stitch marker in the last st to keep track of your rounds.
Rnds 2-4: Sc in each st around. (6 sc)
Rnds 5-14: With CC3, sc in each st around. (6sc)
Arms
The extra tails from your color changes can be a bit tricky to work around. You can leave them on the outside of your work en pull them in afterwards. There’s no need to cut the tails, since you can work them away inside of the rabbit’s body. Or you can also choose to hide them inside the arms. To do so you can use a larger crochet hook and use it to gently push the ends inside of the arms.
With MC.
Rnd 1: Work 6 sc in a magic loop. (6 sc)
Rnds 2-4: Sc in each st around. (6 sc)
Rnds 5-14: With CC3, sc in each st around. (6sc)
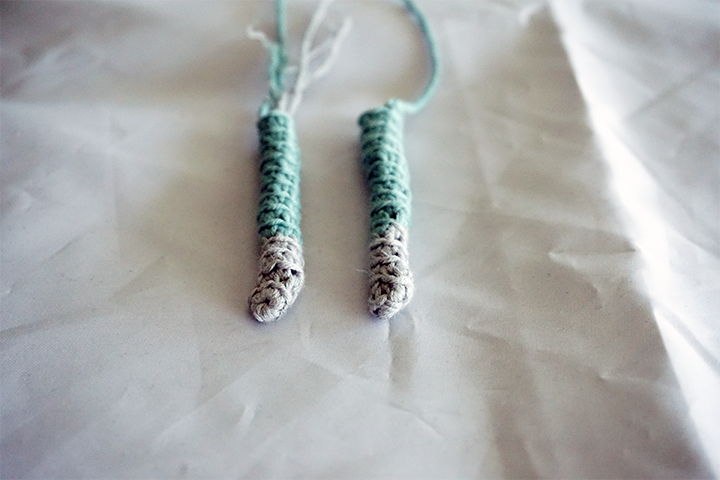
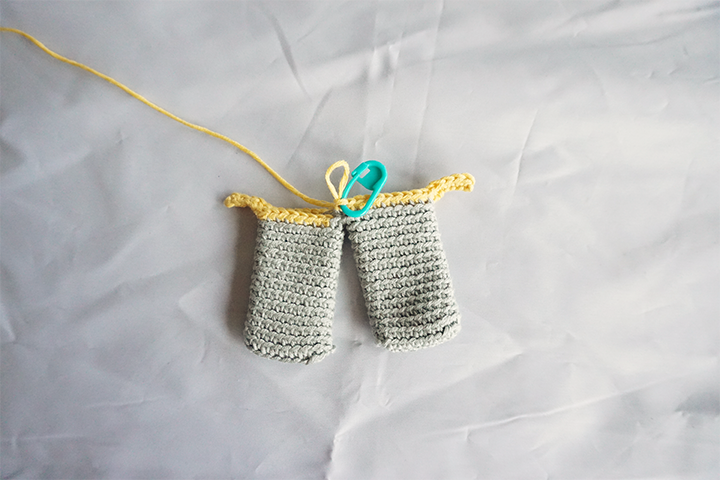
Legs
Make sure that you don’t cut off the extra yarn so that you have enough to attach the the legs to the body. You can use this tail later to close the gap, after joining the two legs together.
You can hide the extra tails from the color changes inside of the legs.

With MC, ch 10.
Rnd 1: Sc in the 2nd ch from hook, sc in next 7 sts, 3 sc inc in the next st, work in the other side of ch, sc in next7 sts, sc inc in next st. (20 sc)
Rnds 2-5: Sc in each st around. (20 sc)
Rnd 6: Change to CC1, sc in eacht st around. (20 sc)
Rnds 7-20: Sc in each st around. (20 sc)
Rnd 21: Sc in next 3 sts, leaving rem sts unworked.
Fasten off the first leg. Do not fasten off the second leg.
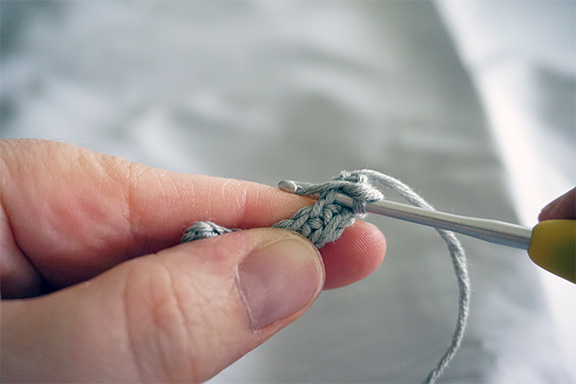
The first sc to join the legs can be a bit tricky. To make sure your first st is firm, give it a little snug at the end. After that just crochet in the round like you normally would.
You’ll find it easier to close the gap between the legs, after you’ve already done some rounds of the body-part of the rabbit.
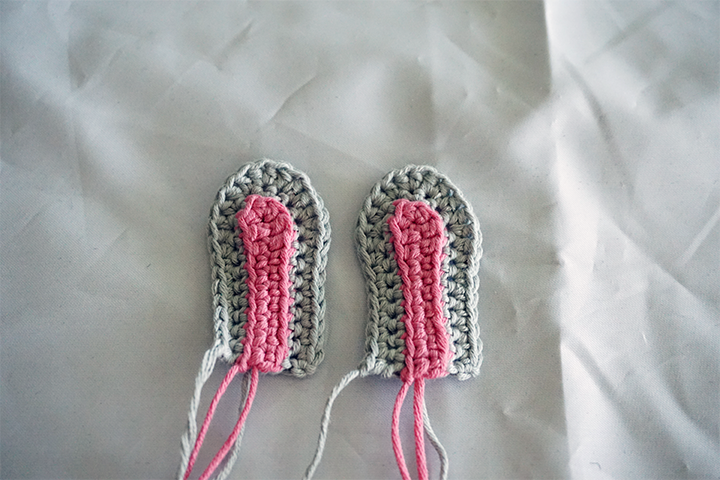
Ears – part 1
With CC2, make 2.
Ch 11.
Row 1: Sc in the 2nd ch from hook, sc in next 6 ch, hdc in next 2 ch, 3 hdc inc in the last ch, work in the opposite side of the ch, hdc in next 2 ch, sc in next 7 ch. (21 sc)
Fasten off.
Ears – part 2
With MC, make 2.
Ch 11.
Row 1: Sc in the 2nd ch from hook, sc in next 6 ch, hdc in next 2 ch, 3 hdc inc in the last ch, work in the opposite side of the ch, hdc in next 2 ch, sc in next 7 ch. (21 sc)
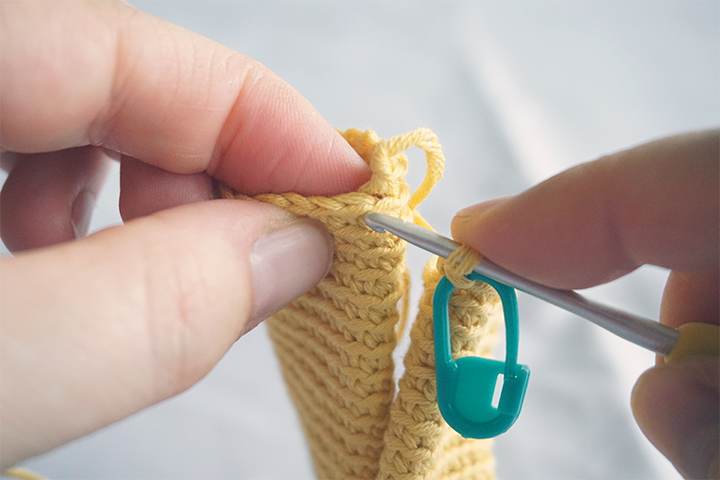
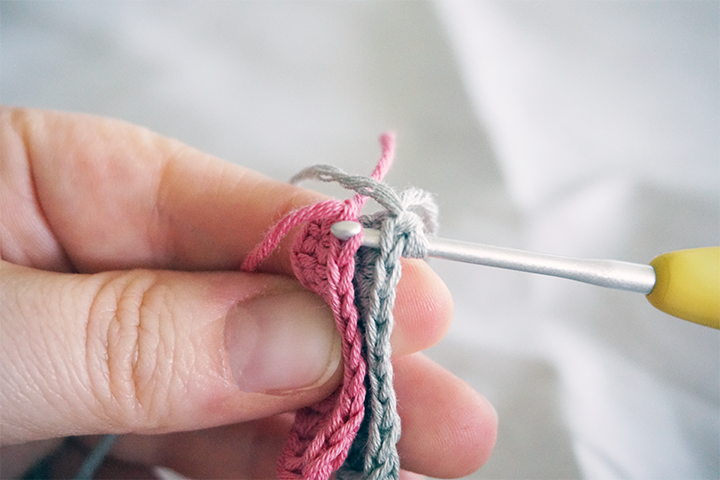
Row 2: Join Ears Part 1 and Part 2 by going through both loops of the first st of Ear_Part 2 and the front loop of first st of Ear_Part 1, sc in next 10 sts, 3 sc inc, sc in next 10 sts, turn. (23 sc)
The ears are designed so you don’t have to sew parts together afterwards. First you make the 2 inner pieces (pink). Next you make the same piece in MC and use this piece to crochet both parts together.
Hold both pieces to eachother with your fingers or keep them together with some stitch markers. This will make the first few stitches easier.
Row 3: sc in next 7 sts, hdc in next st, hdc inc in next st, hdc in next st, (hdc inc in next st) 3 times, hdc in next st, hdc inc in next st, sc in next 7 sts (27 sc)
You will crochet through both loops of the MC, but only through the backloop of the inner ear (pink). This gives the inner a nice contour.
Fasten off, leaving a long tail.
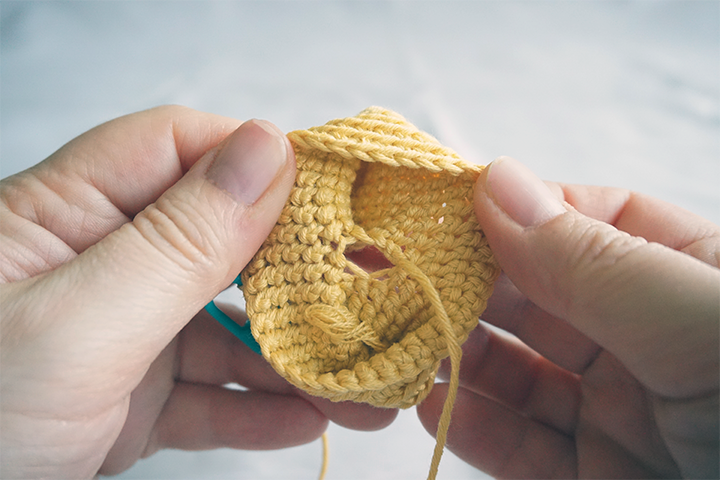
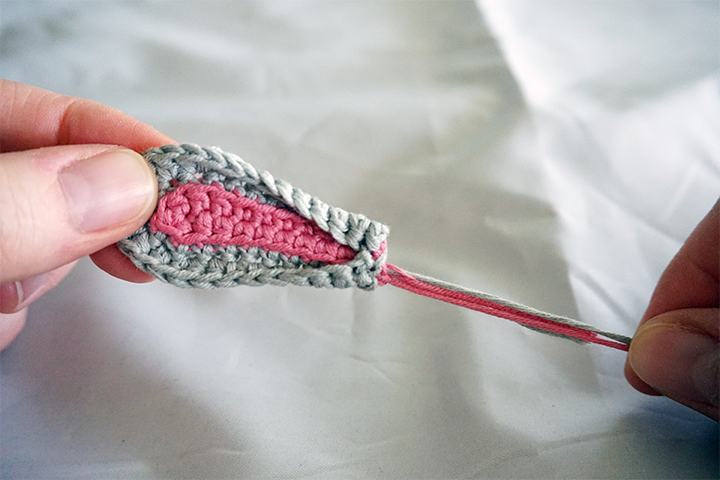
After you’ve done all your rounds for the ears, you’ll notice that they are still a bit flat. Now it’s time to give them some shape.
Fold the sides of Ear to the center and secure with 3 sts.
Put the Ears in between the two layers of Head (one in every corner), attach with 3 to 4 sts.
Folding the outsides to the center, gives te ears that little something extra.
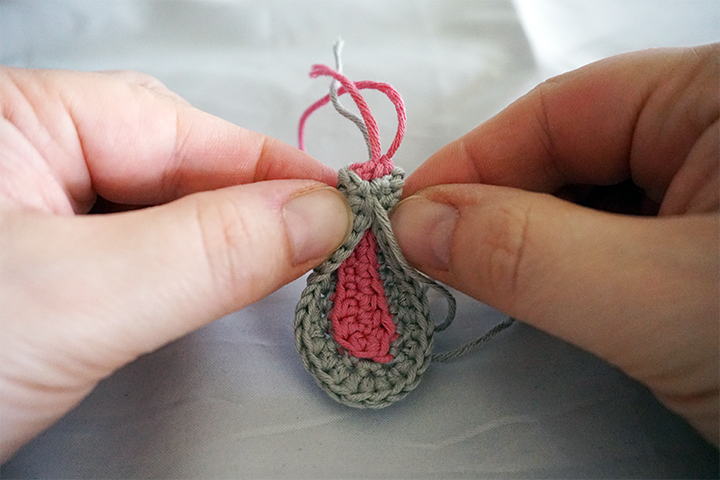
A few stitches at the bottom of the ear is already enough to give the ear a bit more shape.
You don’t need to cut of the extra tails, since you can hide these afterwards inside of the head of the bunnie.
Body
Cont with Rnd 21 of second and first leg.
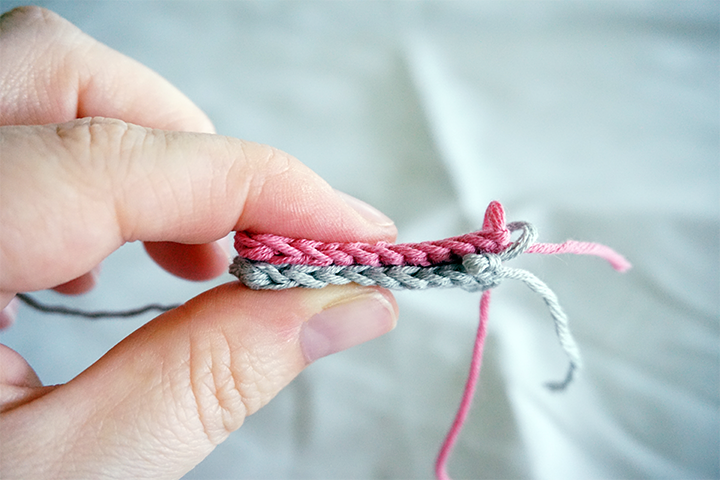
Rnd 21: Join the two legs, sc in every st of the first leg, cont to sc in every st of the second leg (40 sc)
Rnds 22-25: Sc in each st around. (40 sc)
Rnds 26-27: *With CC3, sc in every st around. (40 sc)
Rnd 28: With CC1, sc in every st around. (40 sc)
Rnd 29-30: With CC4, sc in every st around. (40 sc)
Rnd 31: With CC1, sc in every st around. (40 sc)
Rnds 32-37: Rep Rnds 26-31 once more.
Rnds 38-39: With CC3, sc in every st around. (40 sc)
Rnd 40: With CC1, sc i next 9 sts, join one arm with sc in 3 sts, sc in next 18 sts, join the other arm with sc in 3 sts, sc in next 7 sts. (40 sc)
Rnds 41-55: With MC, sc in every st around. (40 sc)
Rnd 56: Sc in next 12 sts, leaving rem sts unworked.
Fasten off, leaving a long tail.
After joining the legs of Robin the rabbit, there’s no more difficult parts. You can just relax and keep crocheting in the round. Change colour if you like, but I bet he looks also cute in a one-tone sweater.
For Rita the rabbit the joining of the legs is a tiny bit different. Inc at both sides of the legs with some ch, we can give her a cute little dress. The second round of the dress is very similar to the technique we used in the first rounds of the legs.
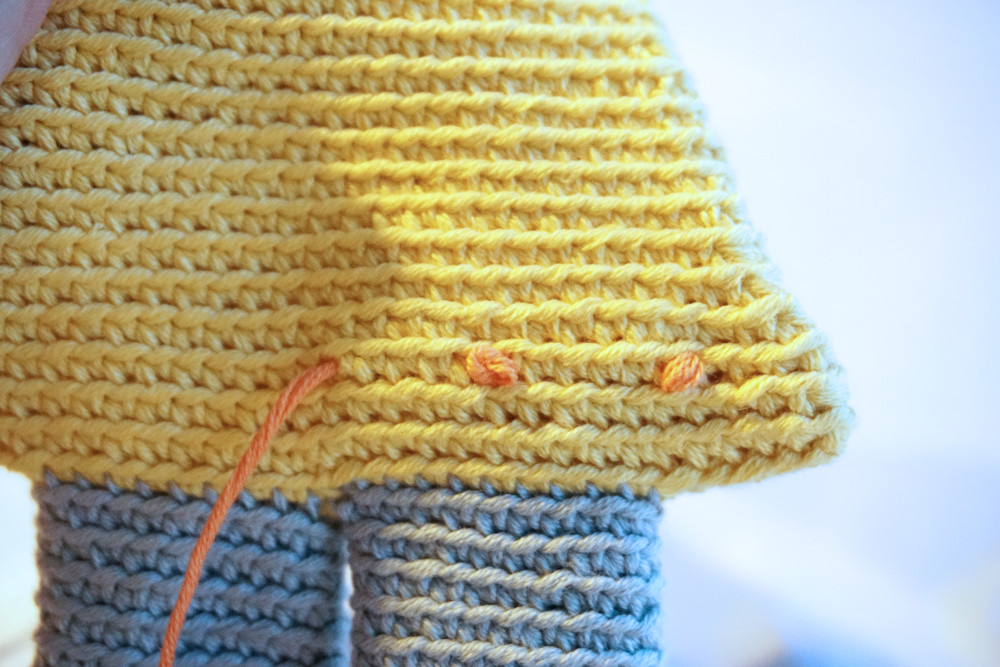
Polka dots
Cut a long tail of CC3 and CC4. Randomly place some french knots on the dress.
To make a french knot insert your needle through a stitch and come back up, wrap the yarn 3 times around your needle, insert the needle right beside the place where you came up with the needle. Skip a few stitches and come back up with your needle in the next place where you want to make a french knot. Gently pull your yarn to form the knot. Repeat this proces as much as you like.
Adding french knots here gives the dress extra texture and it’s quite easy to do!
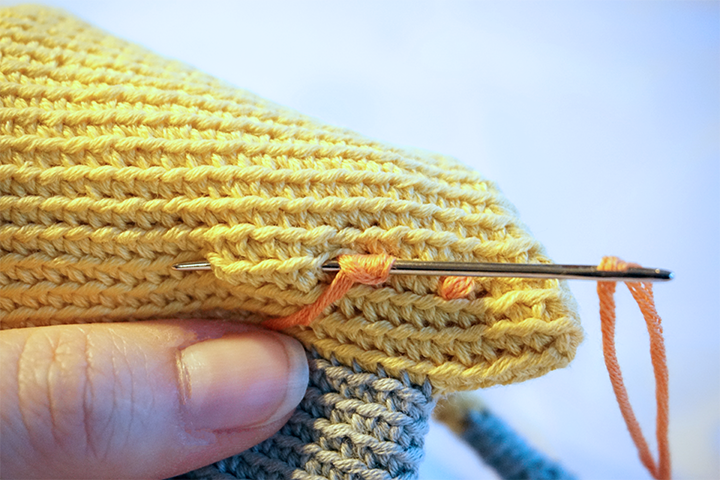
Make sure to be gently when pulling the tail. If you pull to hard, you might string the fabric of the dress.