


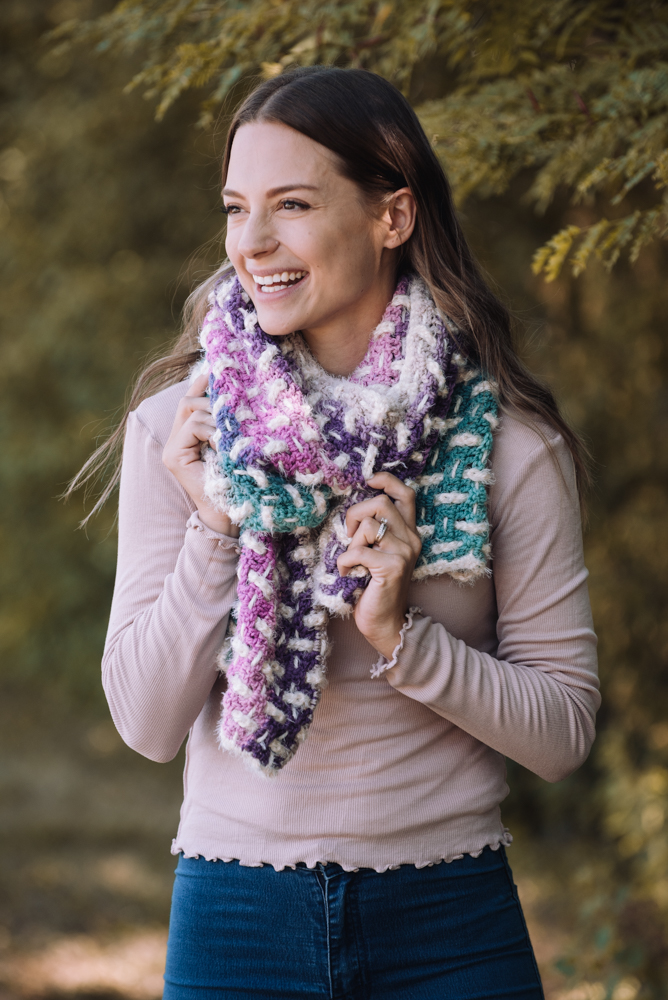
Get soft and cozy texture for days in this fun-loving accessory. A scarf base in self-striping yarn provides a canvas for unique details, including horizontal and vertical stripes woven throughout the project using bulky yarn with a silky eyelash feel.
Time: Weekend Project
Skill Level: Easy
Size: 12” wide x 66” long
Gauge: 11 sts and 8.25 rows = 4” [10 cm] in dc
Materials
 Yarn: Lion Brand Mandala (100% Acrylic; 590 yards [540 meters]/150 grams): Mothra (MC, 1 cake)
 Red Heart Hygge (70% Acrylic, 30% Nylon; 212 yards [194 meters]/227 grams): Pearl (CC, 1 ball)
Hooks: US size H/8 (5.0 mm), US size K/10½ (6.5 mm)
Notions: Tapestry needle
Pattern Notes
This scarf is made in 4 steps.
First, a scarf base is crocheted using the MC and smaller hook.
Second, a length of CC is woven through each odd row to create horizontal stripes.
Third, strips of chain stitches in CC are woven through the spaces of the scarf base to create vertical stripes.
Fourth, a border secures the ends of the weaving strips and creates a soft, sturdy edge for the scarf.
Pattern
Scarf Base
With MC and smaller hook, ch 236.
Row 1: Dc in 3rd ch from hook and in each ch across. Turn. (234 sts)
Row 2: Ch 3 (counts as first dc), dc in next st, *ch 2, sk 2 sts, dc in next 2 dc; rep from * across until 4 sts rem, ch 2, sk 2 sts, dc in last 2 sts. Turn. (234 sts, 58 spaces)
Row 3: Ch 3 (counts as first dc), dc in next st, *2 dc in next sp, dc in next 2 dc; rep from * across until 4 sts rem, 2 dc in next sp, dc in last 2 sts. Turn. (234 sts)
Rows 4-25: Rep Rows 2-3.
Fasten off.
Weave in ends.
Weaving Strips (Make 58)
With CC and larger hook, ch 36.
Fasten off.
Weave in ends.
Horizontal Stripes
Cut 13 pieces of CC 74” long.
Stripe 1: Thread a tapestry needle with a length of CC. Working across Row 1, weave over the first 2 sts, under the next 2 sts, *over the next 2 sts, under the next 2 sts; rep from * across.
Stripe 2: Thread a tapestry needle with a length of CC. Working across Row 3, weave under the first 2 sts, over the next 2 sts, *under the next 2 sts, over the next 2 sts; rep from * across.
Stripes 3-13: Rep Stripe 1 and Stripe 2 across rem odd Rows.
Weave in ends.
Vertical Stripes
Stripe 1: Using your fingers and starting at the right edge of the scarf, pull a weaving strip through the spaces of Scarf Base over Row 1, under Row 3, over Row 5, under Row 7, over Row 9, under Row 11, over Row 13, under Row 15, over Row 17, under Row 19, over Row 21, under Row 23, and over Row 25.
Stripe 2: Pull a weaving strip through the next column of spaces to the left, under Row 1, over Row 3, under Row 5, over Row 7, under Row 9, over Row 11, under Row 13, over Row 15, under Row 17, over Row 19, under Row 21, over Row 23, under row 25.
Stripes 3-58: Rep Stripe 1 and Stripe 2 across Scarf.
Border
Rnd 1: With CC and smaller hook, ch 1, work sc evenly spaced around all edges of Scarf, working through the end of each weaving strip to secure it, working 2 sc in each corner, join with sl st in first sc.
Fasten off.
Finishing
Weave in ends.
Block if desired.
Hi a beautiful scarf would love the pattern as a blanket
Can’t wait to get yarn to do it
I think it would be fairly easy to adapt to a Afgan. Just keep adding rows and make the chain (vertical stripes) to the new measurement. I am guessing that one cake makes 12 inches so depending on how wide you want depends on how many cakes you get. 60 inches would need 5. I am going to try this next after I finish a throw for my sons new unit.
I love this pattern so much I would like to make it an afghan. Are there any such afghan patterns similar to this scarf?
Hello! I’ve reached out to the designer for advice and she or I will reply as soon as possible. Thanks! – Nicola, Editor
Beautiful scarf. can’t wait to make it. I did notice in the added photos which are very helpful but I believe Horizontal and Vertical photos are opposite. Please correct me if I am wrong
Hi Sandy! Thanks for bringing this to our attention! The photos are actually labeled correctly, but, they were oriented the incorrect way. This has now been fixed so it should hopefully make sense now. Happy crocheting! – Nicola, Editor
I wish you guys would have photos of construction and/or stitch charts. This is a really pretty scarf and learning the technique is why I subscribe to pattern sources.
Hello Sarah! Some additional photos have now been added in the downloads section underneath the photos on the right hand side of the page. Hope this helps! – Nicola