


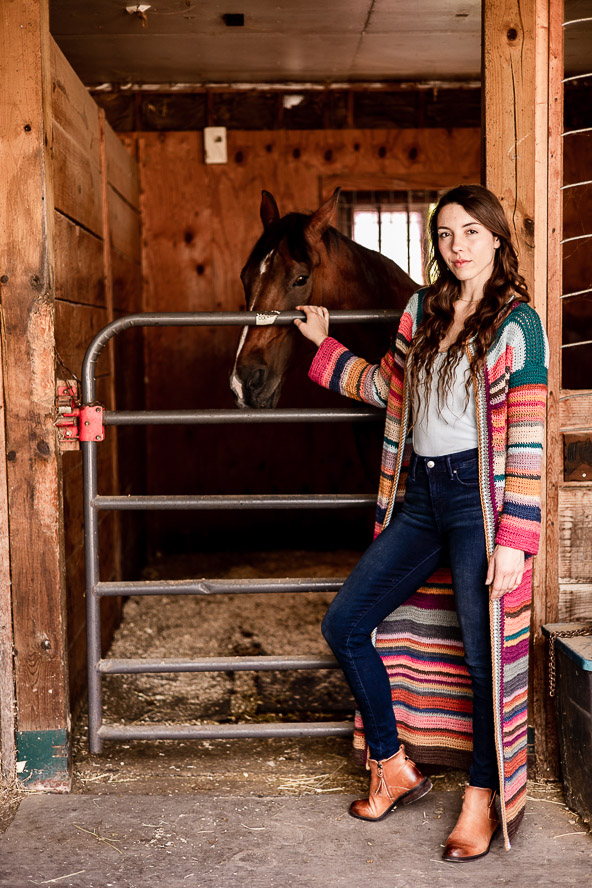
Stand out in a crowd with this stunning duster inspired by the sunset. Made from the bottom up with minimum seaming, the sleeves are crocheted directly onto the garment. Working in the front loop creates a subtle stitch texture that adds to the visual interest and is easy enough for a beginner crocheter to try.
Skill Level: Beginner
Size: Finished Bust Size 38 (42, 46, 50, 54)” to fit bust 34 (38, 42, 46, 50)”, 47 (47, 48, 49, 49)” long
4” positive ease recommended.
Shown in size 38”
Gauge: 14 sts and 8 rows = 4” [10 cm]
Materials
Yarn: Berroco Vintage (52% Acrylic, 40% wool, 8% nylon; 218 yards [200 meters]/100 grams): 1 hank each for all sizes
- #5103 Mocha
- #5144 Cork
- #5176 Pumpkin
- #5195 Macaron
- #5199 Sage
- #51198 Acia
- #5107 Cracked Pepper
- #51171 Begonia
- #51180 Grapefruit
- #51194 Rhubarb
- #51168 Petals
- #51192 Marmalade
- #5163 Caribbean Sea
- #5126 Watermelon
- #5104 Mushroom
- #5112 Minty
Hook: US size I/9 (5.5 mm)
Notions: tapestry needle
Abbreviations
Front Loop Half Double Crochet (FLhdc)
Pattern Notes
Follow color sequence in pattern.
Change colors in the last stitch of the row.
Chain 2 at the beginning of row does not count as a stitch, unless otherwise stated.
Duster is worked in one piece, bottom up to underarms. Separate panels for front right and left, and back are worked directly off of the bottom panel. The sleeves are worked directly on the completed panels after seaming shoulders.
Weave in ends before working sleeves and border.
Pattern
Ch 135 (149, 163, 177, 191).
Row 1: Hdc in 3rd ch from hook (ch 2 counts as stitch only in this row), turn. (133 (147, 161, 175, 189) hdc)
Rows 2-79: Ch 2, FLhdc in each st across, turn.
Right Front Panel
Row 1: Ch 2, FLhdc in next 33 (37, 40, 43, 47) sts, turn.
Rows 2-15 (15, 17, 19, 19): Ch 2, FLhdc in each st across, turn. Fasten off.
Back
Row 1: Join to next unworked st in Row 79, ch 2, FLhdc in next 67 (73, 81, 89, 95) sts, turn.
Rows 2-15 (15, 17, 19, 19): Ch 2, FLhdc in each st across, turn. Fasten off.
Left Front
Row 1: Join to next unworked st in Row 79, ch 2, FLhdc in next 33 (37, 40, 43, 47) sts, turn.
Rows 2-15 (15, 17, 19, 19): Ch 2, FLhdc in each st across, turn. Fasten off.
Working according to color sequence
Rows 1-5 A
Rows 6-8 B
Row 9 C
Row 10 A
Rows 11-13 D
Row 14 E
Row 15 F
Rows 16-18 C
Row 19 G
Row 20 E
Row 21 B
Row 22 H
Row 23 D
Row 24 A
Row 25 I
Row 26 J
Row 27 F
Row 28 G
Row 29 B
Row 30 C
Row 31 K
Rows 32-34 G
Rows 35-37 E
Rows 38-40 H
Row 41 L
Row 42 M
Rows 43-45 I
Row 46 A
Row 47 C
Rows 48-52 J
Row 53 N
Row 54 D
Rows 55-57 F
Row 58 K
Row 59 O
Rows 60-62 L
Row 63 G
Row 64 I
Rows 65-67 K
Row 68 P
Row 69 M
Rows 70-72 O
Row 73 E
Row 74 D
Row 75 B
Row 76 I
Row 77 J
Row 78 L
Row 79 N
Row 80 (Row 1 of back and panels) C
Row 81 (Row 2 of back and panels) H
Row 82 (Row 3 of back and panels) K
Row 83 (Row 4 of back and panels) A
Row 84 (Row 5 of back and panels) O
Row 85 (Row 6 of back and panels) G
Rows 86-88 (Rows 7-9 of back and panels) N
Rows 89-91 (Rows 10-12 of back and panels) P
Rows 92-94 (94, 96, 98, 98) (Rows 13-15 (13-15, 13-17, 13-19, 13-19) of back and panels) M
Sleeves
Seam shoulders of front right and front left panel to back before adding sleeves.
Rnd 1: With RS facing, join at underarm and evenly work 45 (45, 49, 53, 53) sc in row ends, sl st in back loop to join, turn. (45 (45, 49, 53, 53) sc) Exact st count is not critical so long as your sts neither ripple (too many) or pull tight (too few) around the armhole.
Rnds 2-37: Ch 2, FLhdc in each st around, sl st to back loop of first hdc, turn.
Work sleeve according to color sequence
Rnds 1-4: M
Rnd 5: C
Rnd 6: N
Rnd 7: L
Rnd 8: J
Rnd 9: I
Rnd 10: B
Rnd 11: D
Rnd 12: E
Rnds 13-15: O
Rnd 16: M
Rnd 17: P
Rnd 18-20: K
Rnd 21: I
Rnd 22: G
Rnd 23-25: L
Rnd 26: O
Rnd 27: K
Rnd 28-30: F
Rnd 31: D
Rnd 32: N
Rnd 33-37: J
Border
Row 1: With RS facing, join at corner of row edge at hem, ch 1, sc evenly up side, 3 sc in last st of edge (note: center sc is corner), sc in each st around neck, 3 sc at end of neck edge, sc evenly down side to hem, turn.
Rows 2-5: Ch 2, FLhdc in each st across to corner, 3 FLhdc in corner, FLhdc in each st to next corner, 3 FLhdc in corner, FLdc across.
Fasten off.
Border Color Sequence
Row 1-2: H
Row 3: E
Row 4: P
Row 5: B
Finishing
Weave in ends, block.
Is there a way I can get a pdf or print this out. I like to mark up the pattern and highlight to keep my place.
Hi there! You are welcome to save this pattern by copying and pasting into a word document or by printing the pattern via the printer icon on the left hand side of your screen. Hope this helps! – Dana, Editor
This is a lovely stash busting project and has been on my list for quite some time now. I do plan on making one soon!
How would I shorten this pattern to a knee length jacket since it’s done from the bottom up?
What yarn do you need for this is it DK or ARAN
Hello, this is aran weight yarn. Thanks for your interest!
I just made this in XL and it’s really beautiful! 16 colors in earth tones that I already had. It’s not as long as this one and idk why? I’m 5’4″ and it barely covers the top of my boots. Overall, it’s a fairly easy pattern, true to size and took about a week to make. I wish I could submit a picture because it’s gorgeous!
Love to hear this! I hope we get a photo submission feature soon! In the meantime, you can message our pages on Facebook or Instagram to share your photo, or post in our Facebook Group, I Like Crocheters. – Nicola, Editor
Not a question but I think there is an error in row 1 ((bottom)) of the pattern. It says to “hdc in 3rd ch ((xxx)), turn ((stitch count))”. I think the work “across” is missing after the 1st set of parentheses??..?? I knew what to do after crocheting for 49 years but concerned a beginner may not??…?? Thank you for the beautiful pattern!!
What rows are considered the bottom panel?
Hello Vivian! I’ve reached out to the designer for advice and she or I will reply as soon as possible. Thanks! – Nicola, Editor
Thanks for working my pattern. The bottom “panel” of this duster are Rows 1-79. This is the area under the underarm to the bottom hem.
Done pattern up to row 79, then don’t quite understand where to go from there. Any help would be appreciated.
Now, that you have completed the bottom portion of the duster (from underarm to hem), you need to make a front panel, a back and a second front panel. These are made by working them directly onto this bottom portion.
You begin the first panel by continuing right where you finished the bottom portion. You will work the same stitch pattern, but will only work it across 33 (37, 40, 43, 47) sts depending on size and leaving the remaining stitches unworked (these unworked stitches are where you will join and work across for the back and second front panel). Once you complete the first front panel (by working 15 (15, 17, 19, 19) rows), you fasten off. It will look like a “L” shape at this pont…an “L” with a really big bottom.
You then join to the next unworked stitch of Row 79 (the bottom panel) and work the back.
Essentially this will look like a blanket that has 2 slits in it after completing all the panels. These slits are the arm holes.
Ok thank you
What a great pattern to use scrap yarn – create your own color way.