


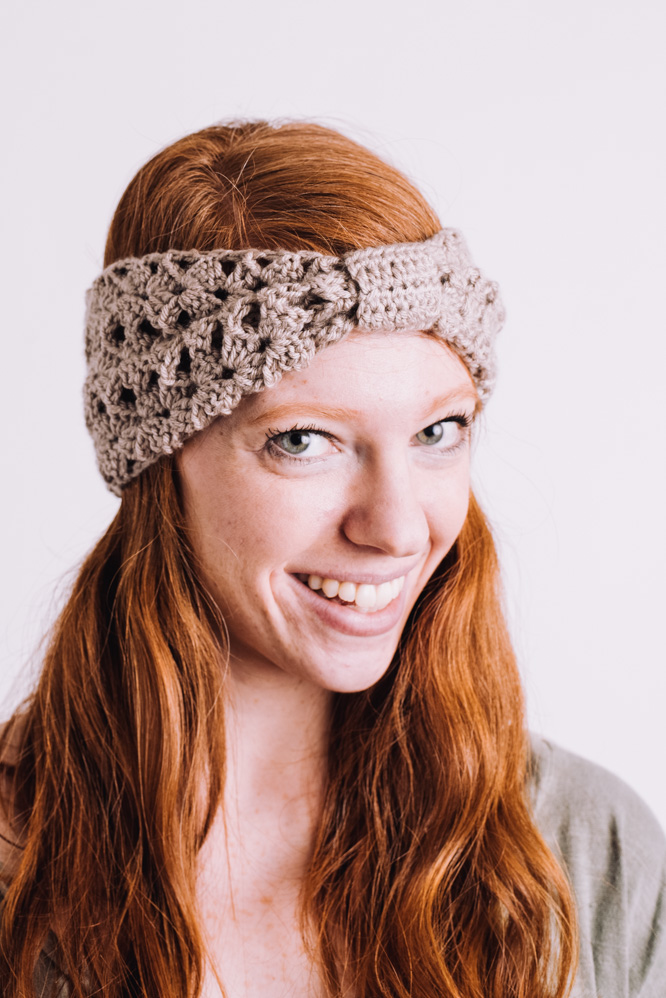
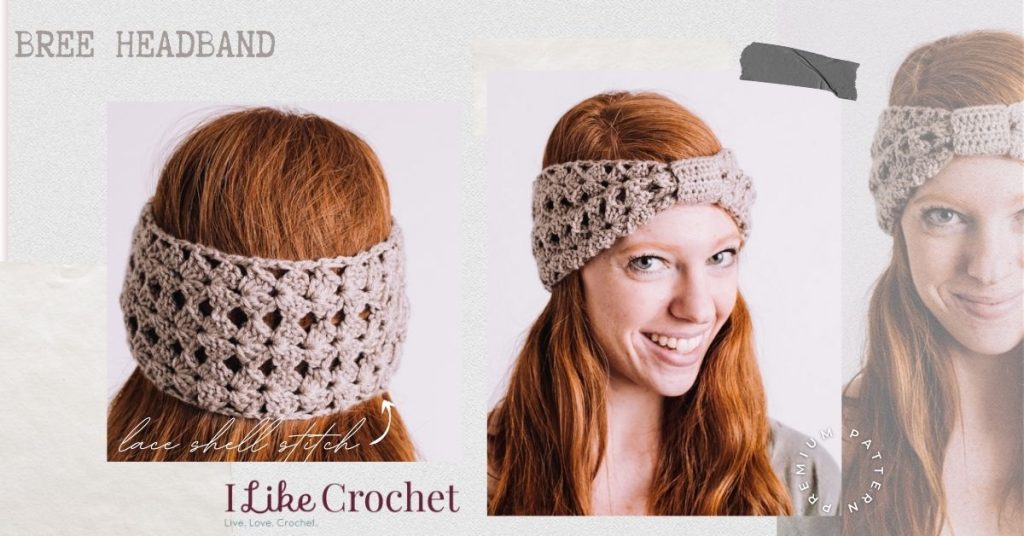
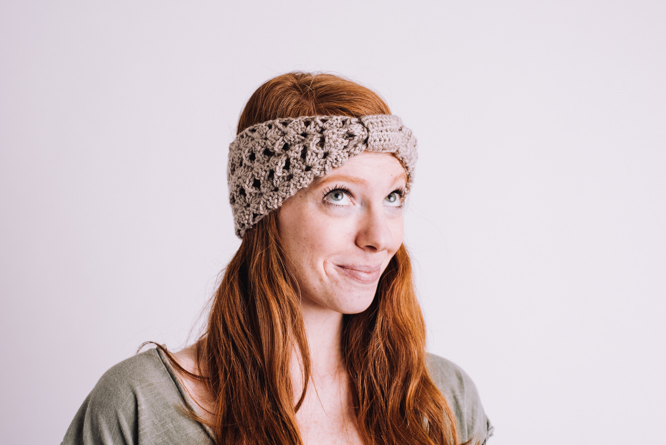
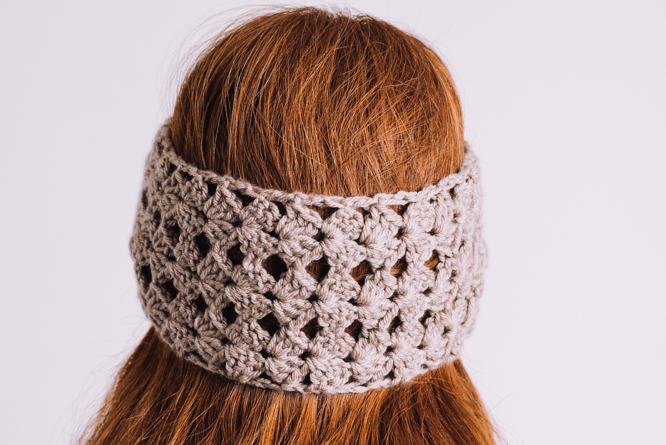
Bree is a boho-chic twisted headband that can be worn throughout the seasons. Crocheted flat with an airy lace shell stitch that will be cinched before seaming the ends together, this is the perfect crocheted accessory for a laid-back look without compromising style.
Skill Level: Intermediate
Size: 18.75” finished length before seaming, 9.25” finished length after seaming, 4.25” finished width, to fit average adult woman’s head,
Gauge: 15 sts = 4” [10cm] in Dc
Materials
 Yarn: Loops & Threads Joy DK (100% Acrylic; 273 yards [250 meters]/100 grams): Latte (1 ball)
Hook: US size G/6 (4.25mm)
Notions: Tapestry needle, scissors
Special Stitches
Lace Shell Stitch: Work (3 dc, ch 2, 3 dc) in st indicated.
For a visual tutorial, see this video: https://www.youtube.com/watch?v=RshDvaZJNkU
Pattern Notes
This pattern is worked widthwise, until you reach the desired length.
This pattern creates a headband to fit the average adult woman’s head: 9” laid flat when finished or 18” length with a 2-3” stretch (20-21” circumference at its max).
The headband’s length can be adjusted, depending on how many repeats of the row are worked. Easily adjust for larger head sizes by simply continue working for additional rows.
Pattern
Headband
Row 1 (Foundation Row)
Ch 21, sc in 2nd st from hook and each ch across row. Turn.
Row 2 (Set-up Row): Ch 3, sk first 3 sts of the work (not from the 3 just chained), in 4th st work (3 dc, ch 2, 3 dc) all in the same st, *sk next 5 sts, work (3 dc, ch 2, 3 dc) all in next st**; rep from * to ** once more to las 4 sts, sk 3 sts, dc in last st. Turn.
Row 3 (Repeat Row): Ch 3, *in next ch-2 sp of Lace Shell Stitch work (3 dc, ch 2, 3 dc); rep from * in each ch-2 sp across row, ending with dc in top of turning ch (beg ch-3).
Rep Row 3 until work meas 18” or desired length, continuing until you can wrap it around the head without it being too loose. You want this to be snug so it doesn’t slip off the head.
Last Row: Ch 3, sk 3 sts, dc in next st, 2 hdc in next ch-2 sp, dc in next dc, sk next st, *sk next 2 sts, dc in next dc, 2 hdc in next ch-2 sp, dc in next dc, sk next st, dc in next dc**, rep from * to ** once more, dc in top of turning ch (beg ch-3). (15 sts)
Seaming
Line up the edges of the piece. When seaming, I prefer to place the side with the edge that your crochet hook is connected to on the bottom.
Seam the edges together using slip stitches. I like to insert my crochet hook through multiple loops on each side for extra security.
Note: Don’t worry about perfectly lining up the stitches. Instead, focus on keeping the piece flat while seaming.
Cut yarn, leaving about a 2” tail.
Weave in all ends going up the seam.
Turn inside out with exposed seam on the inside.
Cinched Piece
Row 1: Ch 9, hdc in 3rd ch from hook and in ch across row. Turn.
Rows 2-9: Ch 1, hdc in each st across row. Turn.
Work until piece meas 2.5”. Don’t cut yarn. Leave attached to hook.
Finishing
Adding Cinched Piece
Make sure your headband is flat with the seam perfectly in the middle of the piece. Cinch the headband so that the piece is folded in the shape of a ‘M’.
Place your cinched piece directly underneath the seam and with the crochet hook attached at the bottom righthand corner of the rectangle.
Pull the edges of the Cinched Piece together so that they line up perfectly. When seaming, I insert my crochet hook through both loops of the bottom edge and two loops of the top edge. Seam together using slip stitches – for your first stitch, insert your crochet hook through to the finished headband so that your hook goes through the first edge, middle crocheted piece, and last edge as well.
Continue seaming until you reach the middle. Work one of your slip stitches through to the middle piece. Continue seaming until end. At the last stitch, slip stitch through to the piece again so that it stays securely in that position and the seam won’t move to the front.
Cut tail and pull through.
Weave in tail end.
Turn headband inside out.
Can this headband be made narrower? It appears to be very wide.
I would guess that you would do just one less row of the lace shell stitch, but since you are working widthwise, you will need to figure out how many chains you need. It might be 14 instead of 21, but you might have to play with it to see exactly what you would need. Keep in mind when it comes to the cinched piece, you will have to adjust that size as well before adding to the finished headband since your headband will be narrower so there will be less to “cinch”.
Can you add this to Ravelry?
Thanks for bringing this to our attention! It will hopefully be added soon. Happy crocheting! – Nicola, Editor
Very fun headband to make., quick & easy. 1 extra row can make a big difference in the size.
I have been looking for this head band, hope my children enjoy this style, thanks for pattern, going to try printing it again, the first try did no print properly
..
Love it. Will give it a try.
I love this headband. I hope I can make it.