


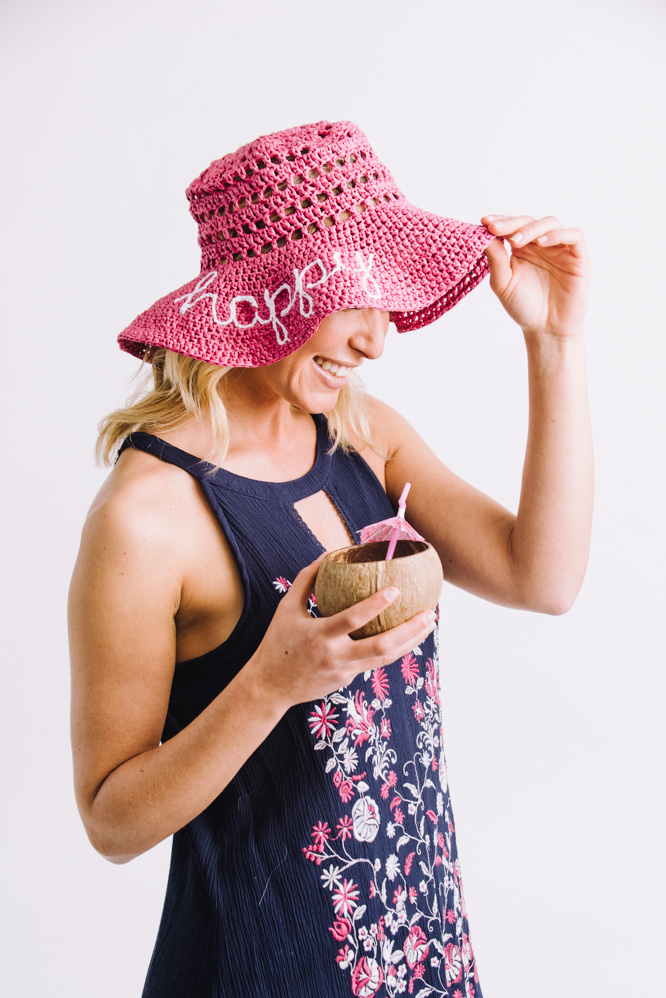
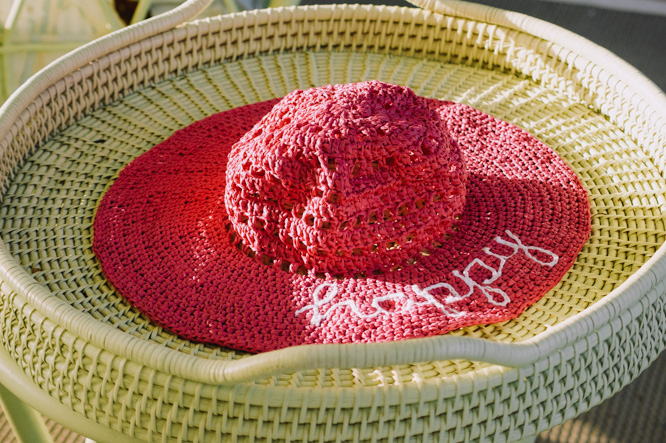
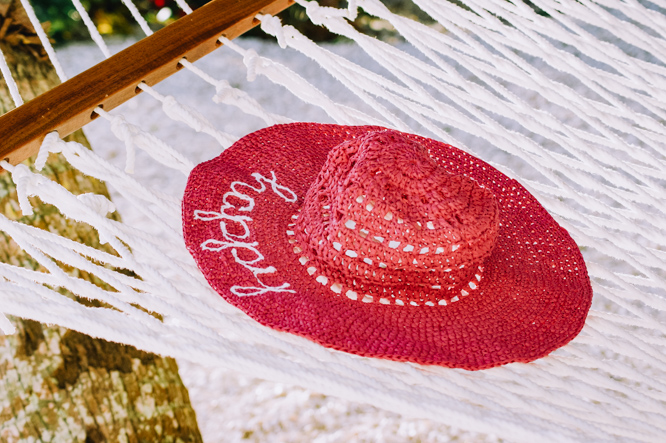
This floppy hat has a vented crown to keep you cool at the beach. Crocheted with raffia yarn, this hat holds its shape but is still extremely portable. Add your favorite inspirational buzzword to personalize the hat to make it all your own.
Skill Level: Intermediate
Size: 13” diameter with brim, 7” diameter at the crown
Gauge: 16 sts and 14 rows = 4” [10 cm] in hdc after blocking
Materials
Yarn: Premier Yarns Home Raffia (100% Cellulose Rayon; 99 yards [90 meters]/40 grams):

94-06 Fuchsia (MC, 3 balls)
Premier Cotton Fair (52% Cotton, 48% acrylic; 317 yards [290 meters]/100 grams): 27-01 White (CC, 1 ball)
Hook: US size H/8 (5.0 mm), US size G/6 (4.25 mm)
Notions: Tapestry needle
Pattern Notes
Ch-3 at beginning of round counts as dc unless otherwise specified.
Ch-4 at beginning of round counts as dc and ch-1 space.
In Round 7, dc is done in first st to move ch-1 spaces to keep stitch count consistent.
Ch-1 at beginning of hdc rounds does NOT count as a stitch.
Pattern
Ch 5, sl st in first ch to form a ring.
Rnd 1: Ch 3, 14 dc in ring, sl st in top of beg ch-3 to join. (15 dc)
Rnd 2: Ch 3, 2 dc in each st around, dc in st at base of ch-3, sl st in top of beg ch-3 to join. (30 dc)
Rnd 3: Ch 4, sk 1, *2 dc in next st, sk 1, ch 1; rep from * 13 more times, dc in st at base of beg ch-3, sl st in 3rd ch of beg ch-4 to join. (30 dc, 15 ch-1 sps)
Rnd 4: Ch 3, dc in ch-1 sp, *dc in next st, 2 dc in next st, dc in ch-1 sp; rep from * 13 more times, dc in last st, dc in st at base of beg ch-3, sl st in top of beg ch-3 to join. (60 dc)
Rnd 5: Ch 4, sk 1, 2 dc in next st, sk 1, ch 1, *dc in next st, sk 1, ch 1, 2 dc in next st, sk 1, ch 1; rep from * 13 more times, sl st in 3rd ch of beg ch-4 to join. (45 dc, 30 ch-1 sps)
Rnd 6: Ch 3, dc in ch-1 sp, dc in next 2 sts, dc in ch-1 sp, *dc in next st, dc in ch-1 sp, dc in next 2 sts, dc in ch-1 sp; rep from * 13 more times, sl st in top of beg ch-3 to join. (75 dc)
Rnd 7: Ch 3, dc in next st, ch 1, sk 1, *dc in next st, sk 1, ch 1; rep from * 35 more times, sl st into top of beg ch-3 to join. (38 dc, 37 ch-1 sps)
Rnd 8: Ch 3, *dc in next st, dc in ch-1 sp; rep from * 36 more times, sl st in top of beg ch-3 to join. (75 dc)
Rnds 9-12: Rep Rnds 7-8 twice more.
Rnd 13: Rep Rnd 7.
Rnd 14: Ch 1, hdc in next st, working in each ch-1 sp and dc across, *hdc in next 4 sts, 2 hdc in next st; rep 14 more times, sl st to first st to join.
Rnd 15: Ch 1, 90 hdc, sl st in first st to join. (90 hdc)
Rnd 16: Ch 1, *hdc in next 5 sts, 2 hdc in next st; rep from * 14 more times, sl st in first st to join. (105 hdc)
Rnd 17: Ch 1, *hdc in next 6 sts, 2 hdc in next st; rep from * 14 more times, sl st in first st to join. (120 hdc)
Rnd 18: Ch 1, hdc in next 120 sts, sl st in first st to join. (120 hdc)
Rnd 19: Ch 1, *hdc in next 7 sts, 2 hdc in next st; rep from * 14 more times, sl st in first st to join. (135 hdc)
Rnd 20: Ch 1, hdc in next 135 sts, sl st in first st to join. (135 hdc)
Rnd 21: Rep Rnd 20.
Rnd 22: Ch 1, *hdc in next 8 sts, 2 hdc in next st; rep from * 14 more times, sl st in first st to join. (150 hdc)
Rnd 23: Ch 1, hdc in next 150 sts, sl st in first st to join. (150 hdc)
Rnd 24: Rep Rnd 23.
Rnd 25: Ch 1, *hdc in next 9 sts, 2 hdc in next st; rep from * 14 more times, sl st in first st to join. (165 hdc)
Rnd 26: Ch 1, hdc in next 165 sts, sl st in first st to join. (165 hdc)
Rnd 27: Rep Rnd 26.
Fasten off and weave in ends.
Lettering
Use CC and smaller hook for lettering.
Lettering can be added in either surface crochet in a slip stitch or in embroidery using the chain stitch. Choose a word and either write it in cursive or find a cursive font, then use the image as your visual aid as you work.
Separate the letters into 3 sections, top, middle, and bottom. The top section starts after Rnd 14 and ends after Rnd 18 (4 rows). The middle section starts after Rnd 18 and ends after Rnd 22 (4 rows). The bottom section starts after Rnd 22 and ends after Rnd 26 (4 rows).
Make each letter 4 stitches wide in the middle, with 1 stitch space between them.
Use pins to mark where your letters will go on the brim before you begin stitching.
Finishing
Block brim. Spray starch can be used for a stiffer brim if desired.
Where do I buy the yarn?
Hello! It looks like this particular yarn is discontinued. I recommend taking a look at YarnSub for suitable substitutions: https://yarnsub.com/yarns/premier_yarns/home_raffia
-Nicola, Editor
Love this! Blondes need hats!!