


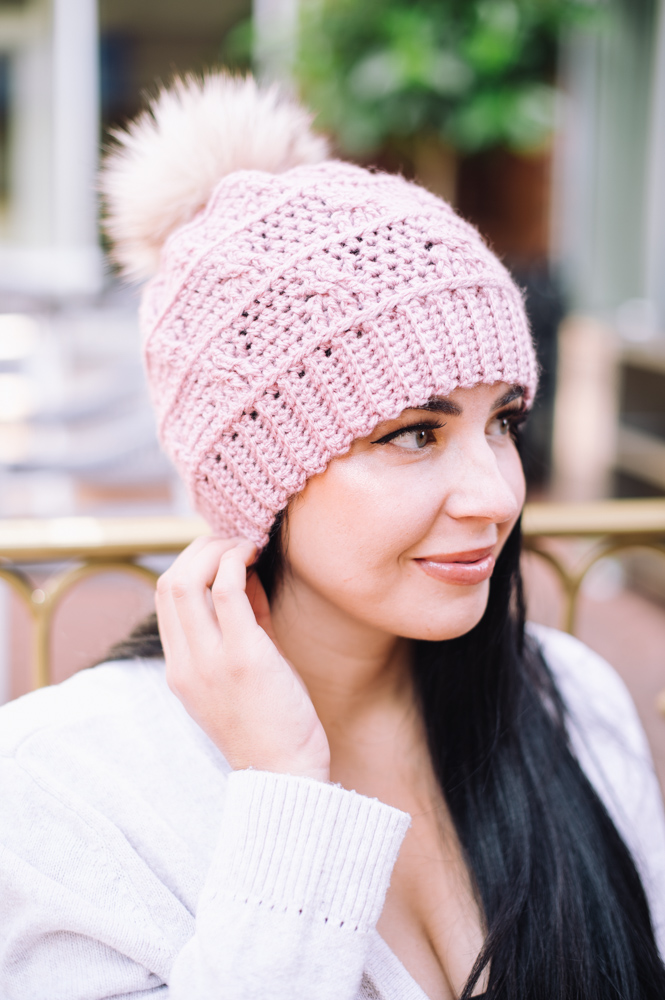
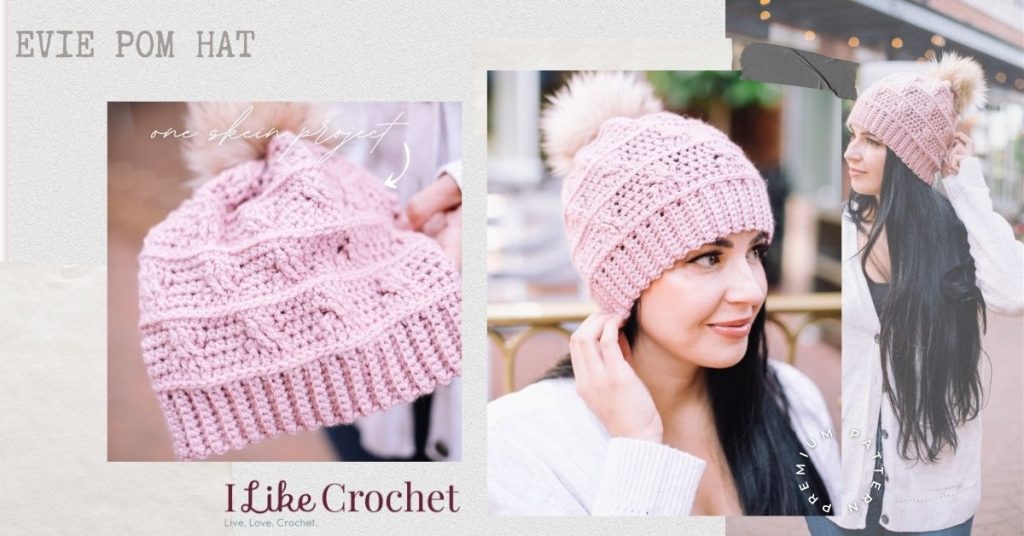
Spice up your autumn-winter wardrobe look with an ultra cozy cabled hat topped with a playful pom pom! Evie is a super fun design that plays with texture and yarn to create something that’ll keep your ears nice and toasty as the days turn cooler. With interchangeable poms, this hat is customizable and super fun to wear!
Time: 3 Hour Pattern
Skill Level: Easy
Size: 21.5” [54.5 cm] circumference, 8.5” [21.5 cm] tall to fit medium ladies head.
Gauge: 8 hdc = 2.5” (6.4 cm)
Materials
 Yarn: Stylecraft Special Aran (100% acrylic; 214 yards [196 meters]/100 grams): #1080 Pale Rose (1 ball)
Hook: US size H/8 (5 mm)
Notions: Tapestry needle, stitch marker, Faux Fur detachable pom pom (optional)
Special Stitches
Left Cable: Worked over 4 sts; sk next 2 FPdc, FPtr around next 2 FPdc, then working in front of the 2 FPtr just made, FPtr around the 2 skipped FPdc.
Pattern Notes
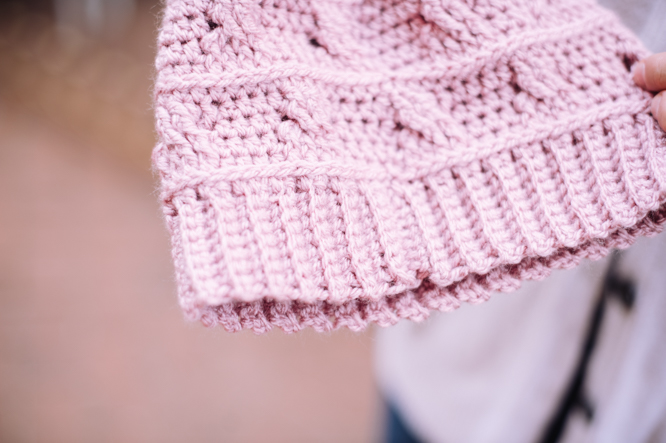
The hat is started with the ribbing worked in rows sideways then continued in rounds from the bottom to the top.
To adjust circumference, add or subtract a multiple of 8 rows for brim which will add/subtract an 8-st pattern repeat to hat for 2.5” [6.4 cm].
To avoid gaps at the joining of the rounds, skip the beginning chains and always join in the top of the first stitch of the round. This allows the chains to become “filler” stitches and keeps your seam from having large holes.
Pattern
Brim
Ch 11.
Row 1: Sc in 2nd ch from hook and in each rem ch across, turn. (10 sts)
Row 2: Ch 1, sc in BL in each st across, turn.
Rows 3-72: Rep Row 2.
Join ends by holding Row 1 edge above the last row edge. Ch 1, slip stitch the short sides together inserting the hook through the back loops of the stitches on both sides to create a circular band.
Turn the piece inside out, so that the seam will be hidden on the WS.
Hat
Rnd 1: Ch 1, hdc in same st as ch 1, hdc in each row-end of brim around, sl st in top of first hdc to join. (72 sts)
Rnd 2: Ch 1, working in back horizontal bar, hdc in each st around, sl st in top of first hdc to join.
Rnd 3: Ch 1, [hdc in next 4 sts, FPdc around next 4 sts] 9 times around, sl st in top of first hdc to join.
Rnd 4: Ch 1, [hdc in next 4 sts, Left Cable] 9 times around, sl st in top of first hdc to join.
Rnd 5: Rep Rnd 3.
Rnd 6: Ch 1, hdc in each st around, sl st in top of first hdc to join.
Rnd 7: Rep Rnd 2.
Rnd 8: Ch 2 (does not count as a st throughout), [FPdc around next 4 sts, hdc in next 4 sts] 9 times around, sl st in top of first FPdc to join.
Rnd 9: Ch 2, [Left Cable, hdc in next 4 sts] 9 times around, sl st in top of first FPtr to join.
Rnd 10: Rep Rnd 8.
Rnd 11: Rep Rnd 6.
Rnds 12 – 16: Repeat Rnds 2 – 6
Rnds 17 – 21: Repeat Rnds 7 – 11
Fasten off, leaving a tail long enough to sewing top close.
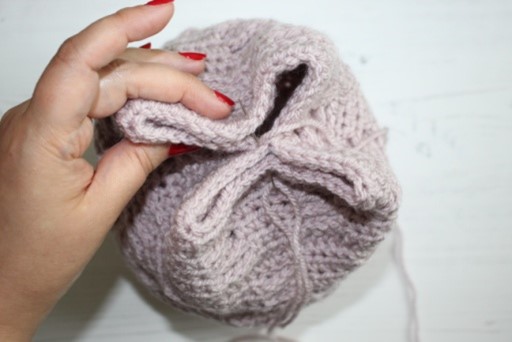
Finishing
- Turn hat inside out; place hat down flat with seam in the center, sew together the st on the opposite side
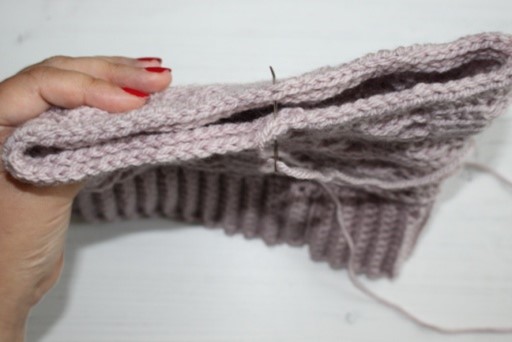
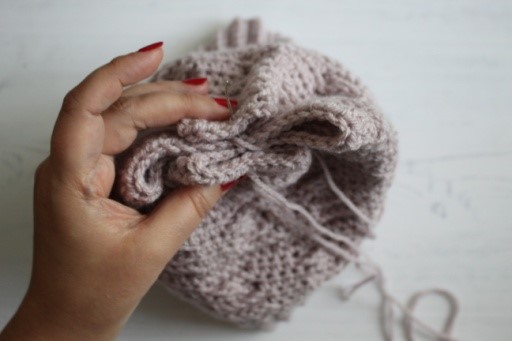
- Push each of the 2 ends in towards the center and sew together; 4 sections created.
- Push each of the 4 new ends towards the center and sew together to close the top of the hat.
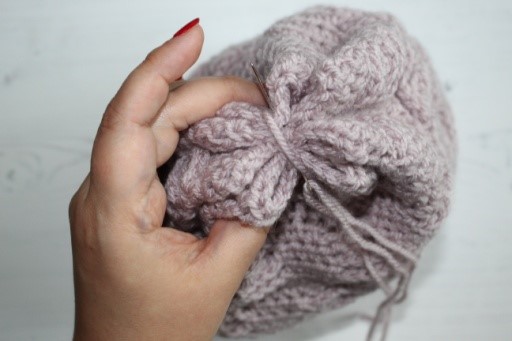
Fasten off and weave in ends. Turn hat right side out. Leave plain or attach a pompom to the top of the hat for extra pizzazz.
Thanks for showing me how to close the top. I have several other patterns I want to do but closing never looks right. I love this magazine.thanks again
On row2 of the brim, it says to Ch1, SC in BL in each stitch across. Turn. What is “BL”?
Hi Donna, BL means Back Loop. Hope this helps! – Nicola, Editor
What a very cute hat! Gonna try some for Christmas gifts. Thanks*