


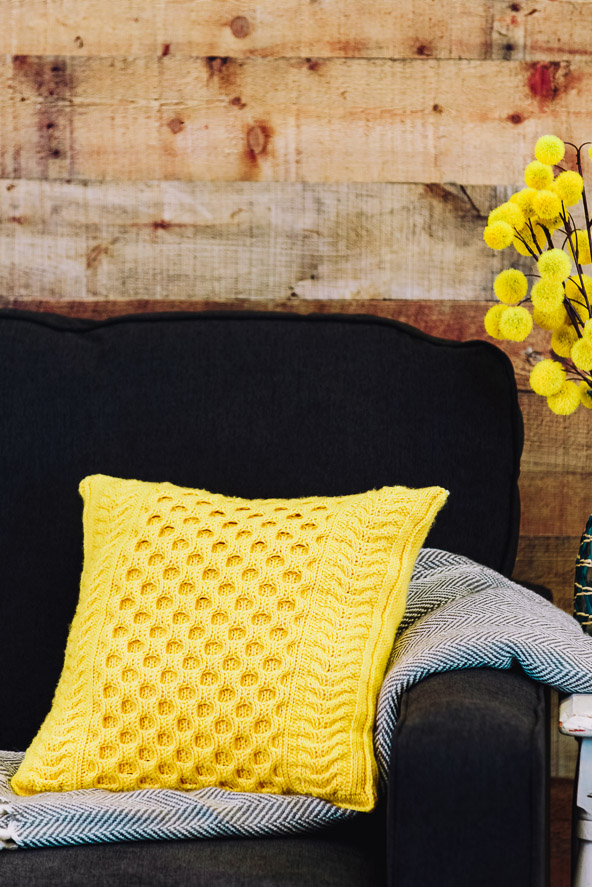
The Pineapple Tunisian Pillow takes its inspiration from Aran cables, creating an interesting texture with a knit like appearance. The back of the pillow is plain tunisian and the top is closed with a zipper closure for easy cleaning. Need help mastering the tunisian crochet cables featured in this pattern? Check out the step-by-step tutorial on the next page.
Skill Level: Intermediate
Size: 16” / [40 cm] x 16” / [40 cm]
Gauge: 21 sts and 27 rows = 4” [10 cm] in Tunisian Knit Stitch after wet blocking
Materials
 Yarn: Nako Baby Luks Minnos (100% Acrylic; 367 yards [336 meters]/100 grams): 627107 Yellow (3 balls)
Hook: US size H/8 (5.0 mm) Tunisian hook; US size G/6 (4.0 mm) crochet hook
Notions: Removable markers (optional), cable needle, zipper
Abbreviations
Tks – Tunisian Knit Stitch
Tps – Tunisian Purl Stitch
C6B – 6-stitch right cable
C6F – 6-stitch left cable
Special Stitches
Tunisian Knit Stitch
Insert hook between front and back vertical bars of next stitch, yarn over and pull up a loop.
Tunisian Purl Stitch
With yarn in front, insert hook under the next vertical bar. Hold yarn in back, yarn over and pull up a loop.
6-stitch right cable (C6B)
Tks the first 3 sts.
Slip these 3 sts on a cable needle, hold to back of work.
Tks next 3 sts, place sts on the cable needle back on hook.
6-stitch left cable (C6F)
Increases
Tks first 3 sts, place these 3 sts on cable needle, hold in front of work, Tks next 3 sts, place sts on cable needle back on hook.
Insert hook in space before next st, Tks next st as usual.
Return pass
Worked after picking up stitches at the end of every row. Ch 1, *yarn over and pull through 2 loops on hook; rep from * to end.
Tips
- Keep the tension even.
- Remember to tighten up the first stitch on the hook when picking up stitches on the forward row. This will help to keep the edge straight and even.
- The last stitch in the forward pass is picked up through two vertical strands.
- If you are not too experienced with crochet cables, use a larger size hook to crochet the cable row so that it is easier to pick up stitches in the next row.
- Optional – place a stitch marker on every cable row to keep track of the rows in between.
Pattern Notes
This pattern is worked in two pieces (front and back) featuring cables on the front and the Tunisian knit stitch at the back. Pieces are seamed on the sides with single crochet.
The top has a zipper closing.
Pattern
Front
With Tunisian hook, ch 80.
Row 1: Pick up st in each ch across.
Rows 2-3: Tks.
Row 4: Work 4 Tks, (2 Tks, inc, 1 Tks, inc, 1 Tks) twice, 3 Tks, (2 Tks, inc, 3 Tks) 4 times, (2 Tks, inc, 1 Tks, inc, 1 Tks) twice, (3 Tks, inc, 2 Tks) 4 times, 3 Tks, (2 Tks, inc, 1 Tks, inc, 1 Tks) twice, 5 Tks. (100 sts)
Row 5: 3 Tks, 1 Tps, C6B, C6F, 1 Tps, 2 Tks, (C6B, C6F) 5 times, 2 Tks, 1 Tps, C6B, C6F, 1 Tps, 4 Tks.
Rows 6-8: 3 Tks, 1 Tps, 12 Tks, 1 Tps, 64 Tks, 1 Tps, 12 Tks, 1 Tps, 4 Tks.
Row 9: 3 Tks, 1 Tps, C6B, C6F, 1 Tps, 2 Tks, (C6F, C6B) 5 times, 2 Tks, 1 Tps, C6B, C6F, 1 Tps, 4 Tks.
Rows 10-12: Rep Rows 6-8.
Rep Rows 5-12, 10 more times.
Rows 93-97: Rep Rows 5-9.
Row 98: 6 Tks, sk 2 st, 4 Tks, sk 2 sts, 5 Tks, (2 Tks, sk st, 6 Tks, sk st, 2 Tks) twice, 2 Tks, sk 2 st, 4 Tks, sk 2 st, 2 Tks, (2 Tks, sk st, 6 Tks, sk st, 2 Tks) twice, 5 Tks, sk 2 st, 4 Tks, sk 2 st, 7 Tks. (80 sts)
Rows 99-101: Tks
Switch to crochet hook.
Row 102: Ch 1, sc in each st, inserting hook like you would for Tks.
Fasten off.
Back
With Tunisian hook, ch 80.
Row 1: Pick up st in each ch across.
Rows 2-101: Tks.
Switch to crochet hook.
Row 102: Ch 1, sc in each st, inserting hook like you would for Tks.
Fasten off.
Finishing
Block pieces before joining.
Place front and back pieces with WS facing with cabled pattern vertically upwards. Starting from the top left of the front, sc around three sides, working a chain at each corner.
Fasten off.
Sew zipper at the top opening.
I just skimmed through the pattern and my question is why would you put the zipper on the top of the pillow?
Hi Cindy! I think it’s just to say that the zipper is on the top or the bottom of the pillow, not on the seamed sides. You are welcome to add the zipper to either top of bottom of the pillow. Happy crocheting! – Nicola, Editor
most of us crocheter are visual people. We learn by looking and reading instructions. You should show illustration of each stitch as it is made. Some pattern books have illustration – hand drawn of the overall patterns. I will not subscribe until there is a user friendly instruction. I had been crocheting for years, some Tunisian. But your instruction should be more illustrated.
Hi Larraine, we do have a photo tutorial for this pattern: https://www.ilikecrochet.com/daily/crochet-techniques/tunisian-crochet/tunisian-crochet-cable-stitch-tutorial/
Hope that helps! – Nicola, Editor