


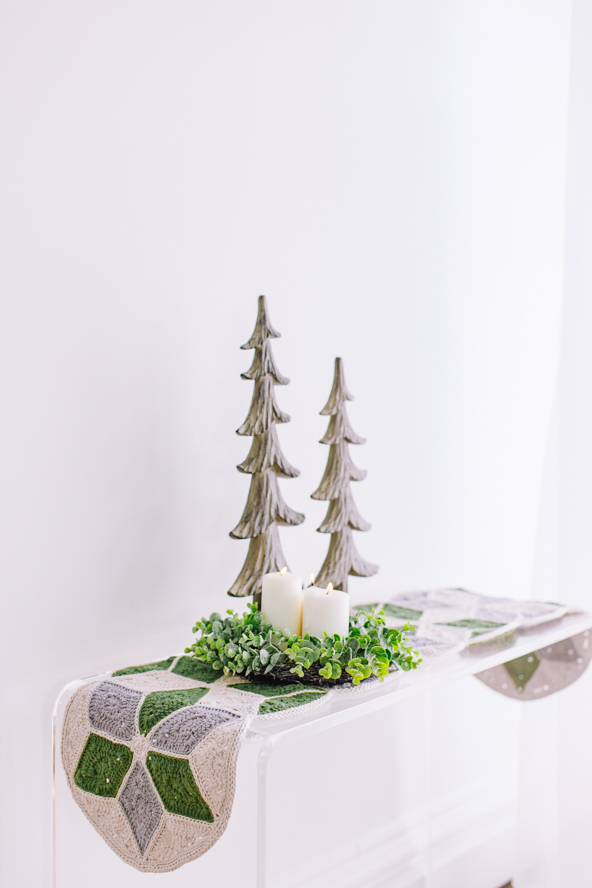
Introducing the Evergreen Quilt-Inspired Crochet Table Runner pattern, a versatile and timeless piece that adds a touch of elegance to any space, year round. Drawing inspiration from the art of quilting, this pattern brings a unique and handmade touch to your table setting. Whether you’re celebrating a special occasion or simply elevating your everyday dining experience, this table runner is sure to be a cherished addition to your home.
Time: A Couple of Weekends
Skill Level: Intermediate
Finished Size: 54 inches L x 13.5 inches W
Gauge: Gauge is not important to project
Materials
 Yarn: Circulo Natural Cotton Maxcolor 4/6 (100% cotton; 247yards [226 meters]/200 grams):
#7684 Porcelain (MC, 2 ball), 5718 Forest Green (C1, 1 balls), #8212 Chrome (C2, 1 ball)
Hook/Needles: US size G/6/4.0 mm crochet hook
Notions: Removable stitch markers or safety pins, tapestry needle
Abbreviations
PM: Place a stitch marker or safety pin in indicated st or ch.
Special Stitches
Slip stitch join (sl st join): With lp on hook, insert hook from RS to WS between front and back lps of designated st or ch, yo, pull lp up through lp on hook to create the Slip st join. Sl st join counts as first surface sl st unless otherwise noted.
Surface slip st (surface sl st): With lp on hook and working yarn under piece, insert hook from RS to WS between front and back lps of designated st or ch, yo, pull lp up through lp on hook.
Single crochet join (sc join): With slip knot on hook, insert hook into designated st, yo, pull lp through, yo, pull through both lps on hook completing the Single crochet join.
Back horizontal bar: Skip top 2 lps of indicated st, insert hook in next horizontal bar on back of st. (Also called 3rd bar)
Extended double crochet (ext dc): Yo, insert hook in designated st, yo, pull lp through, yo, pull through 1 lp on hook, (yo, pull through 2 loops on hook) twice completing the Extended double crochet st.
Treble crochet (tc): Yo twice, insert hook in designated st, yo, pull lp through, (yo, pull through 2 lps on hook) twice completing the Treble crochet st.
Pattern Notes
Weave in ends as work progresses.
Chain-4 at beg of rows or rounds counts as beg treble crochet stitch.
Chain-3 at beg of rows or rounds counts as beg double crochet stitch.
Join with a slip stitch unless otherwise noted.
Pattern
DIAMOND
Make 10 with MC and 13 each with C1 and C2.
Make a magic ring.
Rnd 1 (RS): Ch 1, [sc, hdc, dc, tc (see Special Stitches), ch 2, tc, dc, hdc] twice in ring, join in top of beg sc, turn to WS. (14 sts)
Rnd 2: Ch 4 (see Pattern Notes), dc in same st, * dc in next 3 sts, (dc, ext dc (see Special Stitches), tc, ch 2, tc, ext dc, dc) in next ch-2 sp, dc in next 3 sts,* (dc, ch 1, dc) in next sc, rep from * to * once, join in 3rd ch of beg ch-4, do not turn. (28 sts)
Rnd 3: Sl st in first ch-1 sp (does not count as a st), turn to RS, ch 3 (see Pattern Notes), (dc, ch 1, pm (see Pattern Notes) in ch just made to mark center side edge, 2 dc) in same place, * dc in next 7 sts, (dc, ext dc, tc, ch 3, pm in first and 3rd chs on either side of middle ch, tc, ext dc, dc) in next ch-1 sp, dc in next 7 sts,* (2 dc, ch 1, 2 dc) in next ch-1 sp, rep from * to * once, join (see Pattern Notes) in top of beg ch-3. Fasten off. (48 sts) (Note: Middle ch bet both marked chs is diamond tip)
First Motif Assembly
Referring to photo for diamond color placement, *place #1 and #2 RS up on a flat surface having marked chs at center side edges matching, *with MC, sk marked chs at center side edge, working through both layers, sl st join (see Special Stitches) in next st, (sl st join counts as first surface sl st), [surface sl st (see Special Stitches) in next st] 11 times, surface sl st in next marked ch*, fasten off. (13 surface sl st). ** Working clockwise, rep from * to ** 5 times to seam side edges of all 6 diamonds together. Note: Center inside opening of motif is unworked.
Partial Motif Assembly
Make 6
[Referring to diagram for color placement, working clockwise, rep from * to ** of First Motif 5 times to seam side edges of 5 diamonds together.] Note: Unworked side edges of first diamond and 5th diamonds are not seamed. Work this partial motif assembly 5 more times to create all 6 partial motifs.
Table Runner Assembly
Using diagram as placement guide, beg with First Motif and next Partial Motif, {with partial motif against bottom edge of prev motif, matching diamond tips and markers at side edge of lower motif with seam ends of upper motif, beg at outer right side edge of motifs, with MC, working through both layers, sk first unmarked (middle) ch at diamond tips, sl st join in next marked ch, (sl st join counts as first surface sl st ), *[surface sl st in next st] 12 times*, surface sl st in next marked ch, work in only one layer, insert hook in st at end of next side seam and in next marked ch beside side seam of same diamond, yo, pull lp through lp on hook (counts as a surface sl st), working through both layers, rep from * to * once, surface sl st in next marked ch, fasten off.} (28 surface sl sts) Rotate piece to left until rem unassembled diamond tips at opposite side of both motifs are at right side edge of work, rep { } once. Continue to join next 5 partial motifs in same manner to create Table Runner.
Motif Center
Rnd 1: With inside center opening of any motif RS facing, inserting hook through center of surface sl sts and in back lps of chs, with MC, sc join (see Special Stitches) in last surface slip at end of any diamond side seam, working from right to left around center opening, sc in next unworked chain at tip of same diamond, [sc in last surface slip st of next diamond seam, sc in center of next unworked chain of tip of same diamond] 5 times, do not join. (12 sc)
Rnd 2: Working in back lps of sts, sc in first sc, sk next st, [sc in next sc, sk next st] 5 times, join in beg sl st. Fasten off. (6 sc)
TRIANGLE
Make 10 with MC and 4 each with C1 and C2
Make a magic ring.
Row 1 (RS): Ch 4, (ext dc, dc, hdc, sc, hdc, dc, ext dc, tc) in magic ring, turn. (9 sts)
Row 2: Ch 4, (tc, ext dc, dc) in same place at base of beg ch-4, dc in next 3 sts, (dc, ch 1, dc) in next st, dc in next 3 sts, (dc, ext dc, 2 tc) in 4th ch of beg ch-4, turn. (16 sts)
Finishing Rnd 1: Ch 4, pm in in last ch made to mark triangle tip, (tc, ext dc, 3 dc) in same place, dc in next 7 sts, 3 dc in next ch-1 sp, pm in 2nd dc just made to mark corner angle of triangle, dc in next 7 sts, (3 dc, ext dc, 2 tc) in 4th ch of beg ch-4, pm in last st made to mark opposite triangle tip, working over ends of rows of long edge, (do not ch 1), 2 sc around post of first tc, *work 8 sc evenly spaced* to magic ring, sc in magic ring, rep from * to * to within last tc at end of row 3, 2 sc around post of last tc, join in marked ch at op of beg ch-4, move marker to join to mark triangle tip. Fasten off. (50 sts)
Triangle Assembly
Following colors listed on assembly chart, place triangle between diamonds #1 and #2 on a flat surface matching marked sts at triangle tips with marked chs at diamond tips, beg at outer edge, with MC, sk first unmarked (middle) ch at diamond tip, working through both layers, sl st join in next marked chs of diamond and triangle tip, *surface sl st in each of next 12 sts, surface sl st in next marked ch of diamond and next st of triangle, work 1 surface sl st in end of next side seam and in next marked corner st of triangle, surface sl st in marked ch of next diamond and next st of triangle, surface sl st in each of next 12 sts, surface sl st in next marked ch of diamond and marked st of triangle,* [working in one layer, sl st in tip of next diamond (counts as surface sl st), pm in st just made to mark diamond tip, place next triangle against outer edge of motif matching marked sts at triangle tips with marked chs at diamond tips, working in both layers, surface sl st in next marked ch of diamond and marked st of triangle, rep from * to * once] 3 times to add triangles 2-4, {working in one layer, sl st in tip of same diamond (do not place marker in this tip), sl st in end of next seam, pm in st just made to mark seam end, sl st in tip of next diamond (do not place marker in this tip), working in both layers, surface sl st in next marked ch of diamond and marked st of triangle, rep from * to * once} 6 times to join triangles #5-10 to long side edge of table runner, rep [ ] 3 times to assemble next MC triangles 11-13, rep from { } 5 times to join rem 5 triangles, sl st in next diamond tip, (do not place marker in this tip), sl st in end of next seam, pm in st just made to mark end of seam, sl st in tip of next diamond, (do not place marker in this tip), sl st in end of next seam, join in back lp of first sc of triangle straight edge, do not fasten off. (565 sts)
Border
Rnd 1: Working in back lps of sc and surface sl sts around perimeter of table runner, ch 1, sc in same st, sc in next 20 sc to within 1 surface sl st from marked dc tip, [dc in next surface sl st, 3 dc in next marked st (diamond tip), dc in next surface sl st, sc in next 21 sts to within 1 surface sl st from marked st] 3 times, {sc in next sl st, sl st in next marked end of seam, sl st in next sl st, sc in next surface sl st, sc in next 21 sts} 6 times, rep [ ] 3 times, rep { } 5 times, sc in next sl st, sl st in next marked end of seam, sl st in next sl st, sc in next surface sl st, do not join. (456 sts)
Rnd 2: Working in back bar (see Pattern Notes) of sts, sl st in first st and in each st around, join to first st. Fasten off. (456 sl sts)
I love these, I make rugs sometimes huge. I love these
The Evergreen Quilt-Inspired table runner pattern refers to a diagram. I don’t see one included in the pattern. Is it available somewhere?
Diagrams appear at the bottom of the pattern as a big blue button, and appear only for logged-in Gold Members. Please reach out with any questions.
Would love more beginner projects, like ear warmers, beanies, hand warmers!
Hi Carol! We strive to offer a variety of skill levels in each of our issues. You are welcome to browse our beginner tag here: https://www.ilikecrochet.com/tag/beginner/
Here are some patterns I think you’ll like:
https://www.ilikecrochet.com/magazine/crochet-hat-patterns/guava-beginner-beanie/
https://www.ilikecrochet.com/magazine/crochet-mitten-and-glove-patterns/crochet-fingerless-gloves-patterns/regal-wristwarmers/
https://www.ilikecrochet.com/magazine/crochet-accessories/snow-puff-ear-warmer/