


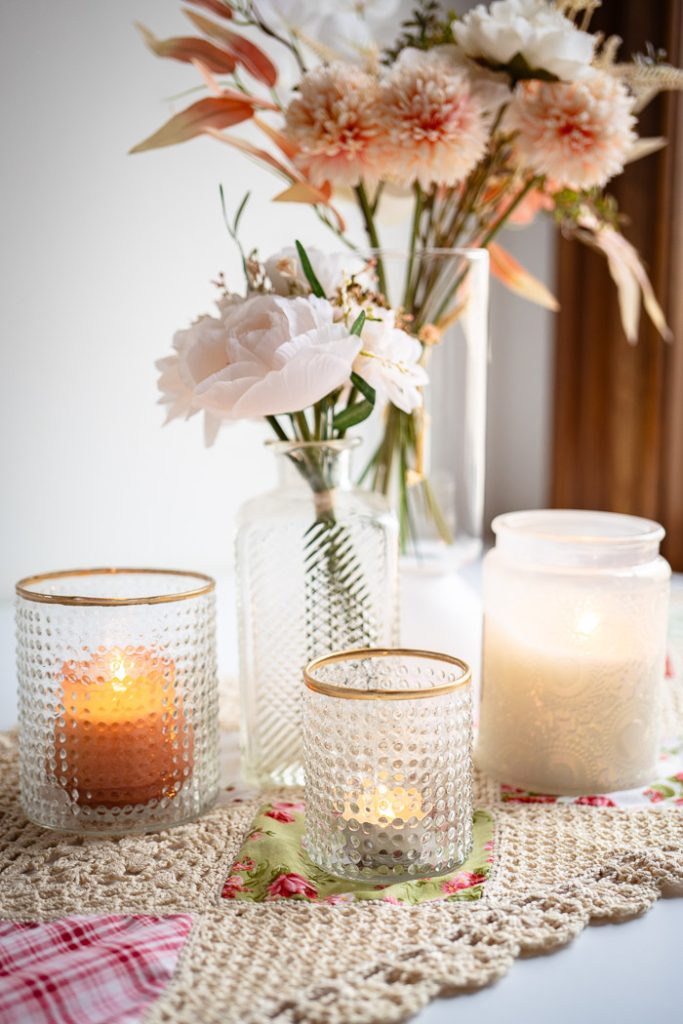
Inspired by vintage table runner designs, this beautiful floral piece combines quilting fabrics with lightweight crochet components, making it destined to become your family’s next cherished heirloom. Designed to use pre-cut charm squares, this project is an entertaining and versatile design that can be adapted to any season and finishes with a tailored look, perfectly counted joins and a scalloped picot border.
Time: WEEK PROJECT
Skill Level: Easy
Finished Size: 45” x 17”
Gauge: one Crochet Flower Square = 5” x 5” using US size D hook
Materials
 Yarn: Aunt Lydia’s Crochet Thread Fashion No. 3 (100% Cotton; 150 yards [137 meters] / 1.76 ounces [50 grams]): #226 Natural (MC 5 balls)
 Aunt Lydia’s Crochet Thread Classic No. 10 (100% Cotton; 400 yards [365 meters] / 2.12 ounces [60 grams]): #226 Natural (MC 1 ball)
Hook: US size D / 3mm + US size E / 3.5mm
Notions: Tapestry needle, scissors, blocking mats, iron, sewing pins, sewing machine (for finishing fabric edges), large eye sewing needle (with sharp tip), twelve 5” x 5” fabric squares & matching threads (shown in pattern is 12 charm squares from the fabric collection; Bouquet of Roses by Robert Kaufman Fabrics)
Special Stitches
Puff st = yarn over, insert hook into next st and pull up a loop, (yarn over, insert hook into same st and pull up a loop) twice, yarn over and pull through all 7 loops
Pattern Notes
The table runner is composed of fabric squares, crochet squares, large crochet triangles and corner crochet triangles. Each piece is made separately and finished according to the instructions, so they can be easily joined together during assembly. The length of the runner can be adjusted by adding or removing squares. Each set of fabric squares will add 7” to the finished length.
Pattern
Crochet Flower Squares (make 5 the same)
Using No.3 crochet thread and larger hook; Ch 4 and join with sl st to form a ring.
Round 1: Ch 1, 8 sc into ring. Join with a sl st into first sc.
Round 2: Ch 1, 1 sc into same st, ch 3, (1 sc into the next sc, ch 3) 7 times. Join with a sl st into first sc.
Round 3: Sl st into next ch-3 sp, ch 2 (counts as first dc of dc5tog), dc4tog into same ch-3 sp to complete dc5tog, ch 6, (dc5tog into next ch-3 sp, ch 6) 7 times. Join with a sl st at top of first dc5tog.
Round 4: Sl st into next ch-6 sp, ch 1, (1 sc, ch 4, 1 sc) into same ch-6 sp, ch 4, [(1 sc, ch 4, 1 sc) into next ch-6 sp, ch 4] 7 times. Join with a sl st into first sc.
Round 5: Sl st into next ch-4 sp, [ch 2 (counts as hdc), 3 hdc, ch 2, 4 hdc] into same ch-4 sp, 4 sc into next ch-4 sp, 3 sc into next ch-4 sp, 4 sc into next ch-4 sp, [(4 hdc, ch 2, 4 hdc) into next ch-4 sp, 4 sc into next ch-4 sp, 3 sc into next ch-4 sp, 4 sc into next ch-4 sp] 3 times. Join with a sl st at top of beginning ch-2.
Round 6: Ch 3, [(sc, ch 3, sc) into corner ch-2 sp, ch 3, *sk 3 sts, sc in next st, ch 3; rep from * until next corner ch-2 sp] 3 times, (sc, ch 3, sc) into corner ch-2 sp, (ch 3, sc into 4th st from hook) 3 times, ch 3. Join with a sl st into starting ch-3 sp.
Round 7: 3 Sc into same ch-3 sp, [(4 hdc, ch 2, 4 hdc) into corner ch-3 sp, (3 sc into each ch-3 sp until next corner ch-3 sp)] 3 times, (4 hdc, ch 2, 4 hdc) into corner ch-3 sp, (3 sc into each ch-3 sp) 4 times. Join with a sl st into first sc.
Round 8: Ch 3, sc into first hdc, ch 3, [(sc, ch 3, sc) into corner ch-2 sp, ch 3, *sk 3 sts, sc in next st, ch 3; rep from * until next corner ch-2 sp] 3 times, (sc, ch 3, sc) into corner ch-2 sp, (ch 3, sc into 4th st from hook) 4 times. Join with a sl st into starting ch-3 sp.
Round 9: 3 Sc into same ch-3 sp, 3 sc into next ch-3 sp, [(3 sc, ch 1, 3 sc) into corner ch-3 sp, (3 sc into each ch-3 sp until next corner ch-3 sp)] 3 times, (3 sc, ch 1, 3 sc) into corner ch-3 sp, (3 sc into next ch-3 sp) 4 times. Join with a sl st into first sc.
Cut yarn and weave in yarn tails.
Triangles (make 12 the same)
Using No.3 crochet thread and larger hook; Ch 6 and join with sl st to form ring.
Row 1: Ch 5, sc into ch-6 ring, ch 3, hdc into ch-6 ring.
Row 2: Ch 5, sc into first ch-3 sp, ch 3, sc in next ch-3 sp, ch 3, hdc into same last ch-3 sp.
Row 3: Ch 5, sc into first ch-3 sp, [ch 3, sc in next ch-3 sp] to end of row, ch 3, hdc into same last ch-3 sp.
(Note: On each repeat of Row 3; your last sc and the hdc will be worked into the same ch-3 sp. On each row, you will gain one new ch-3 sp.)
Repeat Row 3 ten more times. You should now have 13 ch-3 spaces across the top of your most recent row.
Sl st to secure yarn, then cut yarn and weave in ends.
Corner Triangles (make 4 the same)
Using No.3 crochet thread and larger hook; make the corner triangles the same as the large triangles, but ending on the row that has 9 ch-3 spaces across the top.
Fabric Squares (make 12 the same)
Cutting Fabrics: Cut twelve squares of assorted cotton fabrics; 5” x 5” each (or use pre-cut charm squares).
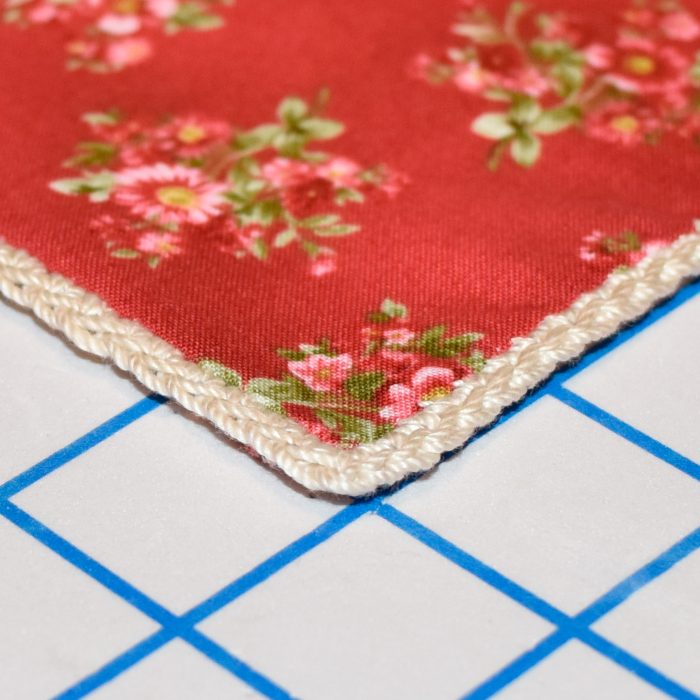
Finishing Edges: Using a thread appropriate for your fabric (the thread color will not be visible on the finished runner); set your sewing machine to a 1/8” wide zigzag or serger stitch and sew all the way around each square, to secure the edges from fraying.
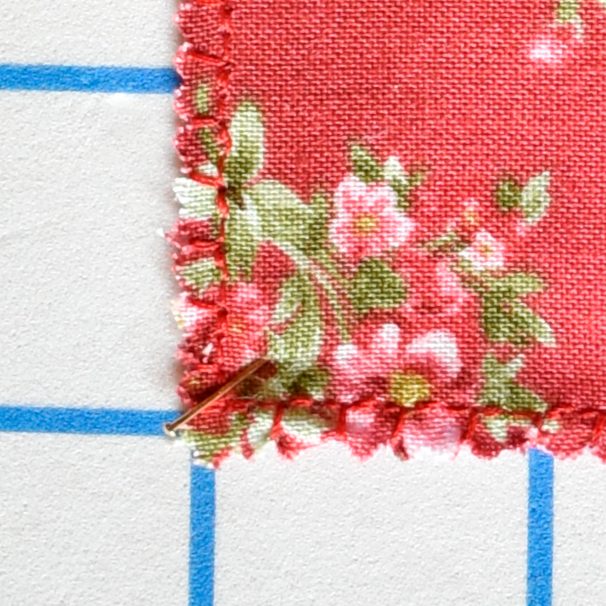
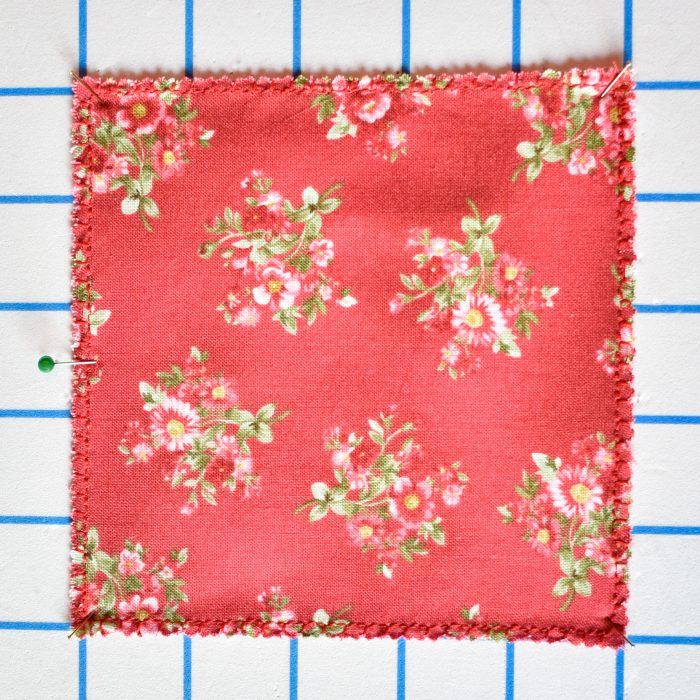
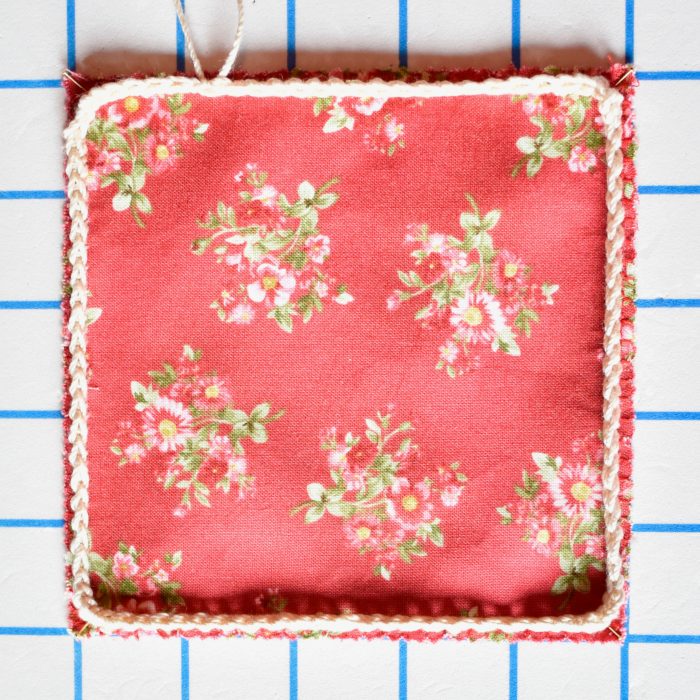
Working the Foundation Embroidery: Using a length of No. 10 crochet thread and a large-eyed, sharp tip sewing needle; work a continuous line of embroidered chain stitches all the way around the inside edge of each square, as shown in the photo tutorial. You will be working 22 chain stitches on each side, plus a chain stitch in each corner (92 stitches total). Your chain embroidery should be worked just inside the machine sewn stitching, so there should be a 1/8” fabric edge around the outside of your chain embroidery.
Step-by-Step Photo Tutorial: To begin, pin the four corners of your fabric to a blocking board or ironing mat (pins with smaller heads are best for this, to avoid snagging).

You will be starting at the bottom left corner and working up. To help space your stitches evenly, place a contrasting color pin halfway along the first side. This will divide the 22-stitch side into two 11-stitch segments.
To begin your embroidery, work your first stitch at a 45° left angle in the lower left-hand corner of the fabric. This is your first corner stitch.
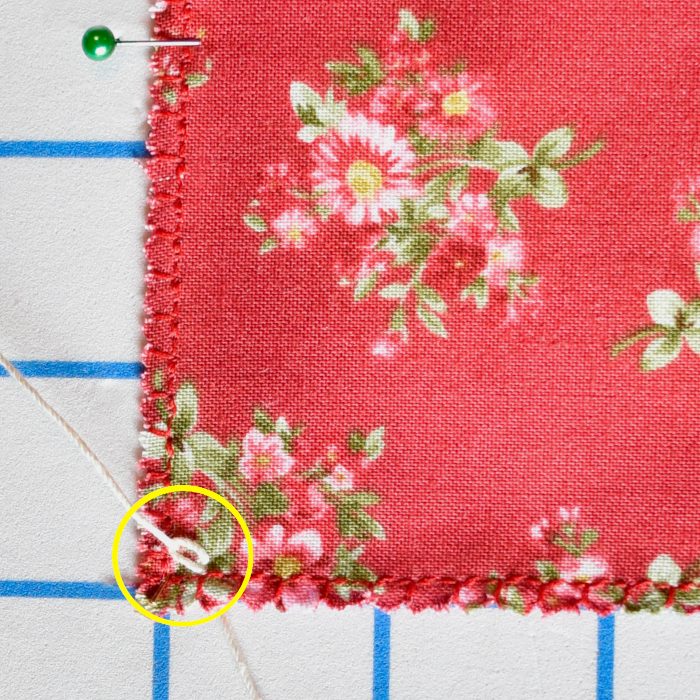
Embroider 11 chain stitch stitches straight up the side. You should be working your embroidery just to the left of the serged edge. When you reach your halfway marker, count your stitches to be sure you’re at 11 (not counting the corner stitch). If you have too few or too many stitches, pull back and adjust the length of your stitches, then continue.
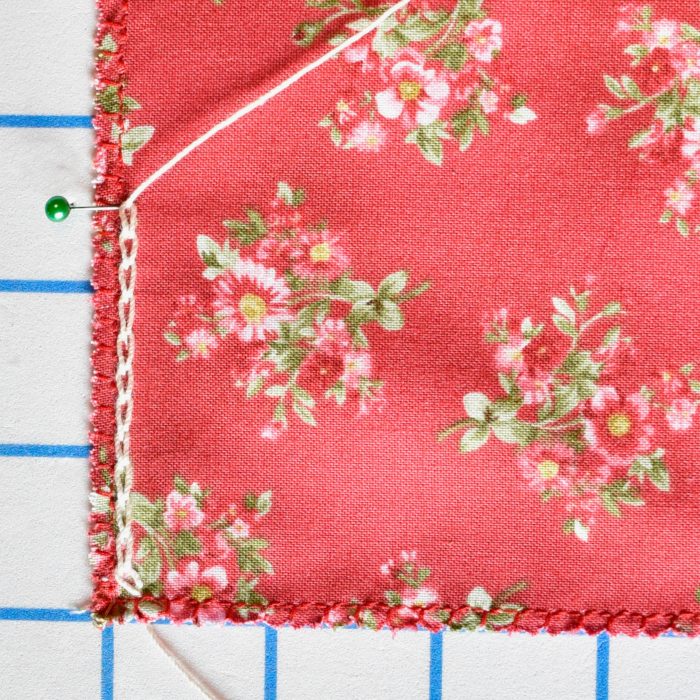
Remove the halfway marker pin and replace with a small pin to hold the piece in place. Work another 11 stitches to complete the first side. To leave enough space for your next diagonal corner stitch, do not work all the way to the corner, as shown.
Repeat this process around all four sides. You will be stitching one diagonal stitch into each corner, then 22 straight stitches along each side. Before beginning each side, place your halfway marker on the next side, as a guide.
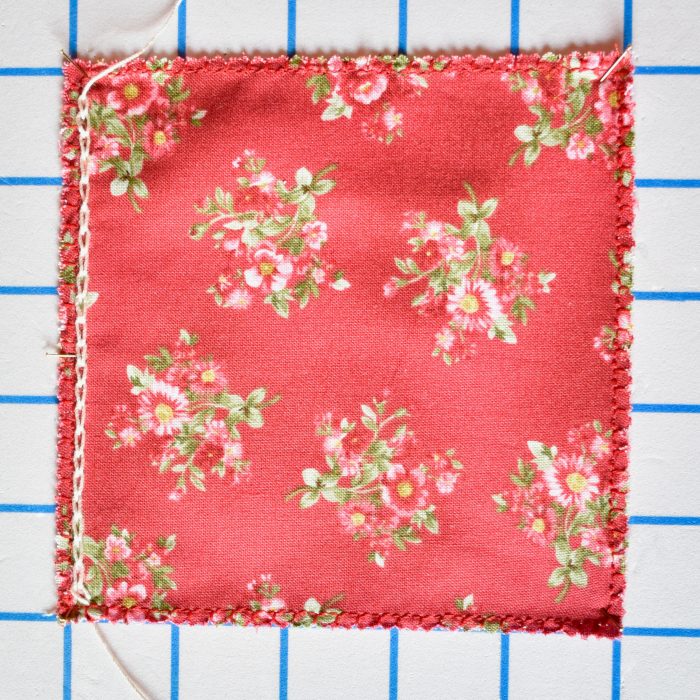
Working the Crochet Edge: Using No. 3 crochet thread and the larger hook; work one round of single crochet into the embroidered foundation chain by working 3 sc into each of the 4 corner ch-sts and 1 sc into each stitch along the sides.
To begin, join your yarn with a slip stitch into any straight stitch. At this point, you will want to remove the fabric from your board, to make it easier to crochet. However, for ease of demonstration, the photo tutorial shows the fabric still pinned.
Sc into each straight chain stitch hereafter. Each time you reach a diagonal corner stitch, you will work 3 sc into the corner stitch, to help round the corners. This will result in a total of 100 sc stitches.
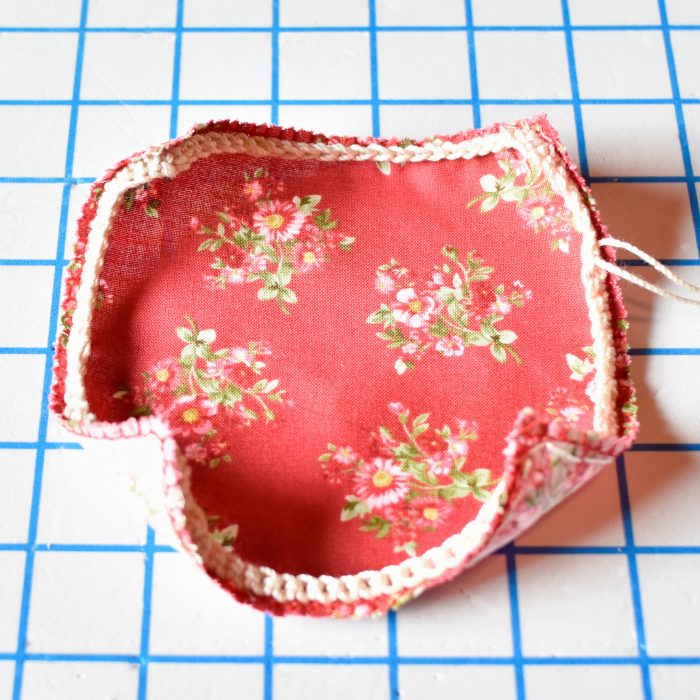
When you’ve completed your round of single crochet, it’s normal for the fabric to have a strong natural curl towards the center.
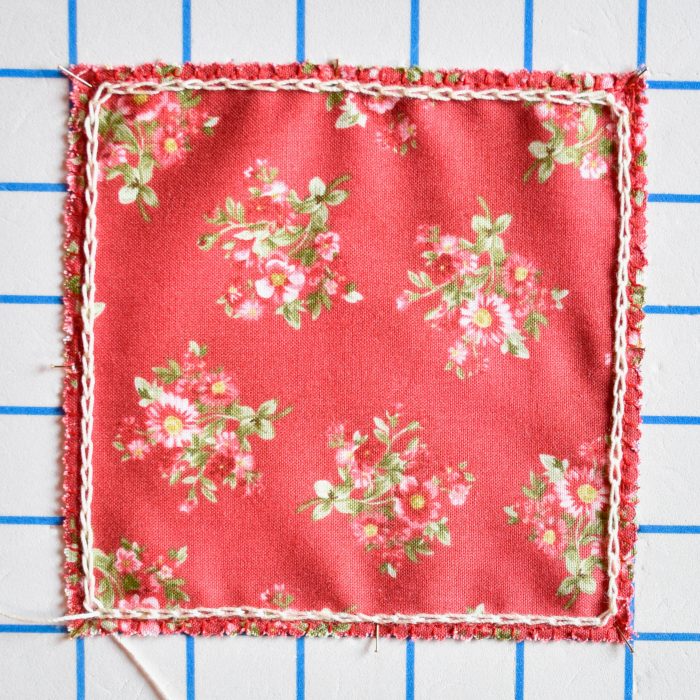
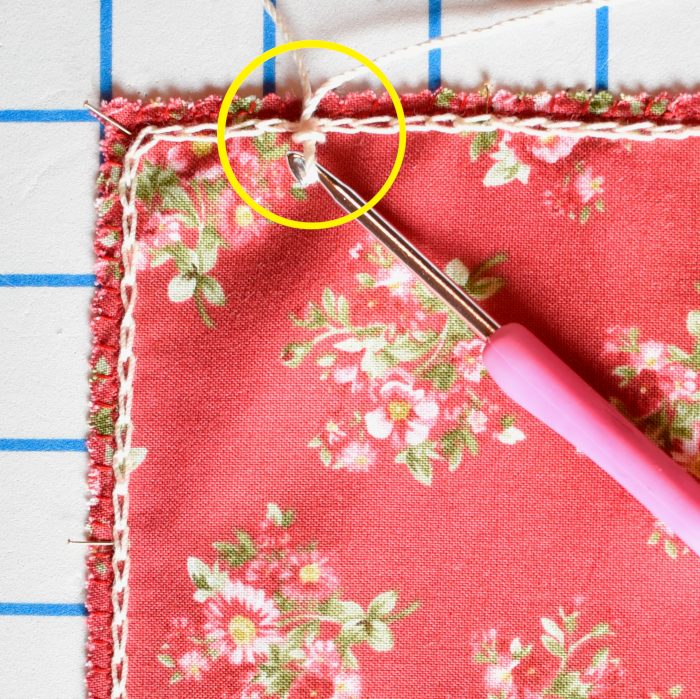
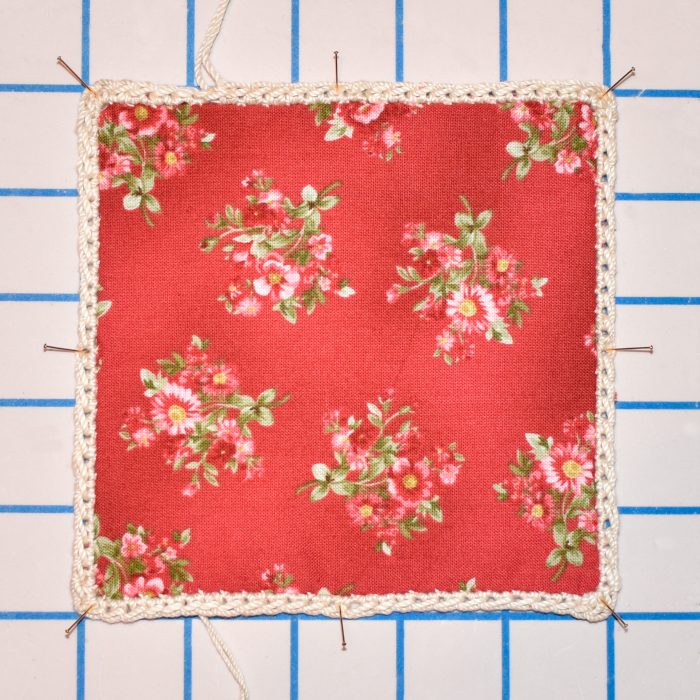
Pressing the Squares: To finish preparing the squares for assembly; pin the square RS-up, (stretched to 5” x 5”) to a blocking mat, taking care to fold the fabric underneath, so there is no fabric edge visible around the crochet. Press lightly with a warm iron to flatten and smooth the edges. Do not try to weave in any of your yarn tails! These will be woven into the adjoining crochet pieces at the end of the project. When ironing, you want your tails to be sticking out the side, not tucked under the fabric, or they will leave ironing marks in your fabric.
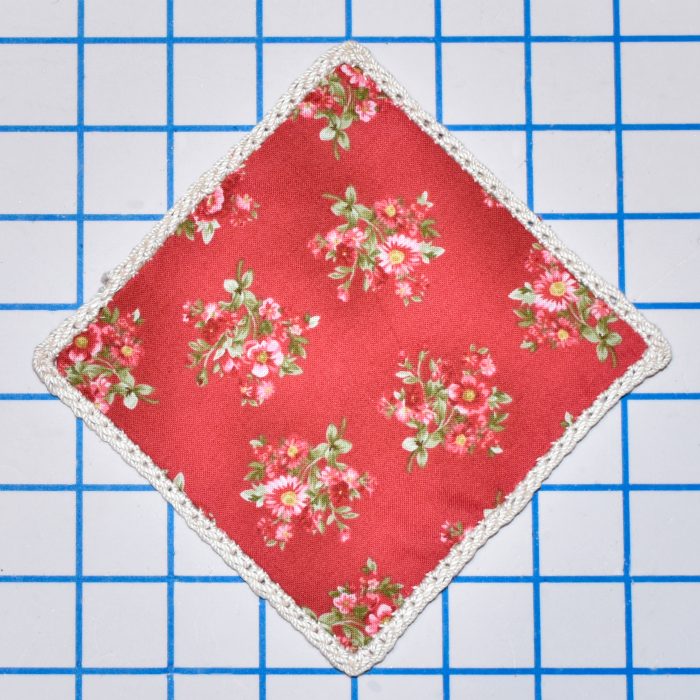
Your finished piece should be 5” x 5” and lie perfectly flat when unpinned. The serged fabric edges should be completely hidden on the underside of the work and the RS should have a perfectly seamless fabric-to-yarn join, ready for assembly.
Assembly
Using the Assembly Diagram (download below) as a guide, lay out all your pieces RS-up and arrange your desired layout for your fabric squares. When you’re happy with the layout, cut a length of the No. 10 thread and stitch all the pieces together. Note that your crocheted squares have the same number of stitches on each edge as your fabric squares, so the pieces should fit together easily.
Border
Setup Round: Using No.3 crochet thread and smaller hook; and starting at the beginning of one of the long sides of the piece: [Sc 235 along the long side, sc 1 corner stitch (place a removable marker or safety pin into the corner stitch), sc 75 along the short side, sc 1 corner stitch (place a marker in the corner stitch)] twice. (624 sts)
Sl st into the next 3 stitches, to bring you to the 3rd stitch to the left of the corner on the first long side. This will be the starting point for Round 1, as indicated by the red dot on the Border Setup Diagram (download below).
Border Round 1: Puff st, *ch 3, skip 2 sts, [skip 2 more sts, (puff st, ch 3, puff st) in next st, ch 3, skip 4 sts, puff st in next st, ch 3, skip 2 sts] to corner st, (puff st, ch 3, puff st) into corner st, ch 3, skip 2 sts, puff st in next st; rep from * to end of rnd. When you reach the end of the rnd, omit the last puff st and sl st into the top of the first puff st.
Round 2: Puff st in same st, *[ch 2, skip puff st, (puff st, dc, puff st, dc, puff st) in next ch-3 sp, ch 2, skip puff st, puff st in next puff st] until corner group, ch 2, skip puff st, (puff st, dc) four times in corner ch-2 sp, puff st in same space, ch 2, skip puff st, puff st in next puff st; rep from * to end of rnd. When you reach the end of the rnd, omit the last puff st and sl st into the top of the first puff st.
Round 3: Puff st in same st, *ch 1, [skip 2 ch, dc in next st, ch 1, puff st in next dc, ch 1, (dc, ch 1) two times in next st, puff st in next dc, ch 1, dc in next st, ch 1, skip 2 ch, puff st in next st, ch 1] until corner group, (dc in next st, ch 1, puff st in next st, ch 1) four times, dc in next st, ch 1, skip 2 ch, puff st in next st, rep from * to end of rnd. When you reach the end of the rnd, omit the last puff st and sl st into the top of the first puff st.
Round 4: Sc in same st, *[skip (1 ch, dc), (sc, ch 3, sc) in next five ch-1 spaces, skip (dc, ch 1), sc in puff st] until corner group, ch 1, skip (ch 1, dc), (sc, ch 2, sc) in next eight ch-1 spaces, ch 1, skip (dc, ch 1), sc in puff st; rep from * to end of rnd. When you reach the end of the rnd, omit the last sc st and sl st into the top of the first sc.
Weave in all yarn ends. Block to measurements; 45” x 17”, being careful not to overstretch the fabric sections.
I think the thread weights are in error in the pattern, the #3 thread is wt1, and the #10 thread is the lace weight. Could someone doublecheck that this was the only error made, ie the quantities for each weight are correct. thanks Connie
Ah, thank you so much for catching that! I’ve fixed the weights in the pattern. Everything else should be correct. Thanks so much! -Dana, Editor
I am a new subscriber. I would like to speak with someone in Customer Service
I have a question. Thank you, Roberta Laumann
Hi Roberta! You can reach our customer service team through our contact form here: https://www.ilikecrochet.com/contact-us/ I hope that helps! -Dana, Editor
This is a beautiful pattern. I can’t wait to start it!
OMG – what a fantastic pattern!
Thank you very much for it!
with love
Marianne
Thank you Marianne! I hope you will enjoy the pattern!