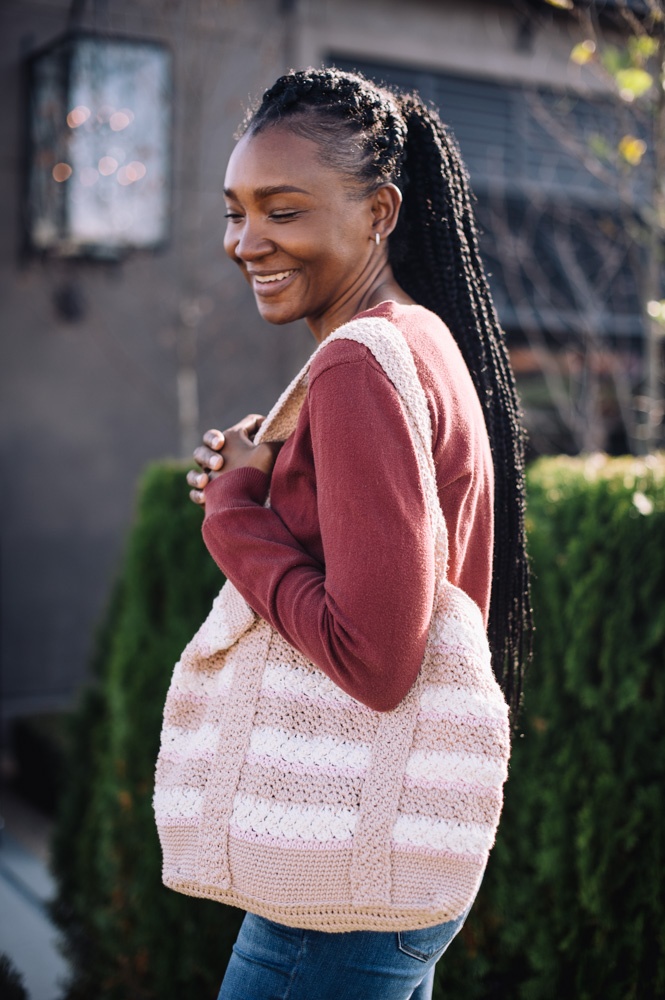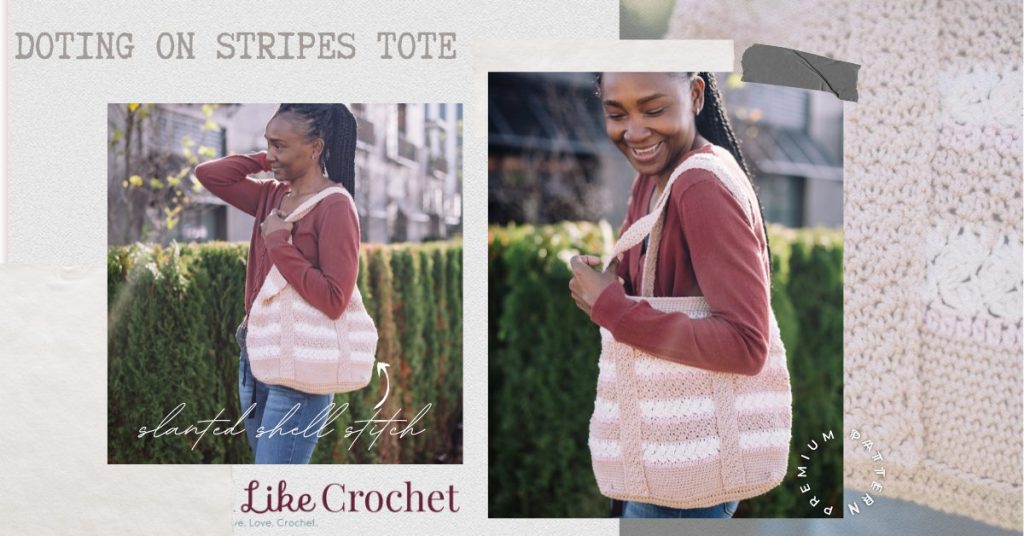
This versatile tote is roomy enough to be your next craft project bag, shopping bag or beach bag. The pattern combines colorful strips and interesting textures for a fun project you can complete on a long weekend.

Time: 3 Day Project
Skill Level: Intermediate
Size: 13” tall and 18” wide when laid flat. Base measures 4” x 14”. Handle loops are approx. 9” high.
Gauge: 15 st and 11 rows = 4” [10 cm] in hdc with larger hook.
Materials
 Yarn: WeCrochet Dishie™ (100% cotton; 190 yards [174 meters]/100 grams); #25400 Linen (A, 3 balls), #25409 Swan (B, 2 balls), #26668 Blush (C, 1 ball)
Hooks: US size 7 (4.5 mm), F/5 (3.75 mm)
Notions: Removeable stitch markers, tapestry needle, ruler or measuring tape, long straight pins
Special Stitches
Slanted Shell (ssh) – (Sc, 2 dc) in indicated st.
Pattern Notes
The bag is started with a flat bottom worked in rows, then the sides are crocheted in the round. Handles are crocheted in rows, and then sewn to the outside of the bag.
Ch 1 at the start of a row or round does not count as a stitch.
Sl st to join new yarn or end a round does not count as a stitch.
Pattern
Bag Base
Row 1: With A and larger hook, fsc 50, turn.
Row 2: Ch 1, hdc across, turn.
Row 3: Ch 1, sc across, turn.
Rows 4–15: Rep Rows 2 and 3. Do not fasten off.
Base of bag should measure approximately 4” x 14” at the end of Row 15.
Bag Body
Rnd 1: Ch 1, sc in BL of first st, ch 1, sc BL in same st to create a corner, place a st marker in the first sc to mark start of rnd, place another st marker in the ch-1 sp to mark the center of the corner, continuing to work in BL only, sc in each st across to the last st of Row 15, (sc, ch 1, sc) in the BL of the last st, mark the ch-1 sp as the next corner, do not turn, *working along the row-ends, work 21 sc (2 sc in hdc row-end, 1 sc in sc row-ends) to the next corner**, (sc, ch 1, sc) in the BL of the first st of Row 1 and mark the ch-1 sp as the next corner, working in BL only, sc across the row to the last st of Row 1, (sc, ch 1, sc) in the last st of Row 1, mark the ch-1 sp as the final corner, rep from * to ** and join with a sl st in the first sc. (146 sc, 4 ch-1 sps)
You will continue to work in rounds for the rest of the bag.
Rnd 2: Ch 1, sc2tog in same st as join and in second sc of corner (skipping the ch-1 sp and removing the marker), mark this st just made as new first st of the rnd, *sc to the next sc-ch1-sc corner, sc2tog in 2 corner sc sts (skipping the ch-1 sp and removing the marker), rep from * twice, sc to end of rnd, join with a sl st in first sc. (142 sts remain)
Rnd 3: Ch 1, sc2tog in same st as join and in next st, mark this st as new start of rnd, *sc in next 48 sts, sc2tog, sc in next 19 sts**, sc2tog, rep from * to ** once, join with a sl st in first sc. (138 sts remain)
Rnds 4–11: Ch 1, sc in same st as join, sc in each st around, join with a sl st in first sc. Fasten off A.
Rnd 12: Join C with a sl st in same st as final join of previous rnd, ch 1, hdc in same st as join, hdc in each st around, join with a sl st in first hdc. Fasten off C.
Rnd 13: Join B with a sl st in same st as final join of previous rnd, ch 1, ssh in same st as join, sk next 2 sts, *ssh in next st, sk next 2 sts, rep from * around, join with a sl st in first sc. TURN. (46 ssh)
Rnd 14 (WS): Ch 1, *sk next 2 dc, ssh in next sc, rep from * around, join with a sl st in first sc. TURN.
Rnd 15 (RS): Ch 1, *sk next 2 dc, ssh in next sc, rep from * around, join with a sl st in first sc. DO NOT turn. Fasten off B.
Rnd 16 (RS): Join A with a sl st in same st as final join of previous rnd, ch 2 (counts as first dc), *sc in next 2 dc, dc in next sc, rep from * around to last 2 sts, sc in last 2 dc, join with a sl st in top of starting ch-2. (138 sts)
Rnd 17: Ch 1, sc in same st as join, dc in next 2 sc, *sc in next dc, dc in next 2 sc, rep from * around, join with a sl st in first sc.
Rnd 18: Ch 2 (counts as first dc), sc in next 2 dc, *dc in next sc, sc in next 2 dc, rep from * around, join with sl st in top of starting ch-2.
Rnd 19: Rep Rnd 17. Fasten off A.
Rnds 20–40: Rep Rnds 12–19 twice, then work Rnds 12–16 once more.
Rnd 41: Ch 1, sc around, join with a sl st in first sc.
Rnd 42 (dec): Ch 1, *sc in next 21 sts, sc2tog, rep from * around, join with a sl st in first sc. (132 sts remain)
Rnd 43: Rep Rnd 41.
Rnd 44 (dec): Ch 1, *sc in next 20 sts, sc2tog, rep from * around, join with a sl st in first sc. (126 sts remain)
Rnd 45: Rep Rnd 41. Fasten off A.
Straps (make 2)
Row 1: With A and smaller hook, and leaving a long tail (approx. 12”) for sewing, fsc 6, turn. (6 sts)
Row 2: Ch 1, sc in first st, dc in next st, *sc in next st, dc in next st, rep from * to end, turn.
Row 3: Ch 1, sc in each dc and dc in each sc across, turn.
Rep Row 3 until the strap measures 48”, then fasten off, leaving a long tail (approx. 12”) for sewing.
TIP: Keep track of your row count on the first strap so you can make the second strap the exact same length.
Finishing
(See Diagram 1)
Lay the bag flat. Where the base meets the sides of the bag, locate the corner points and count in from each corner 9 sts along that last base row.
Place a marker in that 9th st. Do the same on the opposite side of the bag. The marked sts will be your sewing starting points for attaching the straps. When you sew, you will work toward the middle of the bag, not back toward the sides of the bag.
Place one end of the first strap even with the edge of the bag base, with the strap’s corner at the marked st. Pin the strap in place and sew the 6 sts of the strap end to the next 6 in from the marked st on the base edge using the long tail you left on the strap.
Repeat with the other end of the same strap, matching its corner to the 9th stitch from the opposite side of the base (where you placed the marker), being careful not to twist the strap.
Keeping the length of each half of the strap straight, smooth it out and pin it to the top edge of the bag, checking with a ruler that the edge of the strap is roughly the same distance from the edge of the bag all the way up and looks straight. Also check that the top edge of the bag is perpendicular to the width of the strap (not slanted in any way). Pin the length of the strap in place, making sure there are to ruffles or gaps, and that the fabric of the bag is not being pulled or puckered. Everything should be smooth and flat.
Repeat the strap attachment for the second strap on the opposite side of the bag and check that the handles are even before sewing everything in place.
Using the sewing stitch of your choice (running stitch, back stitch, whip stitch), secure the edges of the strap to the bag with A. Use small even stitches so they blend in with the strap.
TIP: Placing a square blocking board or piece of cardboard inside the bag as you attached the straps helps keep the fabric flat and also stops you from accidentally catching the opposite side of the bag with your yarn needle as you sew.
Weave in all ends.


I am going to make this bag it is darling.
A list of abbreviations would be helpful.
Hi Kathryn! We have a master list of abbreviations for reference:
https://www.ilikecrochet.com/crochet-references/master-abbreviations/
Is there a specific abbreviation that you need assistance with? Happy to help! – Nicola, Editor
I think this is really cute, I’ll try it at another time.
????