


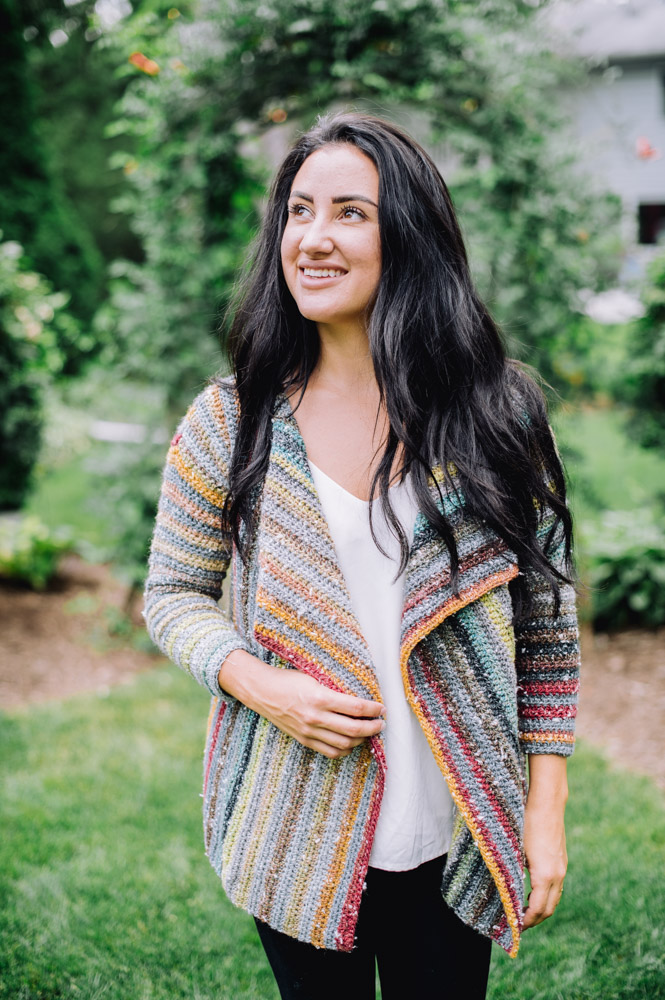
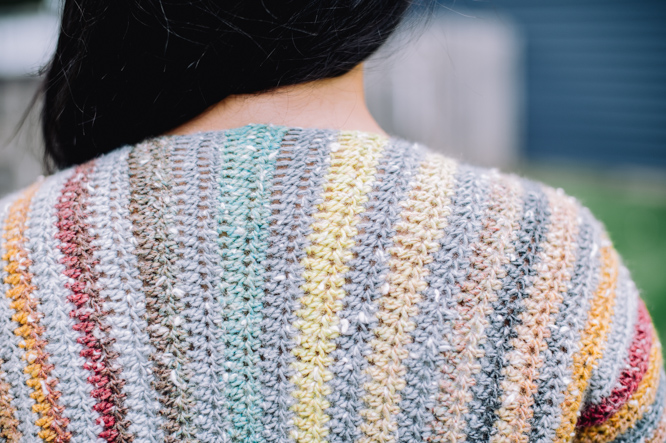
This soft and tweedy cardigan is perfect as the nights draw in, grab your mug and wrap yourself in a hug and let the warmth envelop you. Crocheted sideways to create vertical stripes, this cardigan couldn’t be easier, the back and both sides are worked the same to create the large wrappable front.
Time: 2 Week Project
Skill Level: Beginner
Size: S–M (L– 2X, 3X–5X)
Finished back size 18 (20, 21)” to fit cross back size 14-16.5 (17-18, 18-18.5)”
Shown in size S-M”
Gauge: 14 hdc and 11 rows = 4” [10 cm]
Materials
Yarn: James C Brett Northern Lights (95% premium acrylic, 5% viscose; 492 yards [450 meters]/150 grams): NL03 (A, 2 (2, 2.5) balls), NL09 (B, 2 (2, 2.5) balls)
Hook: US size H/8 (5 mm)
Notions: Stitch markers, tapestry needle.
Special Stitches
This pattern is worked sideways. I have used foundation stitches to add stretch to the edges. If you find foundation stitches too challenging I recommend going up a hook for your foundation chain.
Foundation half double crochet (fhdc):
Ch 3.
Step 1: Yo, insert hook in 3rd ch from hook,
Step 2: Pull up a lp,
Step 3: Yo, pull through 1 lp (creates the chain for the next stitch),
Step 4: Yo, pull through all three lps. (first fhdc made)
Step 1: Yo, insert hook under chain created in Step 3.
Step 2: Pull up a lp.
Step 3: Yo, pull through 1 lp (creates the chain for the next stitch).
Step 4: Yo, pull through all three lps. (next fhdc made)
Rep last 4 steps until you have required number of fhdc.
Pattern Notes
Cardigan is worked flat and sideways.
Do not cut yarn at color change, instead carry unused yarn along turning chain to save weaving in ends.
Pattern
Body Panel (make 3)
Start each piece with A and alternate colors every 2 rows.
Row 1: Fhdc 86 (90, 94), turn.
Rows 2 – 50 (55, 58): Ch 2, hdc in each st across, turn. (86 (90, 94) sts)
Fasten off.
Sleeve (make 2)
Start with B and alternate colors every 2 rows.
Row 1: Fhdc 50 (64, 76), turn.
Size S–M Only:
Rows 2-3: Ch 2, hdc, hdc2tog, hdc to end, turn. (2 sts decreased)
Rows 4-5: Ch 2, hdc in each st across, turn.
Rows 6-44: Rep Rows 2-5 ten more times. (28 sts rem)
Size L–2X Only:
Row 2: Ch 2, hdc in each st across, turn.
Rows 3-4: Ch 2, hdc, hdc2tog, hdc to end, turn. (2 sts decreased)
Row 5: Ch 2, hdc in each st across, turn.
Rows 6-46: Rep Rows 3–5 fourteen more times. (34 sts rem)
Size 3X–5X Only:
Rows 2-5: Ch 2, hdc, hdc2tog, hdc to end, turn. (4 sts decreased)
Row 6: Ch 2, hdc in each st across, turn.
Rows 7-11: Ch 2, hdc, hdc2tog, hdc to end, turn. (5 sts decreased)
Rows 12-47: Rep Rows 6-11 six more times turn. (37 sts rem)
Row 48: Ch 2, hdc in each st across.
All Sizes:
Fasten off.
Finishing
Be gentle with this yarn, pulling too hard when stitching can shred the threads.
To avoid the stitching being too tight I recommend stitching twice per row/stitch. For side seams pass the needle through both loops of the stitch back to front then return front to back through the post of the same stitch. For shoulder and arms, pass the needle through the end post back to front then return front to back through the top of the stitch.
Sew back and front panels together at row-ends starting at the outer edges for (20, 25, 28) rows for shoulders. Leave remaining edges open for neckline.
Starting at center of sleeve and top of shoulder, sew sleeve to front then work in the opposite direction to sew sleeve to back. Repeat for second sleeve.
Starting at the cuff, sew both sides of the sleeve together then continue down the side and sew back and front sides together.
Weave in ends.
Hi, thanks for sharing pattern, one question, if I want to make it a bit longer, is there a multiple, or just measure in from shoulder to length wanted, again that’s for sharing is nice,
It is simply a case of adding stitches to your desired length.
Is there a diagram for sewing the pieces together? I don’t fully understand why there are 3 body pieces
The body pieces are the back and both front sides, they are all the same size to create the drape at the front.
If you carry the unused color across the ends of two rows, doesn’t that create a contrasting float? I don’t see instructions for a border of any kind, so how do you hide those floats?
The unused colour is caught in the chain, kind of draped over your active yarn, so it doesn’t create a float.
Thank you so much!
love the colors I think I could do this one
Is there a way to print this pattern?? I’m old school, lol!!
Hello! You are welcome to save this pattern by copying and pasting into a word document or by printing the pattern via the printer icon on the left hand side of your screen. Hope this helps! – Nicola, Editor
It’s a gorgeous sweater
Love it makes a gorgeous sweater
Beautiful sweater and the colors are the real attention grabber.
Lovely pattern – the sizes don’t make sense – please clarify & go over pattern directions they are alittle confusing.
Hi Linda, The sizing for this pattern is unique because of the construction and oversized fit of the design.
Size: S–M (L– 2X, 3X–5X)
Finished back size 18 (20, 21)” to fit cross back size 14-16.5 (17-18, 18-18.5)”
Shown in size S-M”
Please let me know if there is a part of the pattern that you are specifically having trouble with and I can reach out to the designer for assistance. Thank you! – Nicola, Editor
I love this pattern ????
This seems awesome