


To make the Winter Gerbera Flower Pillow, you’ll need to learn how to create the magic loop. Plus, this is a great technique to learn for so many other crochet projects. Try it out by following this photo tutorial and then try the pillow!
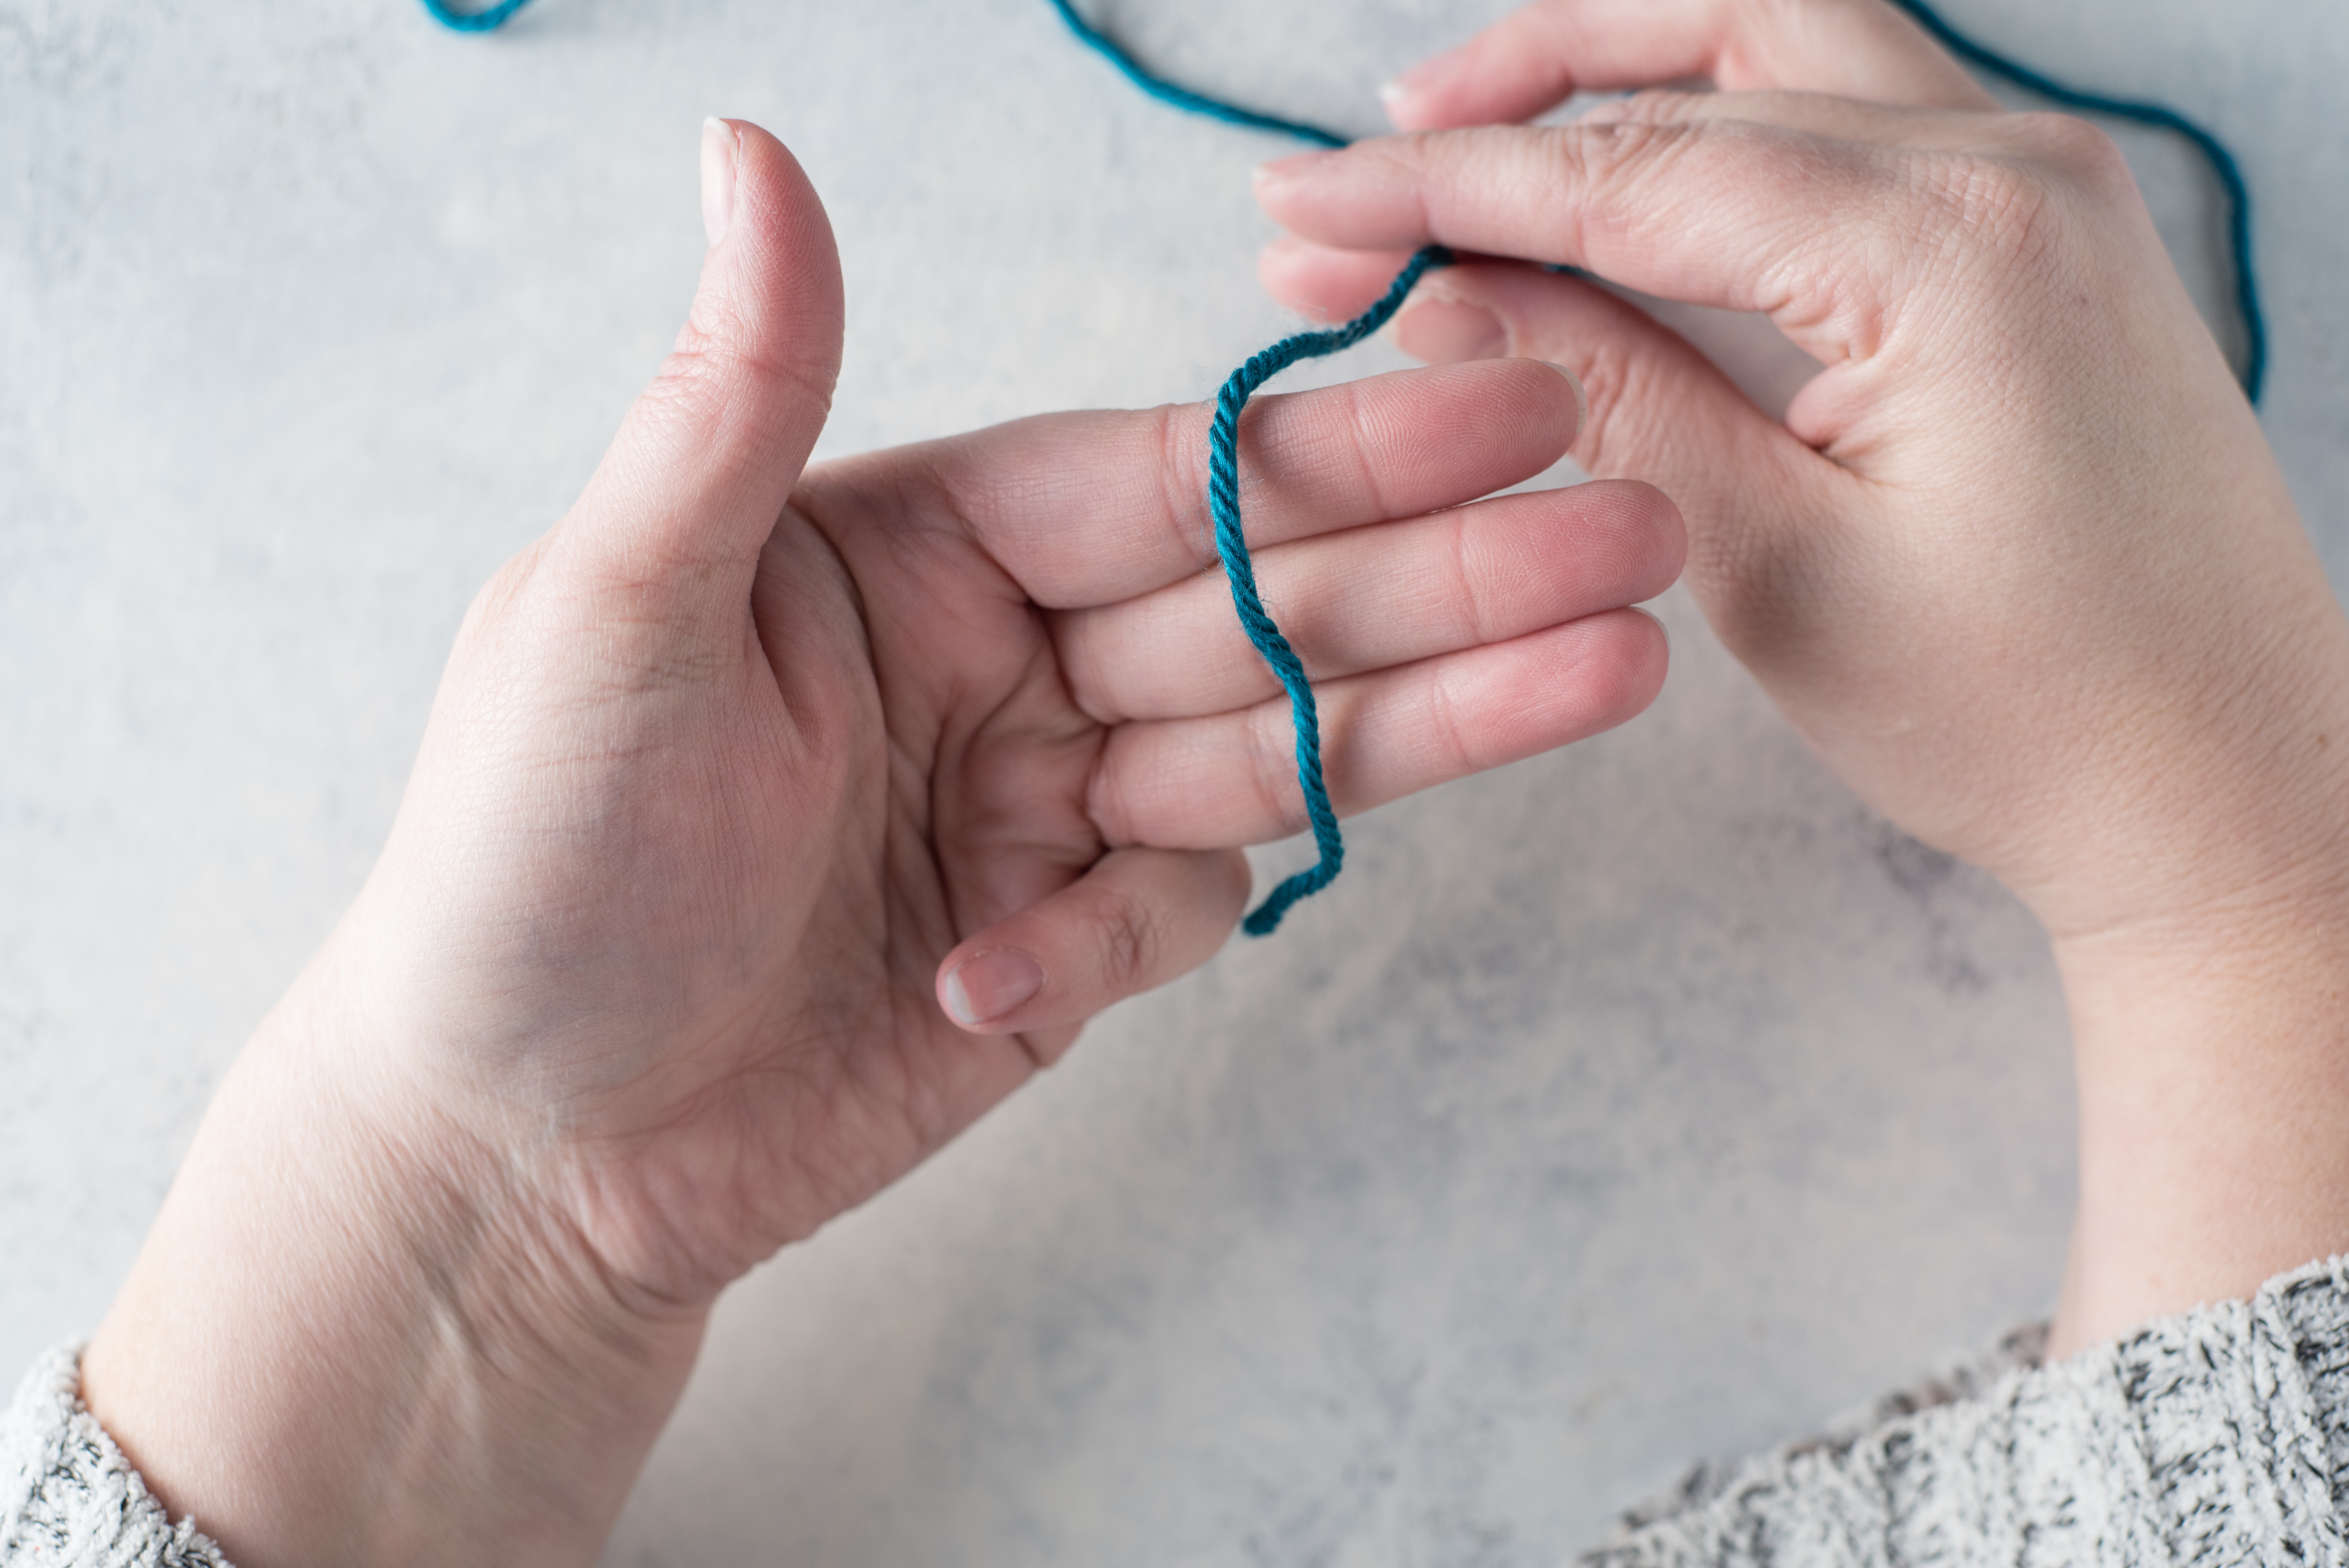
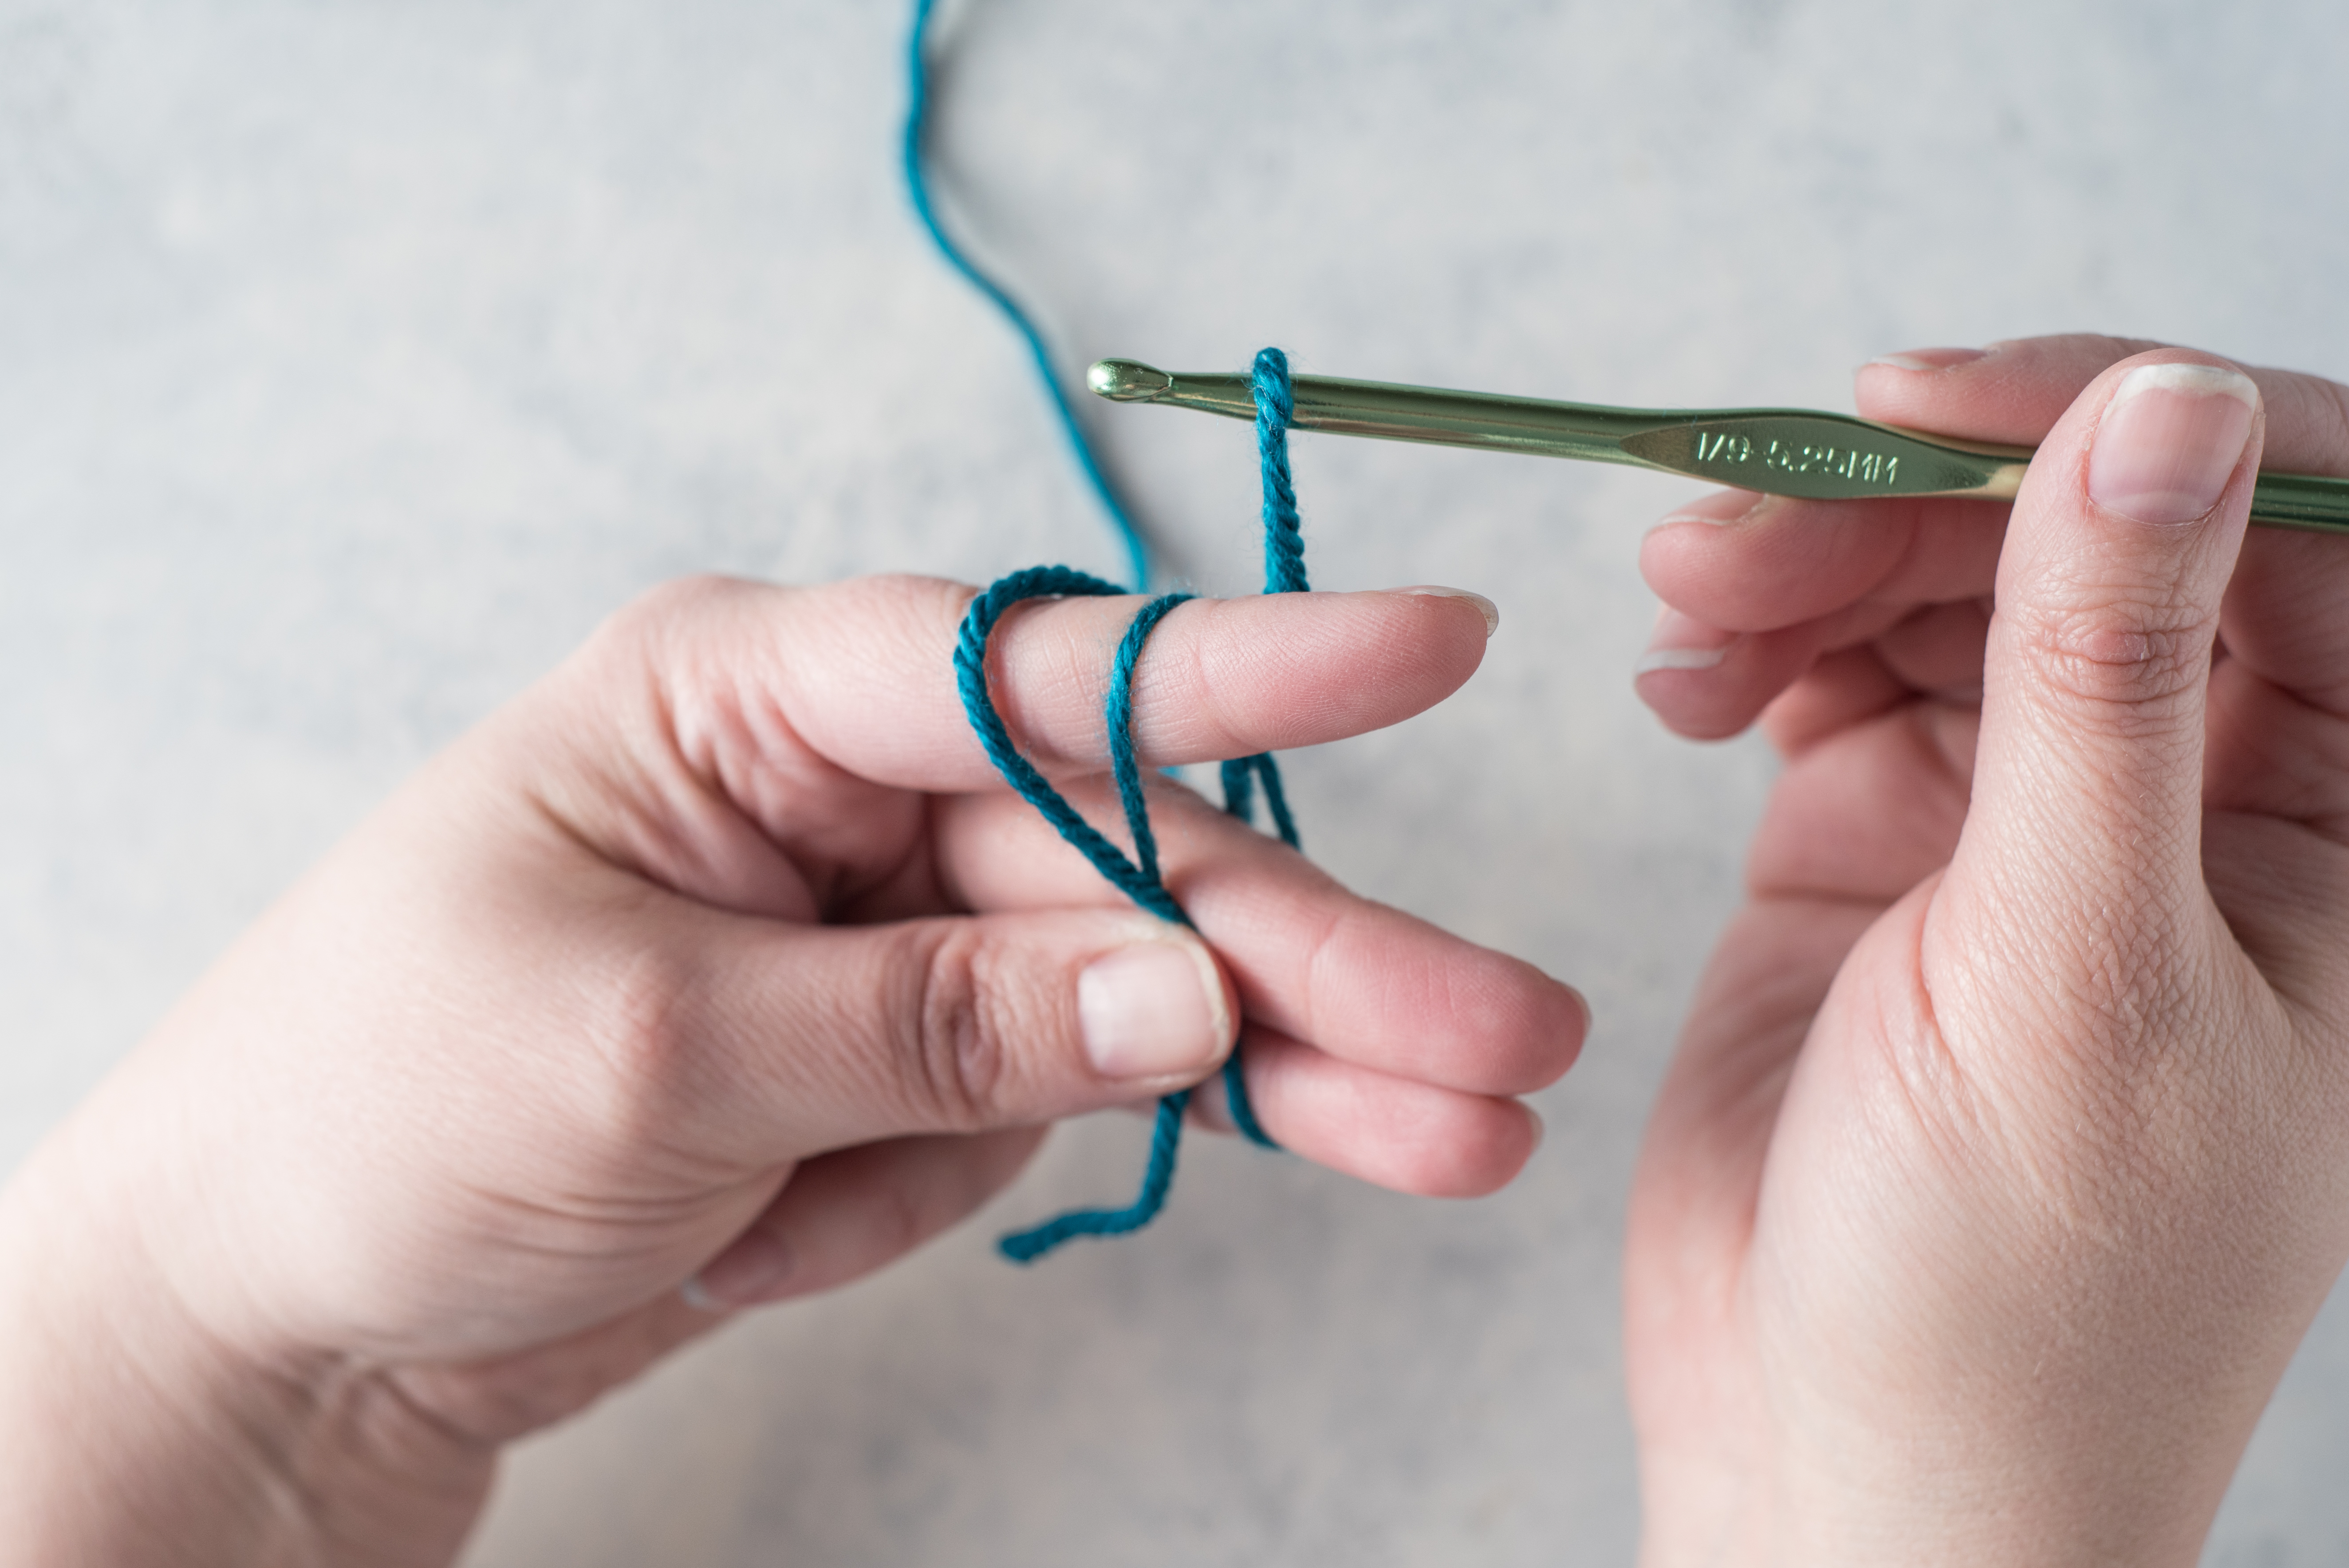
To begin, lay yarn over the fingers of your non-dominate hand.
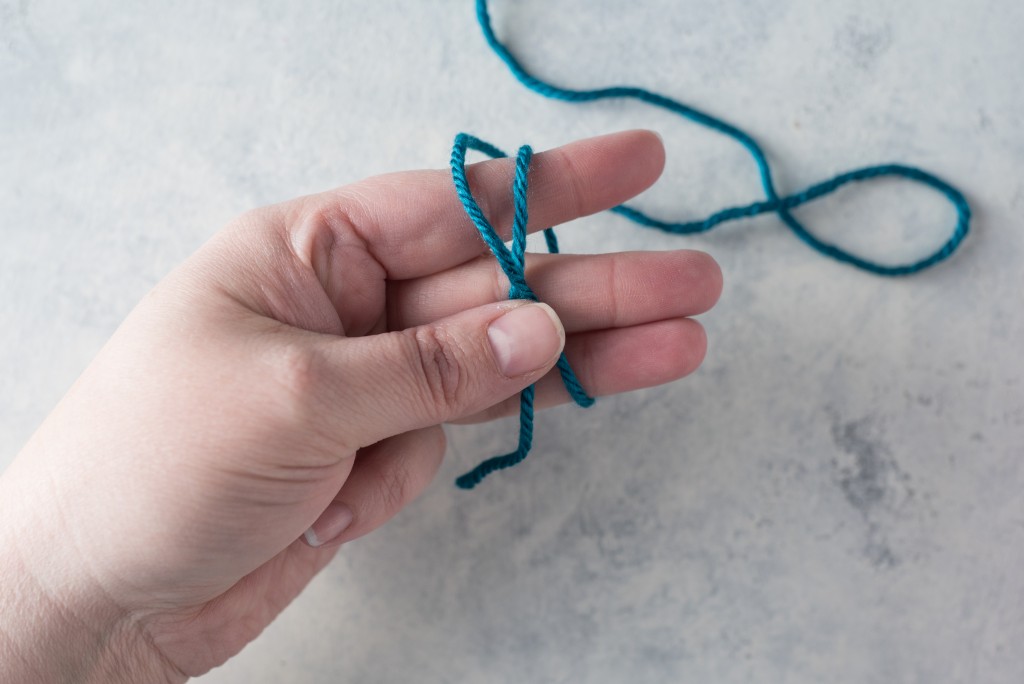
Bring the yarn to the back and up from the bottom across the fingers again. Make sure the yarn crosses the front yarn in an “X” and is towards the thumb.
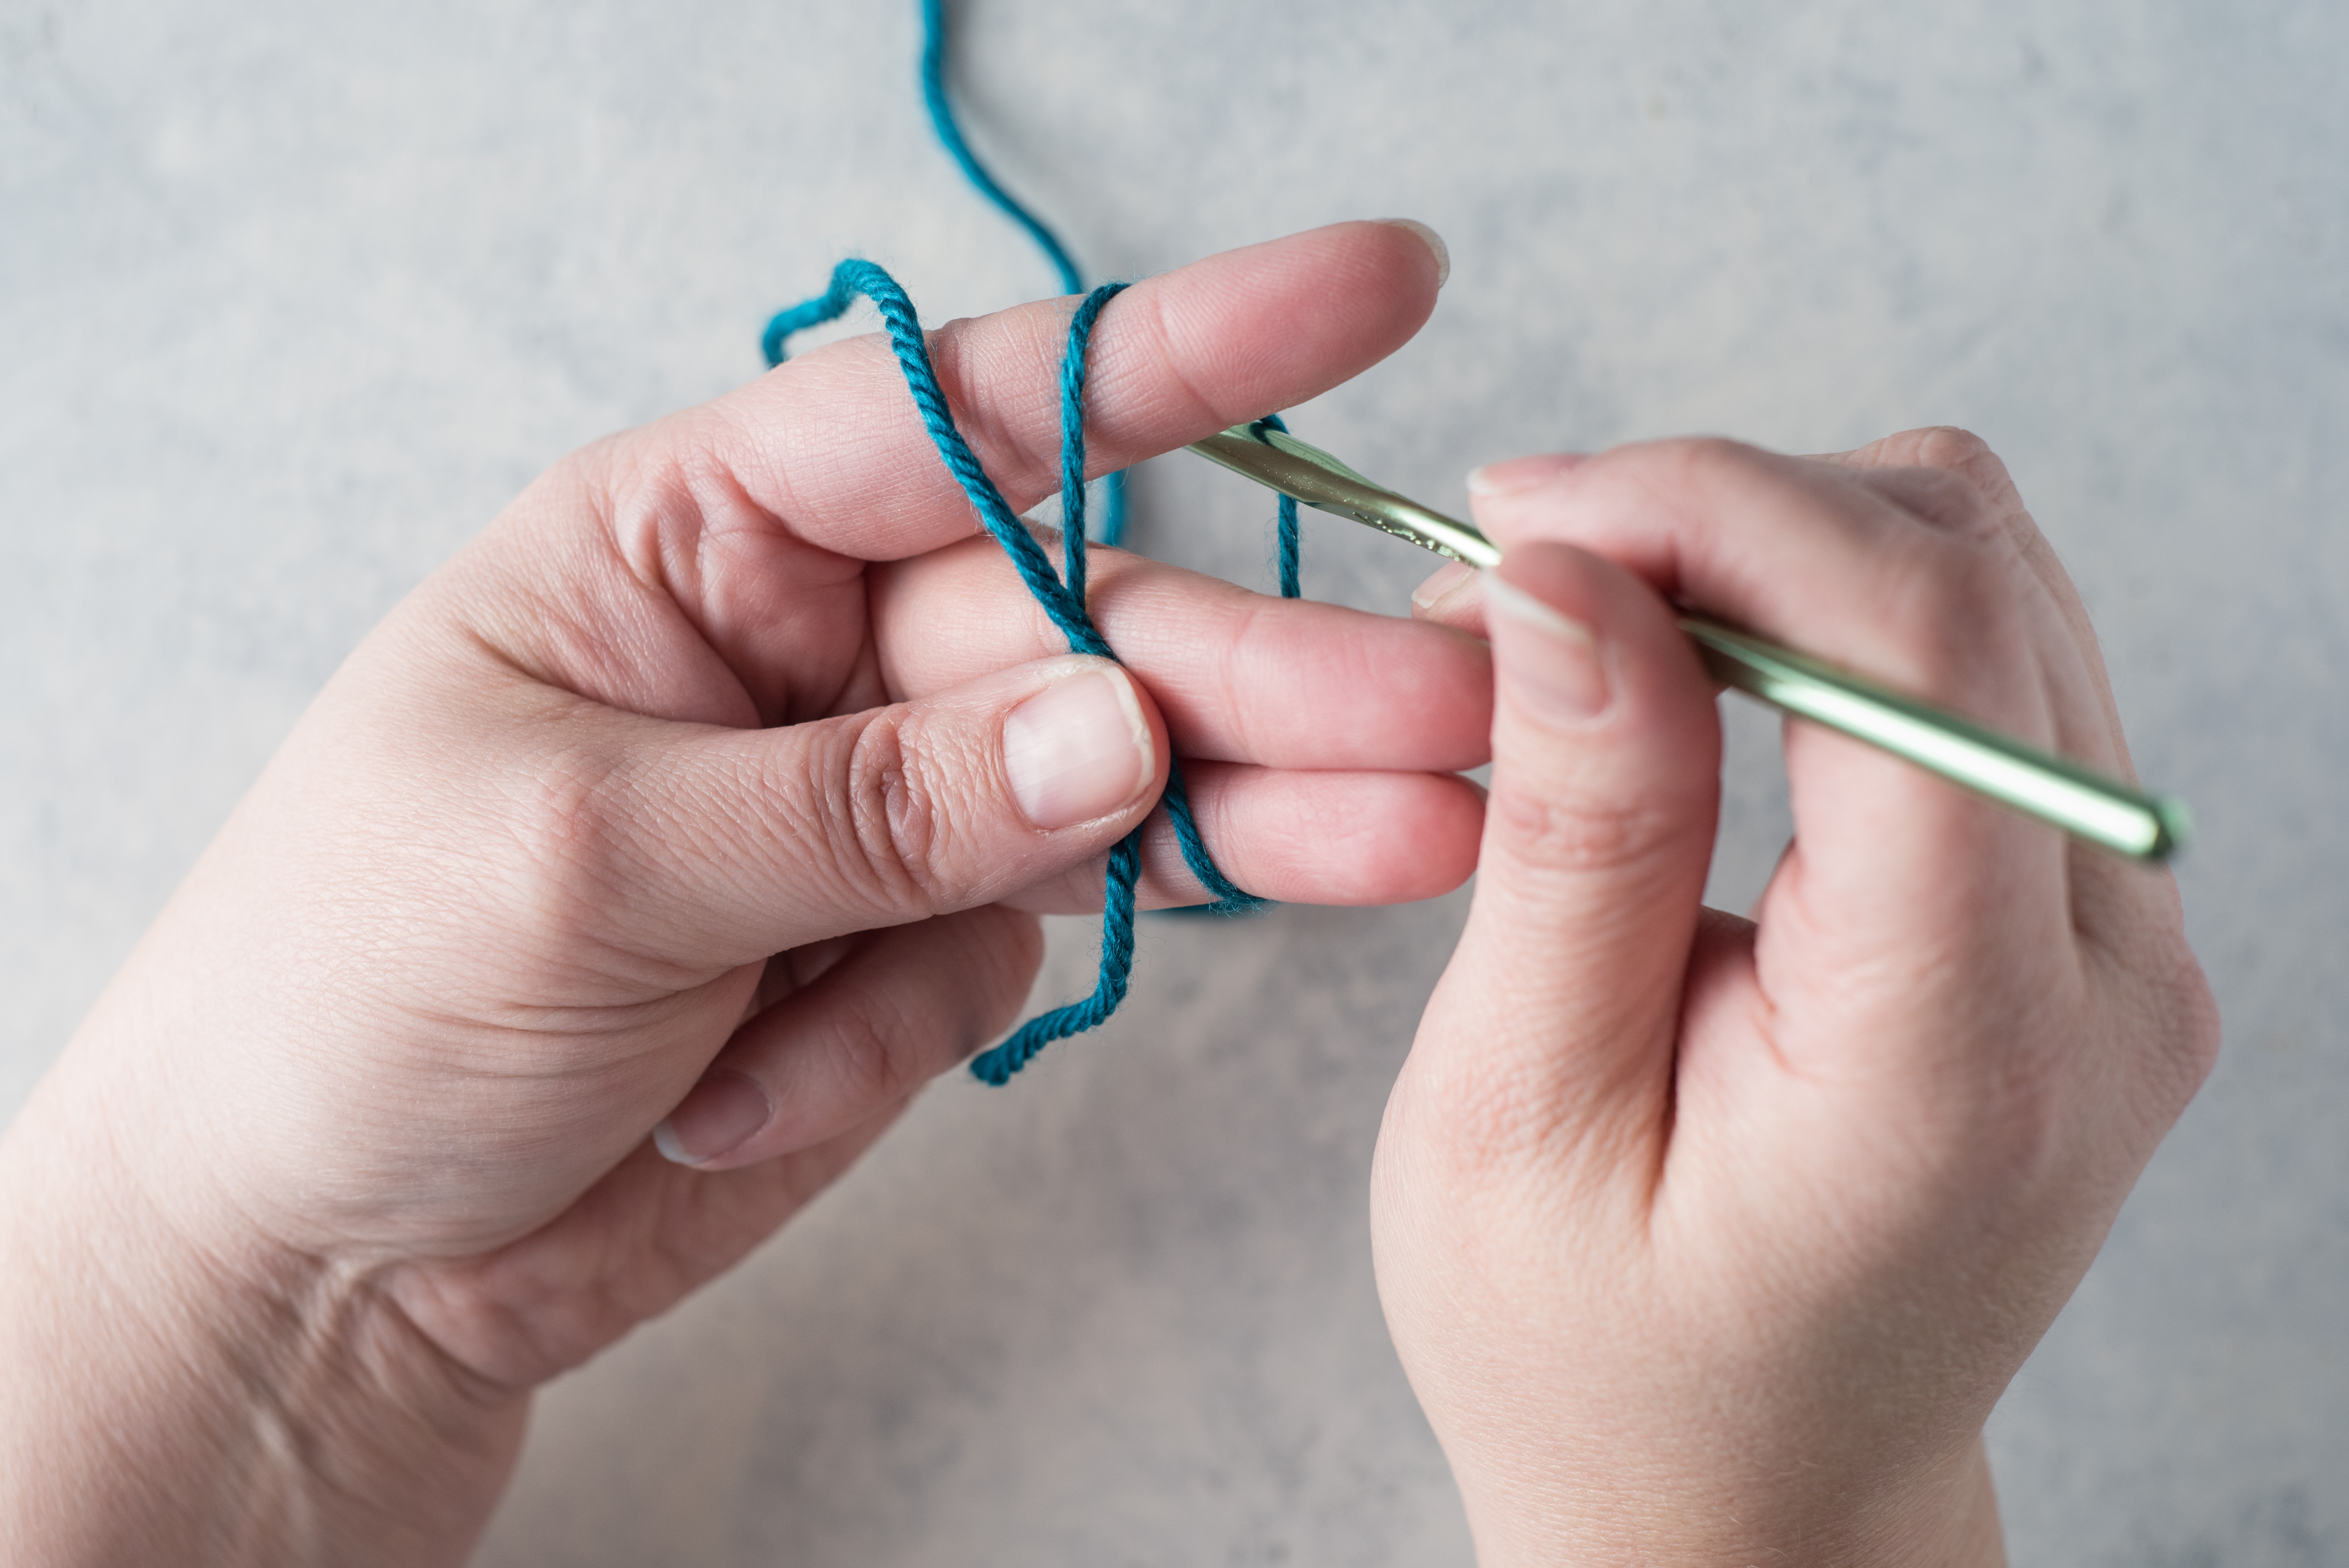
Insert the crochet hook into the loop behind your fingers. Pull up a very loose loop.
Get this special collection of 3 FREE baby blanket patterns from I Like Crochet right now!
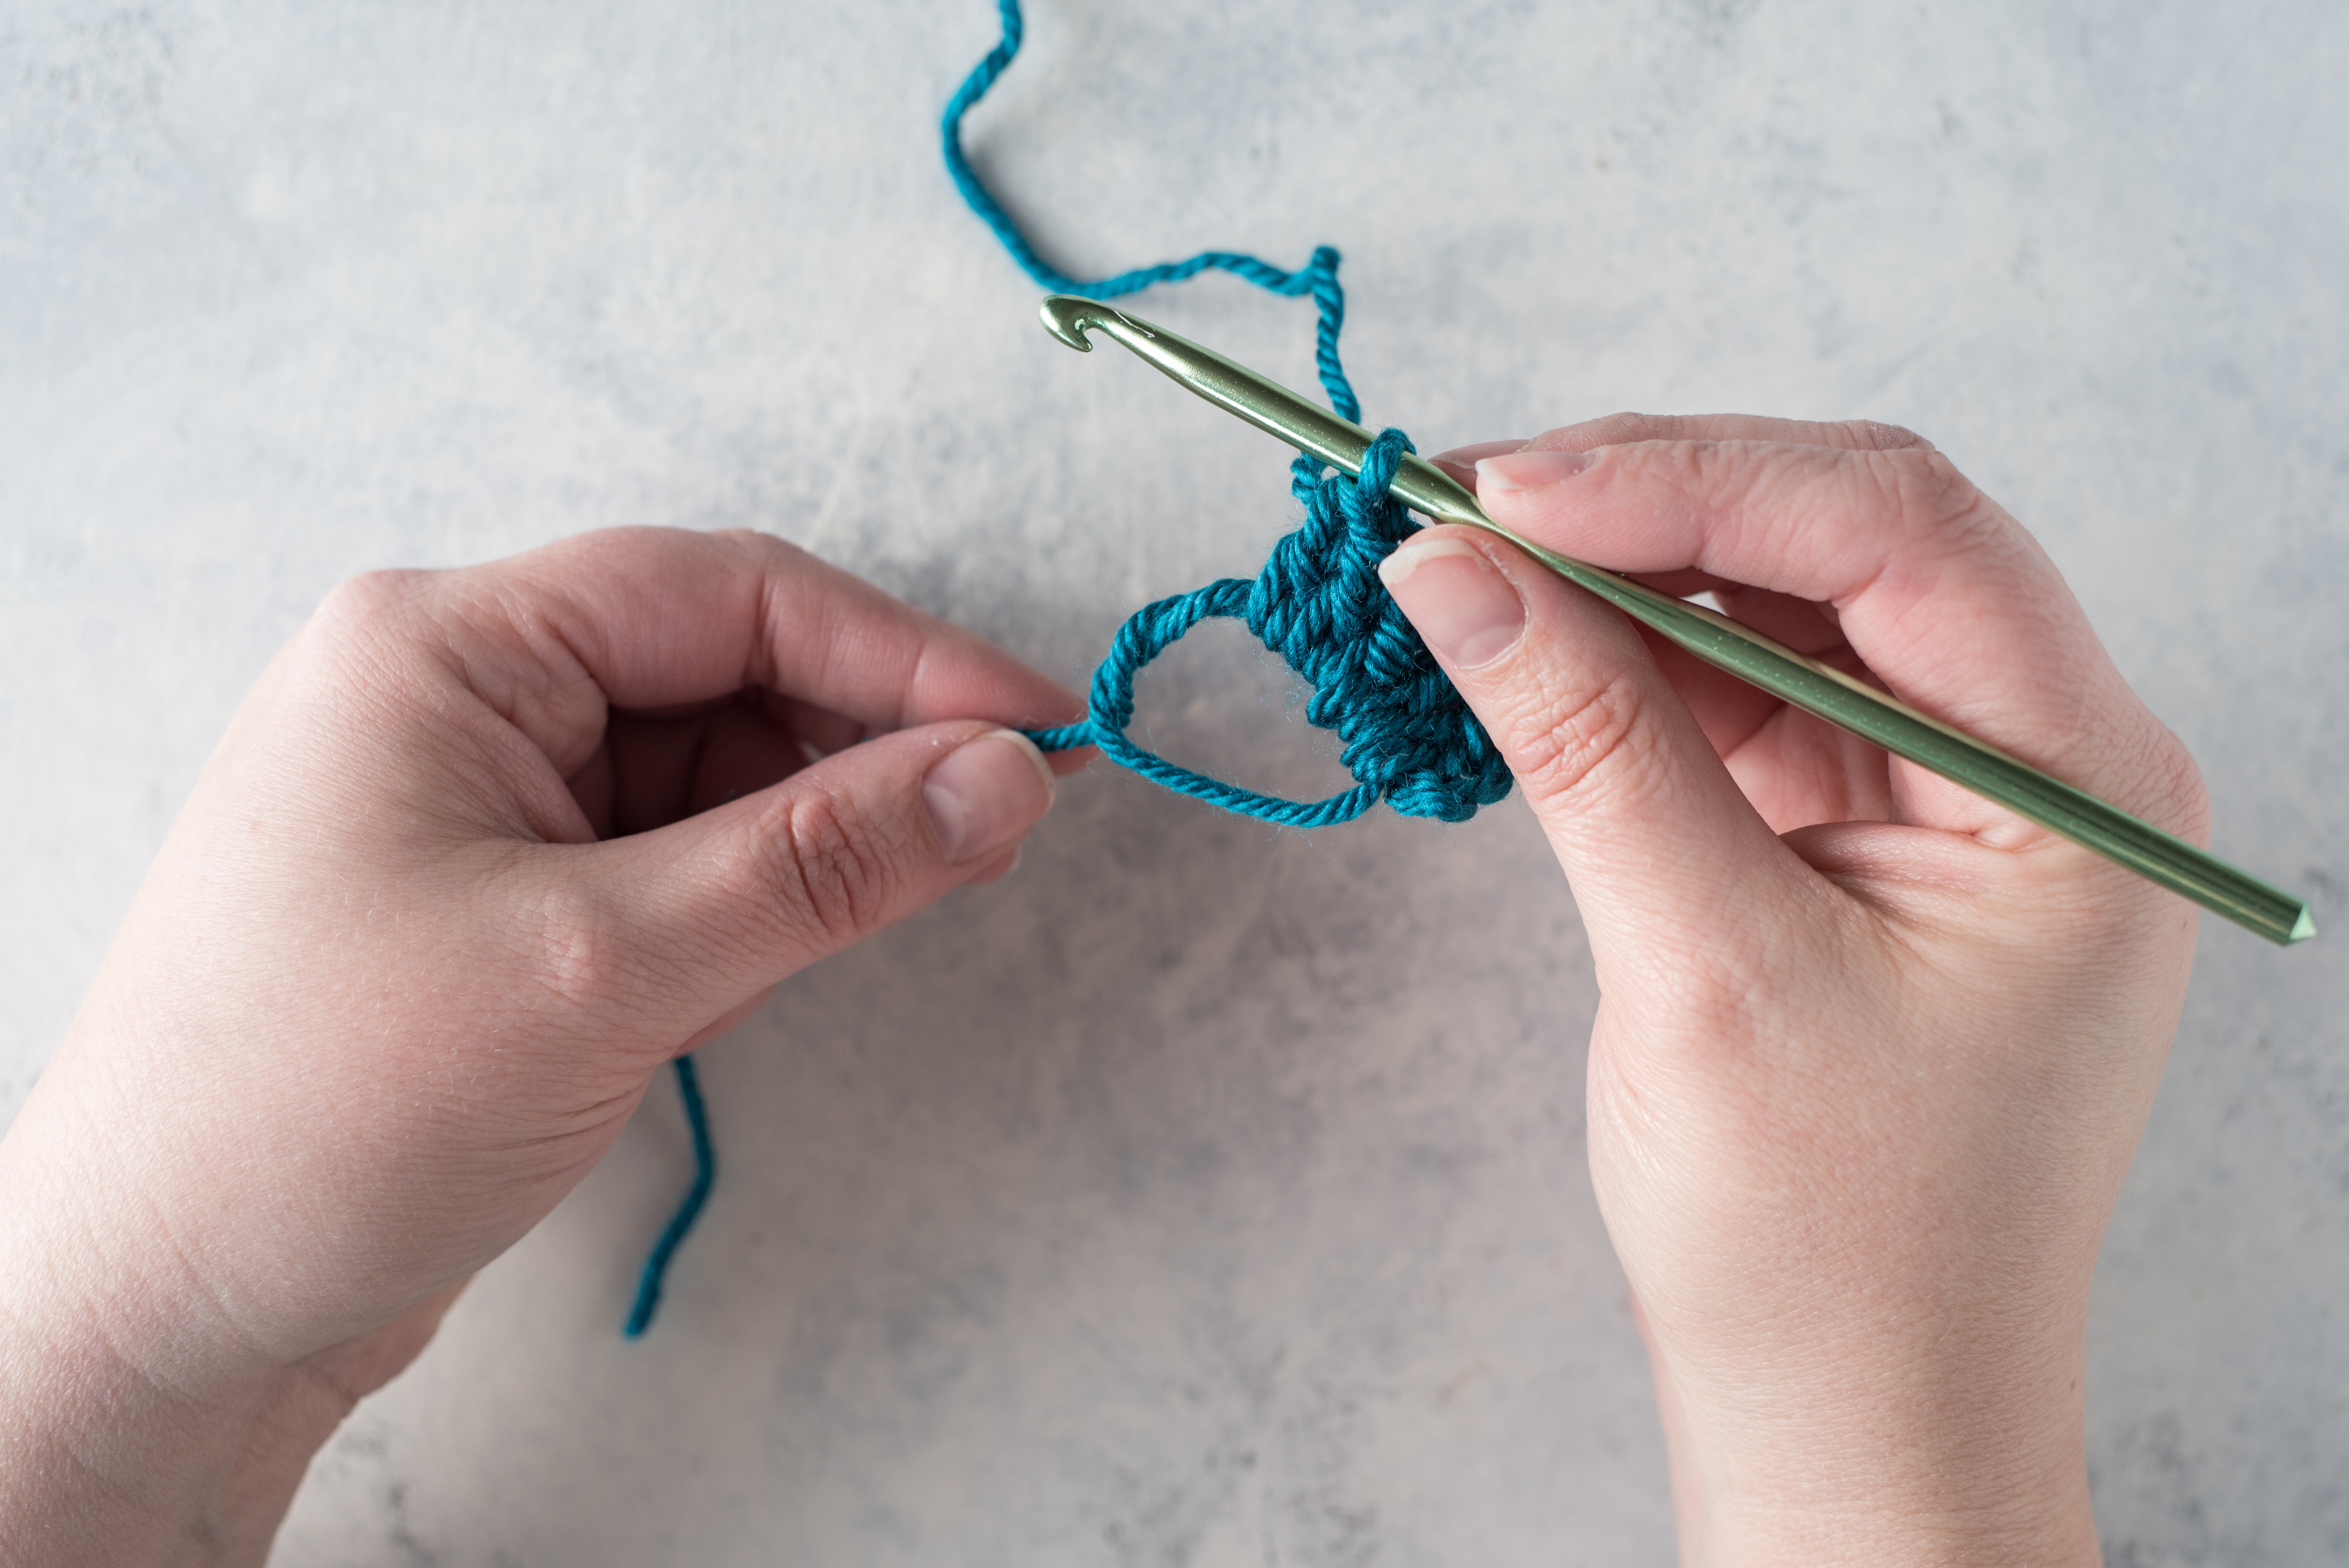
Carefully remove your fingers from the large loop.
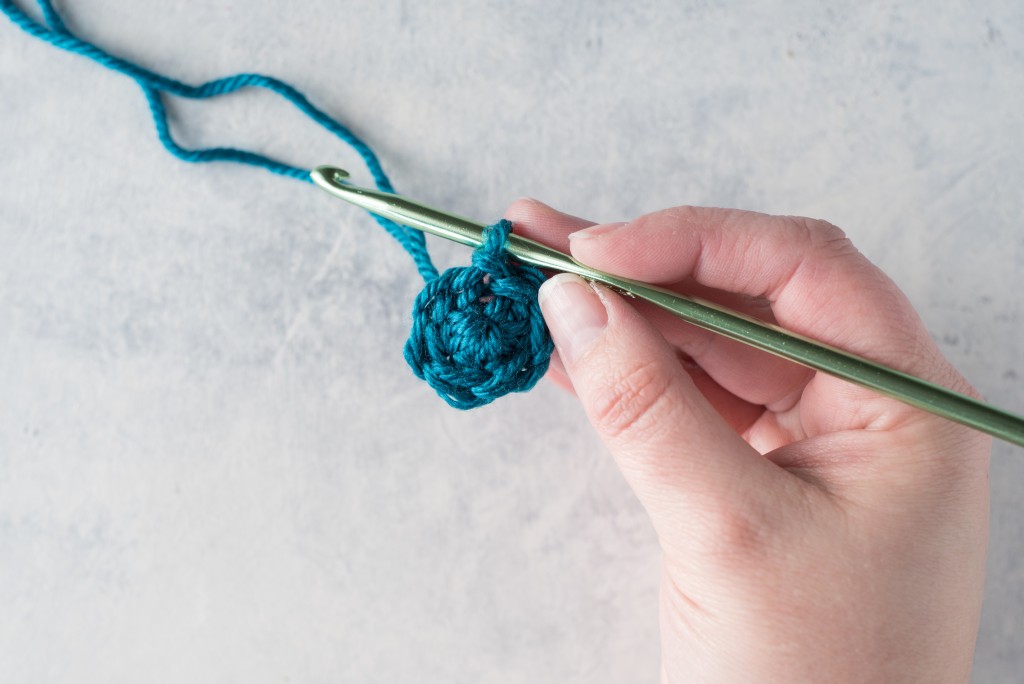
Follow pattern instructions for stitches. Be sure to catch both the loop and the tail when you pull up yarn for each new stitch.
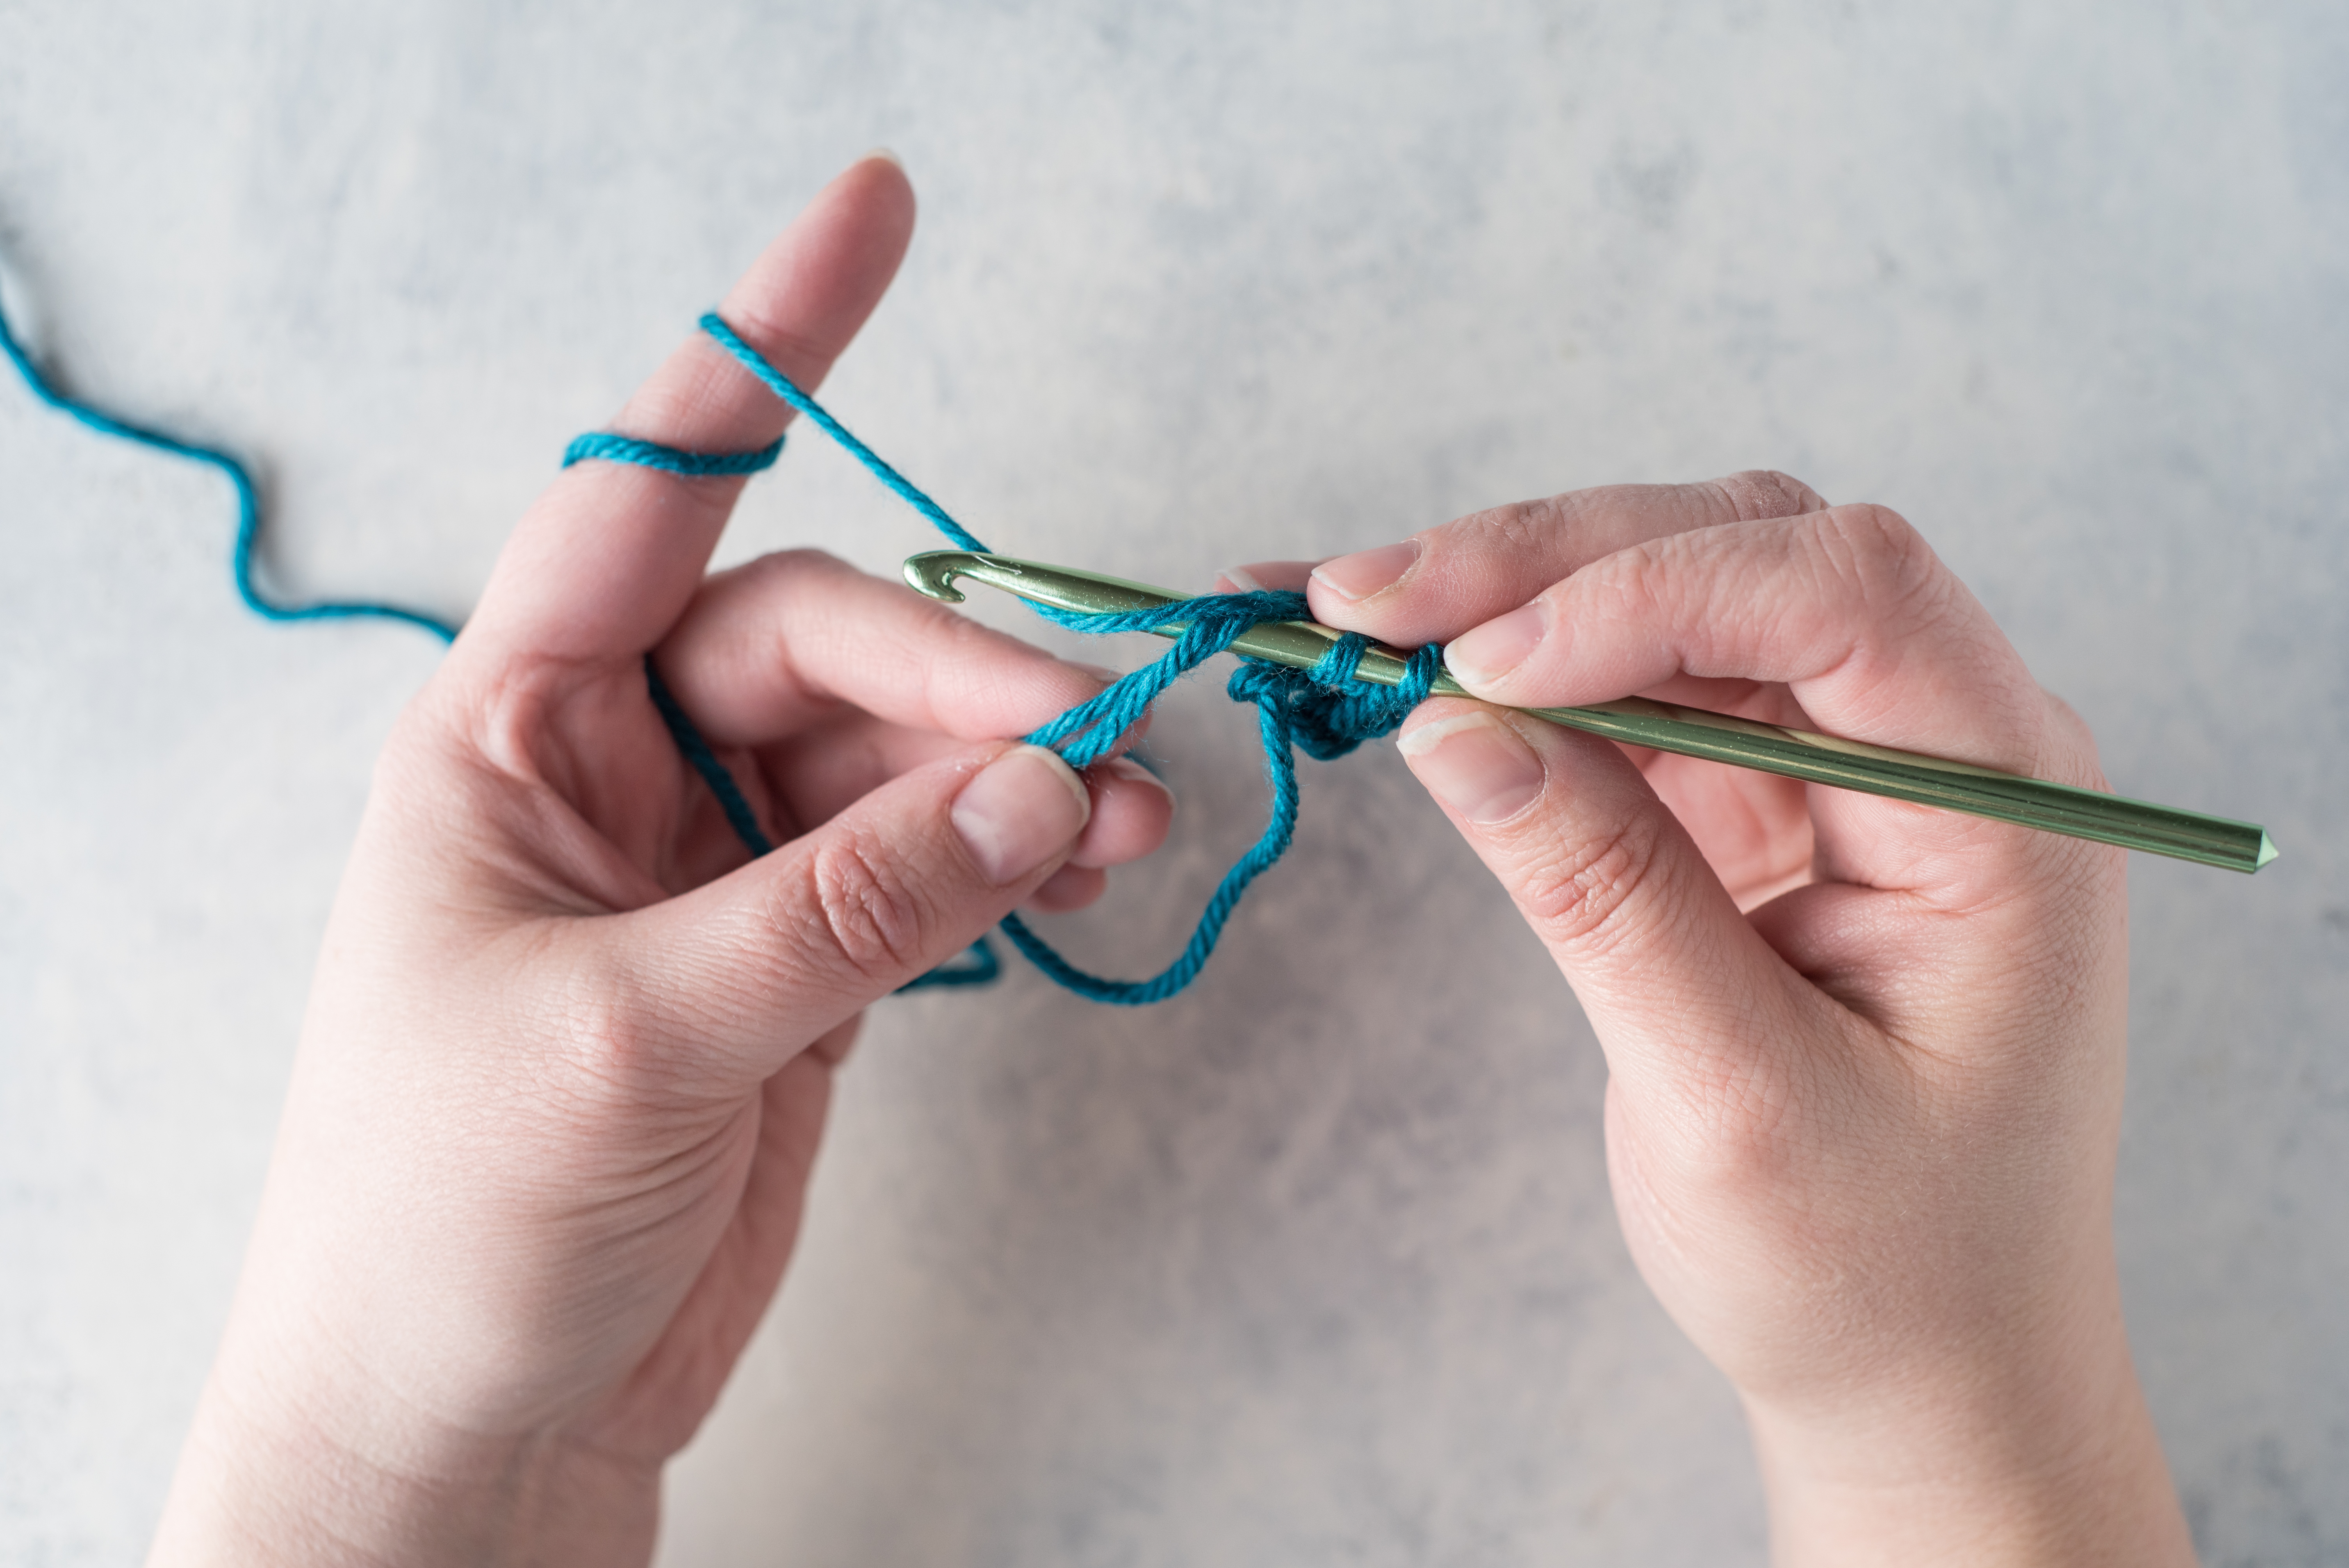
When the correct number of stitches have been made, gently pull the loose tail to close the hole.
Many of our patterns use the Magic Ring, but here are three of our favorites!


Hexagon Gems Baby Blanket | Winter Gerbera Daisy Pillow | Caicos Raffia Purse
I can make the magic ring but I’m not sure if I should always connect with a slip stitch. Some patterns don’t specify that and sometimes say “chain one” after that.
Help
this was very good, I think I got it. it was less complicated than watching a video. problem is I had to let go of the yarn sometimes to scroll down to see what to do next.
Thank you! I continue to have issues with doing the Magic Circle and always have to go to YouTube to figure it out each time.
Me too! I don’t know why I can’t get the hang of it on my own.
I usually just let the trail hang until I’m finished. If it gets in your way, you could always weave it in your yarn like you would do at the end.
I love the magic ring
Sometimes it works for me and sometimes it doesn’t. Gotta figure out what I’m doing wrong when it doesn’t. But I love it when it does. Thanks for the instructions.
I have just learned this technique and I am very happy with it.
I feel like this tutorial is missing some pictures. After you remove your fingers what should it look like? The next photo shows a big circle with looks like a stitch. The needle shows 2 yarn overs while beginning a stitch. What happened?
Very good tutorial. Thank you. I will keep this so, I can review it later.
I have not been able to master it yet .
Thank you. Appreciated very much This is the first time I have made a comment.
Thank you. Appreciated very much
Thank you heaps.
I found this tutorial really confusing-if you are pulling a loop from the back, you do not show where the loop is coming from-also what do you do to tighten the loop?
The loop is coming from your working yarn, up through the gap in your fingers. To tighten, pull the tail end.
NO— I NEVER LEARNED IT THAT WAY BUT I WILL DO IT NOW. MANY THANK YOU AND BLESSINGS!!!
SOOOO what do you do with the tail of the magic ring? you have this long strand just hanging there? what do you do with it? can’t just cut it off?
I think you could just weave in the end after you complete your piece. Hope this helps! – Nicola, Editor