


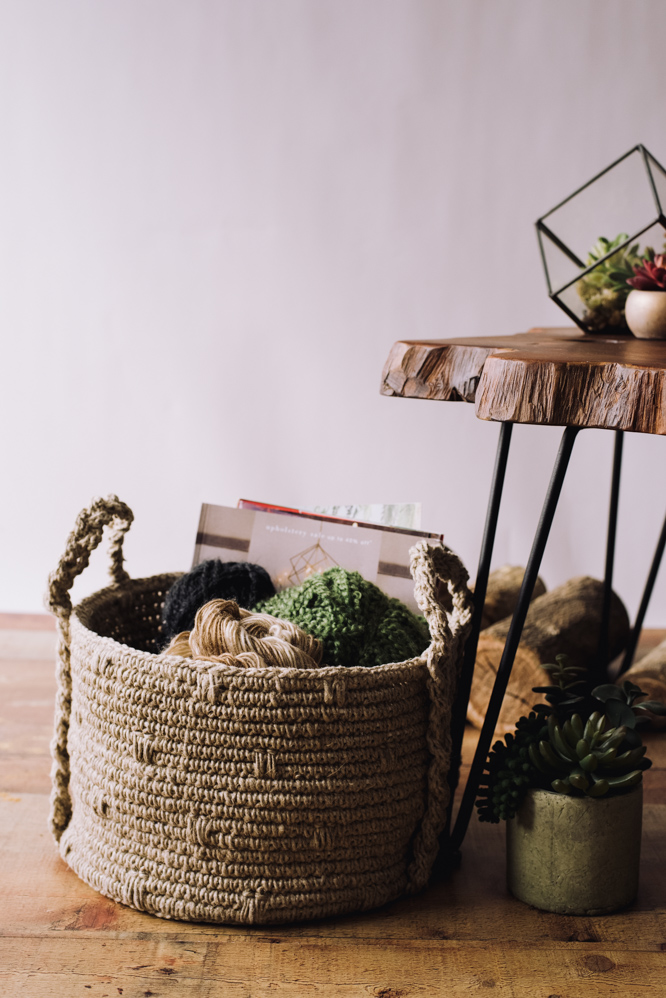
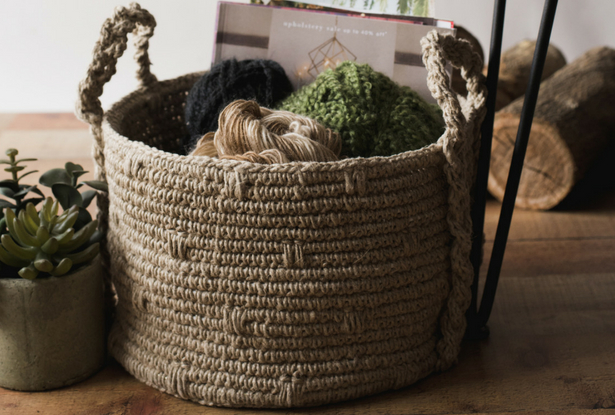
Large metal rings and plastic clothesline are crocheted over with hemp to create an exceptionally sturdy basket that will add a natural accent to any room. Set it beside your favorite reading chair to keep your digital tablet, magazines and hardcover books within reach —or use it to hold your yarn!
Skill Level: Easy
Size: 12” diameter x 8” high, excluding handles
Gauge: 3 sts = 1” and 5 rnds = 2” [5 cm] in sc using smaller hook working over clothesline
7 sl st = 2” using larger hook
Materials
 Yarn: Darice #HMP-5-PP / 100lb Natural Color Waxed Hemp; Twine 200 ft balls (6 balls)
Hook: US size I/9 (5.5 mm); US size G/6 (4 mm)
Notions: Darice #17160 12” diameter gold metal rings (2), KingCord 3/16” diameter x 100′ white Polyporpylene plastic clothesline with polyester core (80 feet), 37mm x 15mm lobster claw swivel clasp clip, Extra-large stitch marker (see Designer Tips for DIY Stitch Marker), extra-large darning needle with eye large enough for hemp cord
Special Stitches
To work sc sts over clothesline
Hold clothesline behind top edge of work, insert hook into indicated place or st and under clothesline, yo, pull up lp, yo, pull through both lps on hook to complete as a sc.
Working over wire ring
Hold ring and clothesline together behind top edge of work and work in same manner as for clothesline.
Accent stitch (AS)
Insert hook in top of next st 2 rnds below current rnd, yo, pull up lp, yo, pull through 1 lp on hook, insert hook into same st 2 rnds below, yo, pull up lp, yo, pull through all 3 lps on hook.
Pattern Notes
Open package of clothesline and hand roll it into a ball before stitching.
Do not join end of rnds.
Do not ch-1 at beg of rnds.
Place a stitch marker on first st of rnd and move marker to first st of next rnd as work progresses.
Designer Tips
Place clothesline ball into a coffee can or large bowl container to hold while stitching.
A 37mm x 15mm lobster claw swivel clasp clip fits easily over the thick hemp. Turn it into a fun DIY Extra-large stitch marker by using a large jump ring to secure a pretty charm to the swivel end of the clip.
Holding the crochet hook in the knife hold position will make stitching the basket easier as work progresses.
Pattern
With smaller hook, ch 5, join to 5th ch from hook to form a ring.
Rnd 1: Holding clothesline behind ring, ch 1, work 12 sc in ring, placing a stitch marker in first st made, do not join rnds. (12 sc)
Rnd 2: Work 2 sc in each st around. (24 sc)
Rnd 3: Work 2 sc in first st, sc in next st, (2 sc in next st, sc in next st) around. (36 sc)
Rnd 4: Work 2 sc in first st, sc in next 2 sts, (2 sc in next st, sc in next 2 sts) around. (48 sc)
Rnd 5: Work 2 sc in first st, sc in next 3 sts, (2 sc in next st, sc in next 3 sts) around. (60 sc)
Rnds 6-9: Sc in each st around, increasing 12 sts evenly spaced. (108 sc)
Rnd 10: Sc in each st around, increasing 3 sts evenly spaced. (111 sc)
Rnds 11-13: Rep Rnd 10. (120 sc)
Rnd 14: Working in BL only, hold metal ring and clothesline behind work, sc in each st around. (120 sc)
Rnd 15: (Work AS in next 2 sts, sc in next 10 sts) 10 times. (20 AS, 100 sc)
Rnds 16-19: Sc in each st around. (120 sc)
Rnd 20: Sc in next 8 sts, (AS in next 2 sts, sc in next 10 sts) 9 times, AS in next 2 sts, sc in next 2 sts. (20 AS, 100 sc)
Rnds 21-24: Rep Rnds 16-19. (120 sc)
Rnd 25: Sc in next 3 sts, (AS in next 2 sts, sc in next 10 sc) 9 times, AS in next 2 sts, sc in next 7 sts. (20 AS, 100 sc)
Rnds 26-29: Rep Rnds 16-19. (120 sc)
Rnd 30: Rep Rnd 15. Fasten off.
Braid Handles (make 2)
With larger hook, (ch 101, sl st in back bar of 2nd ch from hook and in each ch across) 3 times. Fasten off.
Gently pull each strand to meas 30”. (3 individual strands of 100 sl sts, each joined together on one end)
Finishing
Assembly
- Place Braid Handle on flat surface with joined end at top. Working basic braiding technique and beginning on right side edge, bring right cord over center cord and under left cord. Repeat to end of strands. Note: When necessary, gently tug on a strand as needed to ensure ends stay consistently even throughout to bottom of braid. Place a safety pin through strand ends at bottom of braid to secure. Gently pull on completed braid if needed to measure 26”.
- With Basket upside down and RS facing, remove safety pin and keeping cord ends in position, place ends even with any 3 unworked FL of rnd 15, place sl knot on smaller hook, insert hook into right cord end of braid and into first FL of basket, yo and pull through both lps on hook to complete as a sl st, (insert hook into next cord end and into next FL of basket, yo and complete as a sl st) twice. Fasten off.
- Skip 3” at base of Basket and join opposite end of braid in same manner to next 3 FL of Basket. Fasten off.
- Thread a 15” length hemp through darning needle and use to work a few short tacking stitches through handle and top edge of basket to secure into position. Rep for opposite end of handle.
- Rep Steps 1-4 to add 2nd Braid Handle to opposite side of Basket.
This is one of your coolest ideas to date!! Can’t wait to try it! And copy it off for the gals in the Crochet class that I teach.
do you have a tutorial for this?
Hi Donna! At this time, we do not have a tutorial for this pattern. Please let me know if you have a specific question and I can reach out to the designer for assistance! – Nicola, Editor
Can this be made larger?