


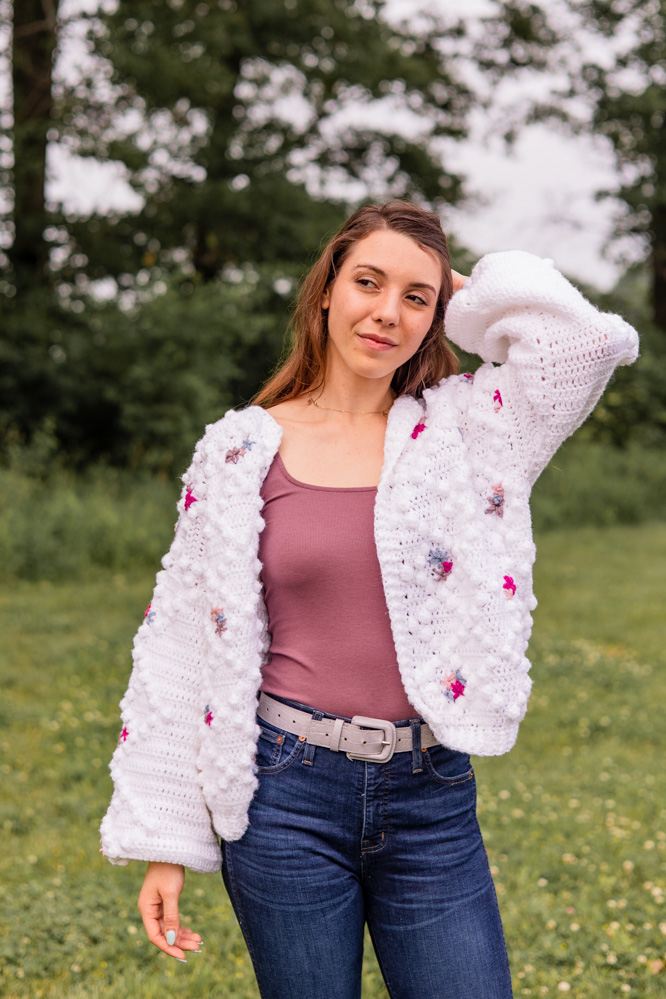
Chunky and covered in bobbles and flowers, this oversized cardigan is a fun project to practice your embroidery skills. Start crocheting and get creative!
Time: 2 Week Project
Skill Level: Advanced
Size: Finished Bust Size 44 (46, 50, 54, 58, 62, 66, 70, 74)” to fit bust 30 (32, 36, 40, 44, 48, 52, 56, 60)”
14” positive ease recommended.
Shown in size 36”
Gauge: 14 sts and 8 rows = 4” [10 cm] in double crochet.
Materials
 Yarn: Cygnet Yarns Kiddie Supersoft Aran (100% Acrylic: 201 yarns [184 meters]/100 grams): 208 White (MC, 6, 7, 7, 8, 9, 11, 12, 13, 14 balls), 470 Blue (CC1, 1 ball/20 grams), 473 Clay (CC2, 1 ball/20 grams), 477 Sea Ice (CC3, 1 ball/20 grams), 475 Lilac Chalk (CC4, 1 ball/20 grams)
Hook/Needles: US size H-8 (5.0 mm) crochet hook
Notions: tapestry needle
Downloads:
Special Stitches
Bobble Stitch – *YO, insert hook into st, YO, draw through (3 loops on hook), YO, draw through first 2 loops (2 loops on hook); rep from * 2 more times, YO, draw through all 4 loops. On RS rows the bobble will form on the WS, so gently push it back to the RS of the work.
Lazy Daisy Stitch – Insert needle through fabric, from WS to RS, where the center of the flower will be. Insert the needle back through the fabric in the same spot where the yarn has come up, leave a loop of yarn on the RS. Where the edge of the petal will be, insert needle from WS to RS through loop on RS. Insert the yarn back to the WS of the fabric at the same point where it came out to hold the edge of the loop in place. Continue working petals from the center outwards, in groups of 5 or 7. Take yarn to WS and secure tightly.
Bullion stitch – For this stitch, the needle will come up and down through the same holes twice. First, insert needle through fabric from WS to RS, where the center of the design will be and put the needle down from RS to WS where the end of the petal will be. Do not pull the thread all the way through, leave most of it on the RS of fabric. Then bring needle back up to RS through the first point (center of flower). Taking thread that is coming up through first hole, wrap the thread around the needle 3, 5 or 7 times. Hold the wrapped yarn on the needle gently and pull the needle through the wraps and insert in the “down” hole and pull all excess thread through to WS. Then tighten the yarn to neaten the stitch. Repeat in clusters of 2 or 3. Secure tail on WS.
Pattern Notes
This pattern is worked in flat panels and seamed, then the flower motifs are embroidered randomly across the cardigan in the contrast colors. Turning chain counts as stitch throughout pattern.
Pattern
Back
Ch 79 (82, 89, 96, 103, 110, 117, 124, 131)
Row 1: Starting in 3rd ch from hook, dc across. Turn. (77, 80, 87, 94, 101, 108, 115, 122, 129)
Rows 2-37 (39, 40, 43, 46, 49, 52, 55, 57): Follow Chart A. Fasten off.
Front panels (make 2)
Ch 34 (35, 39, 42, 44, 47, 51, 54, 56)
Row 1: Starting in 3rd ch from hook, dc across. Turn. (32, 33, 37, 40, 42, 45, 49, 52, 54)
Rows 2-37 (39, 40, 43, 46, 49, 52, 55, 57): Follow Chart B. Fasten off.
Sleeves (make 2)
Ch 57 (61, 63, 67, 70, 73, 76, 79, 81)
Row 1: Starting in 3rd ch from hook, dc across. Turn. (55, 59, 61, 65, 68, 71, 74, 77, 79)
Rows 2-28 (28, 30, 32, 34, 36, 38, 38, 39): Follow Chart C. Fasten off.
Finishing
With MC, sl st to join front panels to back at shoulder seam with WS facing. Match center of sleeve motif with shoulder seam, and sl st to join sleeve to body, then sl st to join front to back from cuff to underarm to hem.
Cuff
Join MC to cuff edge, ch 1. *Dc3tog, dc2tog; rep from * 10 (10, 10, 12, 11, 12, 13, 13, 13) times, 0 (2, 0, 0, 0, 0, 2, 3, 3) dc2tog, 0 (0, 2, 0, 2, 2, 0, 0, 0) dc3tog, 0 (0, 0, 0, 2, 0, 0, 1, 3) dc. (22, 24, 24, 26, 28, 28, 30, 32, 34)
Row 1-3 (3, 3, 3, 4, 4, 4, 4, 5): Working in continuous rounds, *FPhdc, BPhdc; rep from * for 3 (3, 3, 3, 4, 4, 4, 4, 5) rnds. Fasten off.
Hem
Join MC to hem edge, ch 1. *Dc2tog, 4 dc; rep from * 22 (23, 25, 28, 29, 32, 34, 36, 38) times, 3 (2, 5, 0, 5, 0, 3, 4, 3) dc. Turn. (118, 122, 135, 145, 155, 165, 178, 189, 198)
Row 1: Ch 3, *FPhdc, BPhdc; rep from * until 1 (1, 0, 0, 0, 0, 1, 0, 1) sts rem, FPhdc. Turn.
Rows 2-4 (4, 4, 4, 5, 5, 6, 6, 6): Ch 3, work FPhdc on what appears as FP, and BPhdc on what appears as BP. Fasten off.
Front Edge
Join MC to right panel hem edge, ch 1. Dc to end, working from hem to neckline. Turn. (73, 77, 78, 84, 91, 96, 103, 108, 112)
Row 1: Ch 3, *FPhdc, BPhdc; rep from * until 0 (0, 1, 1, 0, 1, 0, 1, 1) sts rem, FPhdc. Turn.
Rows 2-3 (3, 3, 3, 4, 4, 4, 4, 5): Ch 3, work FPhdc on what appears as FP, and BPhdc on what appears as BP. Fasten off.
Neckline
Join MC to neckline edge, ch 1. 6 (6, 7, 8, 8, 8, 10, 10, 10) Dc along front neckline, 20 (20, 21, 24, 26, 27, 29, 30, 32) dc across back neckline, and 6 (6, 7, 8, 8, 8, 10, 10, 10) dc across front neckline. (32, 32, 35, 40, 42, 43, 49, 50, 52)
Row 1: Ch 3, *FPhdc, BPhdc; rep from * until 1 (1, 0, 1, 1, 0, 0, 1, 1) sts rem, FPhdc. Turn.
Rows 2-3 (3, 3, 3, 4, 4, 4, 4, 5): Ch 3, work FPhdc on what appears as FP, and BPhdc on what appears as BP. Fasten off.
Embroidery
Using CC1, CC2, CC3 and CC4, embroider flowers using Lazy Daisy and Bullion stitches over the cardigan randomly, working as many or as few as you wish. Fasten off, weave in all ends.
Where do I find Charts A, B and C ? Thank you
Hello Heather! Charts are always on the far right side of the pattern page underneath the photos. Here is a direct link to the charts as well:
https://www.ilikecrochet.com/wp-content/uploads/Marilie-Bobble-Cardigan-Charts.pdf
Thanks! – Nicola, Editor
You gave no ‘Abbreviations Used’ so could you tell me, please, what is ‘FBhdc?’ I know the half-double part, of course. And, at first, I thought it was a typo for FPhdc. But you used it often in the pattern. Thank you for your help.
Gail
Hello Gail! I’ve reached out to the designer for advice and she or I will reply as soon as possible. Thanks! – Nicola, Editor
Hi Gail! You were correct, they should be FPhdc, Front Post Half Double Crochet. Thanks for pointing this out! We’ve made the corrections above. Happy crocheting!