


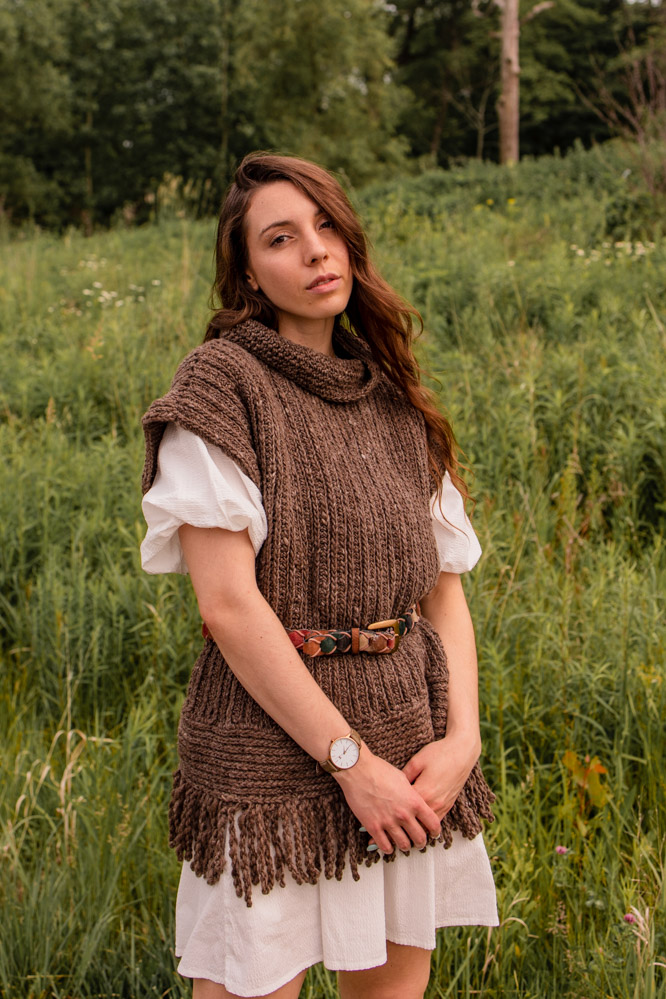
Modern lines for your Autumn wardrobe, the Nightingale Vest can be worn in a variety of ways. Crocheted from side to side for easy personalization, this vest is a staple item for your fall adventures.
Skill Level: Intermediate
Size: S (M, L) shown in size M, 20 (24, 28)” wide x 22” length not including 3” fringe.
Gauge: 16 sts and 8 rows = 4” [10 cm] in Double Crochet
Materials
 Yarn: Noro Haunui (100% Wool; 960 yards [878 meters]/400 grams): #4 Mackensie Basin 3 (3, 4) skeins
Hook: US Size I (5.5 mm)
Notions: Tapestry needle, 6 locking stitch markers, fixed length tool to measure 7” loop for fringe (paperback book or large coffee mug will work).
Pattern Notes
Bodice front and back are worked side to side. Funnel neck and hem are worked in the round after the back and front panels are joined.
A wider bodice is made by working more rows.
A longer bodice is made by increasing the number of stitches per row.
An HDC produces a stitch with three horizonal elements on top of it. Typically one would work through two of them on the next row resulting in a single loop left unworked. To present two of the three as a “V” similar to one would see in a knitted fabric, when working on the RS of the fabric, the hook is inserted into the back loop of the stitch below defined as the one which is furthest from the right side of the work. Likewise, when working on the WS of the fabric insert the hook into the frontmost loop on the wrong side.
The side seams are worked from the bottom edge up to facilitate trying it on prior to fastening off the seam stitches and cutting the tail of the yarn.
It is suggested that a seam of 9” be worked resulting in a 10” arm hole, for a smaller frame, this can be reduced by working a longer seam.
Fringe is made by winding a loop of yarn around itself approximately 20 times then fastening the loop off with a single crochet. As shown the loops were measured off at 7”, twisted and fastened off with a slip stitch. For longer fringe, make longer loops and add more twists. For shorter fringe, make smaller loops, do not decrease the number of twists below 16, they tend to unfurl if there are not at least 16 twists.
For less dense fringe, work a sl st between each fringe stitch. For more, work multiple fringe stitches into each stitch.
As shown on the medium there are 148 fringe stitches, precise number based upon the desired effect, for similar effect on a small work 138 fringe stitches, on a large work 158.
Special Stitch
Fringe Stitch: Sc, extend the loop on the hook to 7” or desired length so that both ends of the loop are 7” each, (7” for the front leg + 7” for the back = 14” makes one loop), twist loop 20 times, using a finger to fold the twisted loop in half, work a slip st into the same st where the sc was worked. Remove finger from loop and allow it to twist around on itself.
Pattern
Front
Shoulder:
Ch 68, turn
Row 1 (RS): Hdc into second ch from hook, hdc in each ch across, turn work. (66 hdc)
Row 2 (WS): Ch 2 (does not count as a st here and throughout), hdc into the front loop across, turn work.
Row 3 (RS): Ch 2, hdc into the back loop across, turn work.
Rep rows 2 – 3 until work measures 4.5 (6.5, 8.5)” from foundation chain edge having just completed a WS row, continue as follows:
Neckline:
Row 1 (RS): Ch 2, hdc into the back loop 58 sts, place marker, leave remaining 8 sts unworked, turn work. (58 hdc)
Row 2 (WS): Ch 2, hdc into the front loop across, turn work.
Row 3 (RS): Ch 2, hdc into the back loop 58 sts, turn work.
Repeat rows 1 – 2 until work measures 15.5 (17.5, 19.5)” from foundation chain edge having just completed a WS row.
Next RS row: Ch 2, hdc into the back loop 58 sts, ch 10, turn work
Next WS row: Hdc into the second ch from the hook, hdc into next seven chain, hdc into the front loop to end of row. (66 hdc)
Second Shoulder:
Row 1 (RS): Ch 2, hdc into the back loop across, turn work. (66 hdc)
Row 2 (WS): Ch 2, hdc into the front loop across, turn work.
Repeat rows 1 – 2 until work measures 20 (24, 28)” from foundation chain edge having just completed a WS row.
Fasten off. Cut yarn with 3” tail, weave in end.
Back:
Ch 68,
Row 1 (RS): Hdc into second ch from hook and in each ch across, turn work. (66 hdc)
Row 2 (WS): Ch 2, hdc into the front loop across, turn work.
Row 3 (RS): Ch 2, hdc into the back loop across, turn work.
Rep rows 2 – 3 until work measures 20 (24, 28)” from foundation chain edge having just completed a WS row.
Using steam, gently block the pieces to relax the fibers for easier seaming.
Allow panels to air dry.
Using locking stitch markers, mark the midpoint of the selvedge edge of each panel.
On the back panel, place two additional stitch markers to denote where they will be aligned to the shoulders on the front panel, approximately 5.5” to the left and right of the center top marker. This is easily done by laying the back panel down with the RS facing up with the center marker at the top and then laying the front panel atop it with the WS facing up, shoulders towards the top and its center marker aligned with the same on the back.
Turn the work 90 degrees and flip the front over so its RS is facing and the shoulders are aligned on the front with the markers just placed on the back.
Starting at a corner of the shoulder, on the inside near the marker, use the mattress stitch to join the two pieces across the shoulder. After the last stitch, pass the yarn through the work twice to secure it, fasten off. Repeat for second shoulder.
Fold the vest such that the WS face each other. With RS facing, begin at the lower right corner and using a mattress stitch, seam along the edge of each piece 9” to form the side of the work. Repeat for second side, if desired, try it on to verify the size of the arm hole suits prior to fastening off the tails of the seams.
Lightly steam the piece to relax it along the seams. Allow to air dry.
Funnel Neck:
With RS facing, pull up loop at the mid-point marker on the back, ch 1, hdc into the selvedge edge stitch of each row to the shoulder seam, hdc down ch of neckline, across neck, hdc up next 9 sts of neck, and across the back sts to mid-point marker, hdc into top of ch-1 and continue working in the round (approximately 80 sts).
Do not turn work, continue hdc into the back loop in the round a total of 9 rounds stopping two sts before the end of the 9th round, 2 sc, slip st to join. Fasten off, weave in end.
Hem:
With RS facing, beginning at lower middle back marker, pull up a loop, ch 1, hdc into the end of each selvedge st around half of back, front, and remaining half of back. Do not sl st to join, continue hdc into the back loop on each stitch a total of 9 rounds, stopping two sts before the end of the 9th round, 2 sc, slip st to join. Do not cut yarn.
Fringe:
Fringe stitch into each hdc around. Do not cut yarn, sl st into the back of the first three fringe stitches to secure the yarn, fasten off and weave in end.
Finishing
Hang the finished vest on a padded hanger and let the fringe edge fall. If any of the pieces are too tightly twisted around themselves, gently manipulate them with your fingers so they are all the same length.
Steam the vest and fringe to relax the stitches.
Enjoy your new vest.
I really like the Nightingale vest. I knit a vest similar to it some years back in all horizontal. However, I like that yours is done vertically and will do mine that way. Thanks much for the lovely design. Ann Schlabach, Aztec, NM