


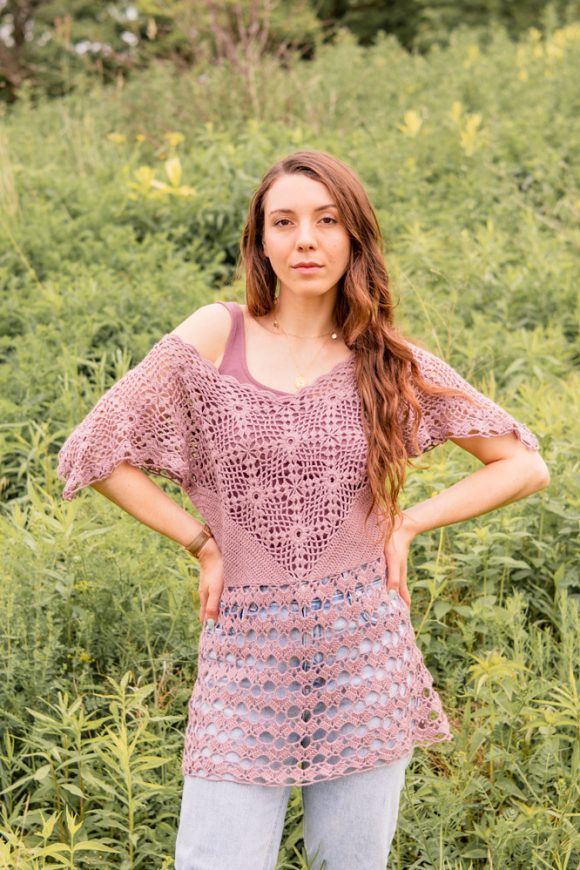
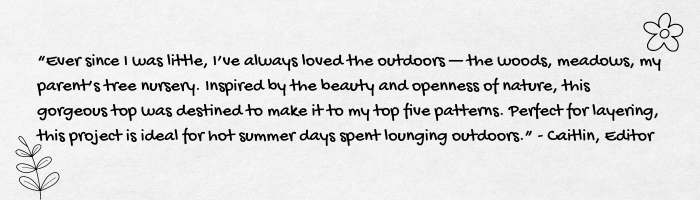
Inspired by the beauty and airiness of an open meadow, each element of this piece has been carefully planned to create an intricate project featuring a wide variety of crochet techniques. Boasting a series of joined lace motifs around the neck, the Ainsley Top is perfect for all your summertime adventures. Ainsley is Scottish for “one’s own meadow” and perhaps this top can be your own “meadow” too
Time: 80 hours
Skill Level: Intermediate
Size: Finished Bust Size 36 (40, 44, 48, 52)” to fit bust 34 (38, 42, 46, 50)”, 2” positive ease.
Shown in size 36”
Gauge: 24 sts and 10 rows= 4″ [10 cm] in dc after wet blocking
Lace motif=3.5” square

Enter to win the yarn needed to make the Ainsley Top by Nazanin Fard
Materials
 Yarn: Knit Picks Gloss Fingering, (70% Merino Wool, 30% Silk; 220 yards [201 meters]/50 grams): 25942 Velveteen (6 (7, 7, 8, 9) hanks)
Hook/Needles: US size C (2.75 mm)
Notions: Tapestry needle
Special Stitches
Beg 3 dc-cluster: Ch 3, yo, insert hook into specified sp, yo, pull through sp, yo, pull through 2 lps on hook, yo, insert hook into same sp, yo, pull through sp, yo, pull through 2 lps on hook, yo, pull through all lps on hook.
3 dc-cluster: yo, insert hook into specified sp, yo, pull through sp, yo, pull through 2 lps on hook, (yo, insert hook into same sp, yo, pull through sp, yo, pull through 2 lps on hook) twice, yo, pull through all lps on hook.
Pattern Notes
Check with the diagram for joining motifs.
Beginning ch 3 counts as dc unless otherwise noted.
Pattern
Motif 1:
Ch 8. Make a ring with a sl st into the first ch.
Rnd 1: Ch 1, 12 sc in ring. End with the sl st into first ch.
Rnd 2: Beg 3 dc-cluster into next sc, [ch 3, 3 dc-cluster in next sc] 11 times, ch 3, sl st into top of first cluster. (12 3-dc clusters)
Rnd 3: (Sl st, ch 3, 2 dc) into first ch-3 sp, * ch 5, 3 dc in same ch-3 sp, [ch 5, sc in next ch-3 sp] twice, ch 5, 3 dc in next ch-3 sp; rep from * 2 more times, ch 5, 3 dc in same ch-3 sp, [ch 5, sc in next ch-3 sp] twice, ch 5, sl st into the 3rd ch. (8 3-dc groups, 16 ch-5 sps)
Rnd 4: Sl st into next 2 dc, sl st into the next ch 5-sp, (ch 3, 2 dc) into same ch-5 sp, * ch 5, 3 dc in same ch-5 sp, [ch 5, sc in next ch-5 sp] 3 times, ch 5, 3 dc in next ch-5 sp; rep from * 2 more times, ch 5, 3 dc in same ch-5 sp, [ch 5, sc in next ch-5 sp] 3 times, ch 5, sl st into the 3rd ch. 20 ch-5 sps
Rnd 5: Sl st into next 2 dc, sl st into the next ch 5-sp, (ch 3, 2 dc) into same ch-5 sp, * ch 5, 3 dc in same ch-5 sp, [ch 5, sc in next ch-5 sp] 4 times, ch 5, 3 dc in next ch-5 sp; rep from * 2 more times, ch 5, 3 dc in same ch-5 sp, [ch 5, sc in next ch-5 sp] 4 times, ch 5, sl st into the 3rd ch. (24 ch-5-sps)
Fasten off.
Motif 2 and all the rest of motifs (make 31):
Work same as motif 1 to end of rnd 4.
Rnd 5: Sl st into next 2 dc, sl st into the next ch 5-sp, (ch 3, 2 dc) into next ch-5 sp, * ch 2, sl st into the corresponding ch-5 sp of previous motif, ch 2, 3 dc in same ch-5 sp, [ch 2, sl st into the corresponding ch-5 sp of previous motif, ch 2, sc in next ch-5 sp] 4 times, ch 2, sl st into the corresponding ch-5 sp of previous motif, ch 2, 3 dc in next ch-5 sp; rep from * as necessary to join to adjacent squares, otherwise work as rnd 5 of motif 1. Fasten off.
Side panels (make 4):
Ch 5. Make a ring with sl st into the first ch.
Row 1: Ch 3, 4 dc in ring. Turn. (5 dc)
Row 2: Ch 3, 2 dc in same st, dc in each and every dc to ch-3, 3 dc in 3rd ch. Turn. (9 dc)
Rows 3-14: Repeat row 2. (57 dc at the end of row 14)
Fasten off.
Underarm panel (make 2):
Ch 16 (28, 40, 52, 64).
Row 1: Dc in 4th ch from hook, dc in every ch. Turn. 14 (26, 38, 50, 62) dc
Row 2-14: Ch 3, dc in each and every dc, dc in 3rd ch. Turn.
Fasten off at the end of row 14.
Assembly:
Using seaming method of choice, seam a side panel to the underarm panel as shown on diagram. Next, align side sections to upper yoke according to diagram. Using stitch markers to keep placement may be helpful, then seam with method of choice.
Skirt:
Rnd 1: Starting from center back, attach yarn to corner of motif between side panels, * [ch 8, skip next side of dc, sc in next side dc of the side panel, ch 5, sc in next side dc of the side panel] until you get to the underarm panel, [ch 8, skip next 3 dc, sc in next dc, ch 5, skip next 2 dc, sc in next dc] until you get to the next side panel. Repeat from * around, replace the last ch 5 with ch 3, dc in join.
Rnd 2: Ch 3, * (4 dc, ch 3, 4 dc) in next ch-8 sp, ch 3, sc in next ch-5 sp, ch 3; repeat from * around.
Rnd 3: Sl st into each of next 3 ch, sl st into next dc, ch 3, dc in each of next 3 dc, * ch 3, sc in next ch-3 sp, ch 3, dc in each of next 4 dc, dc in each of next 4 dc; repeat from * around, end with sl st into third ch.
Rnd 4: Sl st into each of next 3 dc, sl st into next ch-3 sp, ch 11 (count as dc, ch 8), * dc in next ch-3 sp, ch 5, dc in next ch-3 sp, ch 8; repeat from * to first ch-11. End with ch 5, sl st into the 3rd ch.
Repeat rnds 2-4, 7 more times.
Sleeve Edging
Rnd 1: With RS facing, join at first st of underarm panel, [ch 5, skip next dc, sc in next dc] across underarm panel to first motif, [(ch 5, sc in next ch-5 sp) 5 times, ch 5, sc in the corner of the motif] 6 times.
Rnd 2: Ch 3, * (4 dc, ch 3, 4 dc) in next ch-5 sp, ch 3, sc in next ch-5 sp, ch 3; repeat from * around.
Rnd 3: Sl st into each of next 3 ch, sl st into next dc, ch 3, dc in each of next 3 dc, * ch 3, sc in next ch-3 sp, ch 3, dc in each of next 4 dc, dc in each of the next 4 dc; repeat from * around. End with sl st into third ch.
Rnd 4: Sl st into each of next 3 dc, sl st into next ch-3 sp, ch 11 (count as dc, ch 8), * dc in next ch-3 sp, ch 5, dc in next ch-3 sp, ch 8; repeat from * around. End with ch 5 sl st into 3rd ch.
Fasten off.
Neck Edging
Rnd 1: Start from center of back neck, * ch 5, sc in next ch-5 sp; repeat from * around. End with ch 3, dc in next ch-5 sp.
Rnd 2: * 8 dc in next ch-5 sp, sc in next ch-5 sp; Repeat from * around. Fasten off.
Finishing
Weave in all ends.
Block top to size.
The joining of the motifs is really unclear
Maybe the photos on this page will help:
https://www.yarnspirations.com/blogs/how-to/the-ultimate-guide-to-join-as-you-go-crochet
Also there are a lot of videos on YouTube that show the technique.
If there’s one thing I wish, it’s that membership allowed for printing these patterns more easily.
Hello! Thank you for your feedback. We are always looking for new ways to improve our user experience. You are welcome to save this pattern by copying and pasting into a word document or by printing the pattern via the printer icon on the left hand side of your screen. Hope this helps! – Nicola, Editor
The biggest problem I’ve found with these patterns is that the skematics and such are not sized properly for a regular sheet of paper.
Thank you for your feedback! We will take a look at this issue and see if we can adjust this functionality.
I don’t see directions for the number of motifs for each size listed. Would love to make it but I’m not a 36″ bust.
The number of motifs is the same for all sizes. Different sizes are achieved by working the underarm panel and which size you choose. As this top is basically a sleeveless top, but the shape will create the illusion of sleeves.
The skirt set up row is really not written very clearly…I am having to look at the picture to figure out what it is calling for.
Hello Mandy! I’ve reached out to the designer for advice and she or I will reply as soon as possible. Thanks! – Nicola, Editor
I am sorry you have problems with that. I don’t know how to explain it better as you have to work in different directions to get around all the motifs. The motifs on their side, so you have to work in the dc that is sitting on its side. However, when you get to the underarm, you work on the top of the dc. Hope this helps!
beautiful detailing but…to off the shoulder and sloppy looking to suit me
Hi Martha! Just wanted to note that we styled this top a little more “boho”, but that the neckline can be styled more traditionally. Our model has very narrow shoulders which allowed the top to look more casual. – Nicola, Editor
Can you tell me if this top can be worn *on* both shoulders? I cannot tell if this top actually is off-the-shoulder, or if it sits on the shoulders and one shoulder has been pulled down for the photo. Thanks.
Hi Michele, yes this top can be worn on both shoulders! Our model has narrow shoulders, so the open neckline style allowed for off-the-shoulder styling. Hope that makes sense! – Nicola, Editor