


Have fun helping your little one learn motor skills with this teaching toy. Mister Monster teaches how to zip, button, and tie a bow!
Skill Level: Intermediate
Sizes: 17” body diameter; 10” height, assembled, not including hair
Gauge: 14 sts and 16 rows = 4” [10 cm] in single crochet after stuffing
Materials
Yarn:
![]() Universal Yarn Uptown Worsted (100% Anti-pilling Acrylic; 180 yards [165 meters]/100 grams): 360 Midnight (MC), 1 ball; 349 Pale Blue (CC1), 1 ball; 347 Orange (CC2), 1 ball; 304 Baby Yellow (CC3), 1 ball
Universal Yarn Uptown Worsted (100% Anti-pilling Acrylic; 180 yards [165 meters]/100 grams): 360 Midnight (MC), 1 ball; 349 Pale Blue (CC1), 1 ball; 347 Orange (CC2), 1 ball; 304 Baby Yellow (CC3), 1 ball
Hook: US size G/6 (4 mm)
Notions: Tapestry needle; polyester stuffing; 7” zipper; sewing thread and needle; four 7/8” buttons; small amount of white and black felt
Pattern Notes
Body, Head, Arms, and Legs are worked separately and are stuffed with polyester stuffing. Arms and Legs button to the Body.
Pattern
Body
With MC, begin with adjustable ring.
Rnd 1: Work 6 sc into ring, join with sl st to beg sc – 6 sc.
Rnd 2: Ch 1, 2 sc into each sc around, join with sl st to beg sc – 12 sc.
Rnd 3: Ch 1, sc in first sc, 2 sc in next sc, (sc in next sc, 2 sc in next sc) around, join with sl st to beg sc – 18 sc.
Rnd 4: Ch 1, sc in first 2 sc, 2 sc in next sc, (sc in next 2 sc, 2 sc in next sc) around, join with sl st to beg sc – 24 sc.
Rnd 5: Ch 1, sc in first 3 sc, 2 sc in next sc, (sc in next 3 sc, 2 sc in next sc) around, join with sl st to beg sc – 30 sc.
Rnd 6: Ch 1, sc in first 4 sc, 2 sc in next sc, (sc in next 4 sc, 2 sc in next sc) around, join with sl st to beg sc – 36 sc.
Rnd 7: Ch 1, sc in first 5 sc, 2 sc in next sc, (sc in next 5 sc, 2 sc in next sc) around, join with sl st to beg sc – 42 sc.
Rnd 8: Ch 1, sc in first 6 sc, 2 sc in next sc, (sc in next 6 sc, 2 sc in next sc) around, join with sl st to beg sc – 48 sc.
Rnd 9: Ch 1, sc in first 7 sc, 2 sc in next sc, (sc in next 7 sc, 2 sc in next sc) around, join with sl st to beg sc – 54 sc.
Rnd 10: Ch 1, sc in first 8 sc, 2 sc in next sc, (sc in next 8 sc, 2 sc in next sc) around, join with sl st to beg sc – 60 sc.
Rnds 11-35: Ch 1, sc in each sc around, join with sl st to beg sc.
Rnd 36: Ch 1, fpsc around each sc around, join with sl st to beg sc.
Rnd 37: Ch 1, sc in each sc around, join with sl st to beg sc.
Note: Rnds 36 and 37 form zipper facing.
Break MC, switch to CC3.
Considering that the joining place of Body is the back “seam”, sew buttons to Body at Rnd 34, one on each side for Arms. Sew buttons to Body at Rnd 14, one on each side for Legs. Stuff Body Firmly.
Shape Top of Body
Rnd 1: Ch 1, working into unworked top of sts from Rnd 35 inside of Body, (sc in next 8 sc, sc2tog) around, join with sl st to beg sc – 54 sc.
Rnd 2: Ch 1, sc in first 7 sc, sc2tog, (sc in next 7 sc, sc2tog) around, join with sl st to beg sc – 48 sc.
Rnd 3: Ch 1, sc in first 6 sc, sc2tog, (sc in next 6 sc, sc2tog) around, join with sl st to beg sc – 42 sc.
Switch to CC2.
Rnd 4: Working through blo, ch 1, sc in first 5 sc, sc2tog, (sc in next 5 sc, sc2tog) around, join with sl st to beg sc – 36 sc.
Stuff Body again.
Rnd 5: Ch 1, sc in first 4 sc, sc2tog, (sc in next 4 sc, sc2tog) around, join with sl st to beg sc – 30 sc.
Rnd 6: Ch 1, sc in first 3 sc, sc2tog, (sc in next 3 sc, sc2tog) around, join with sl st to beg sc – 24 sc.
Rnd 7: Ch 1, sc in first 2 sc, sc2tog, (sc in next 2 sc, sc2tog) around, join with sl st to beg sc – 18 sc.
Rnd 8: Ch 1, sc in first sc, sc2tog, (sc in next sc, sc2tog) around, join with sl st to beg sc – 12 sc.
Rnd 9: Ch 1, (sc2tog) around – 6 sts.
Break yarn leaving 6” tail. Weave in and out of final rnd. Pull taut, weave end to inside of Body.
Head
With MC, begin with adjustable ring.
Rnd 1: Work 6 sc into ring, join with sl st to beg sc – 6 sc.
Rnd 2: Ch 1, 2 sc into each sc around, join with sl st to beg sc – 12 sc.
Rnd 3: Ch 1, sc in first sc, 2 sc in next sc, (sc in next sc, 2 sc in next sc) around, join with sl st to beg sc – 18 sc.
Rnd 4: Ch 1, sc in first 2 sc, 2 sc in next sc, (sc in next 2 sc, 2 sc in next sc) around, join with sl st to beg sc – 24 sc.
Rnd 5: Ch 1, sc in first 3 sc, 2 sc in next sc, (sc in next 3 sc, 2 sc in next sc) around, join with sl st to beg sc – 30 sc.
Rnd 6: Ch 1, sc in first 4 sc, 2 sc in next sc, (sc in next 4 sc, 2 sc in next sc) around, join with sl st to beg sc – 36 sc.
Rnd 7: Ch 1, sc in first 5 sc, 2 sc in next sc, (sc in next 5 sc, 2 sc in next sc) around, join with sl st to beg sc – 42 sc.
Rnd 8: Ch 1, sc in first 6 sc, 2 sc in next sc, (sc in next 6 sc, 2 sc in next sc) around, join with sl st to beg sc – 48 sc.
Rnd 9: Ch 1, sc in first 7 sc, 2 sc in next sc, (sc in next 7 sc, 2 sc in next sc) around, join with sl st to beg sc – 54 sc.
Rnd 10: Ch 1, sc in first 8 sc, 2 sc in next sc, (sc in next 8 sc, 2 sc in next sc) around, join with sl st to beg sc – 60 sc.
Rnds 11-22: Ch 1, sc in each sc around, join with sl st to beg sc.
Rnd 23: Ch 1, fpsc around each sc around, join with sl st to beg sc.
Rnd 24: Ch 1, sc in each sc around, join with sl st to beg sc.
Note: Rnds 23 and 24 form zipper facing.
Shape Bottom of Head
Work as for Shape Top of Body section.
Hair
Cut 10 pieces each of CC1, CC2, and CC3 that are 38” long. Attach each of the 30 pieces like fringe to the Top of Head in the last few rounds at crown of head as follows: fold piece of yarn in half to 19”, insert hook into a stitch from Top of Head, grab piece of folded yarn in the center and pull through forming a loop, pull loose ends of strand through loop and pull taut. Each strand is about 9” after this step. After all 30 strands are attach, form twisted fringe as follows: take 2 of the 4 strands from each fringe and twist clockwise, repeat for the other 2 strands. Then allow the 2 twisted strands to twist counter-clockwise around each other. Tie the end in an overhand knot. Alternatively, a special fringe twist can be used to twist the fringe.
Mouth
Pin lower zipper tape to Body behind zipper facing, centered in front. Sew into place using small stitches. Pin upper zipper tape to Head behind zipper facing, centered in front. Sew into place using small stitches. Sew remaining edges of Head and Body together using MC and mattress stitch.
Arms
With MC, begin with adjustable ring.
Rnd 1: Work 6 sc into ring, join with sl st to beg sc – 6 sc.
Rnd 2: Ch 1, 2 sc into each sc around, join with sl st to beg sc – 12 sc.
Rnd 3: Ch 1, sc in first sc, 2 sc in next sc, (sc in next sc, 2 sc in next sc) around, join with sl st to beg sc – 18 sc.
Rnd 4: Ch 1, sc in first 2 sc, 2 sc in next sc, (sc in next 2 sc, 2 sc in next sc) around, join with sl st to beg sc – 24 sc.
Rnds 5-7: Ch 1, sc in each sc around, join with sl st to beg sc.
Rnd 8: Ch 1, sc in first 4 sc, sc2tog, (sc in next 4 sc, sc2tog) 3 times, join with sl st to beg sc – 20 sc.
Rnd 9: Ch 1, sc in first 3 sc, sc2tog, (sc in next 3 sc, sc2tog) 3 times, join with sl st to beg sc using CC1 – 16 sc.
Rnd 10: With CC1, sc in blo of each sc around, join with sl st to beg sc.
Rnd 11: With CC2, sc in blo of each sc around, join with sl st to beg sc.
Rnd 12: With CC3, sc in blo of each sc around, join with sl st to beg sc.
Rnd 13: With CC2, sc in blo of each sc around, join with sl st to beg sc.
Stuff Arm. Stuff lower MC portion of Arm firmly, and striped part lightly. Cont to stuff Arm every couple of inches.
Rep Rnds 10-13, 5 more times, then rep Rnds 10-11 once more.
Stuff Arm one final time.
Button Tab
Break CC1 and CC3, cont with CC2 only. Fold Rnd 13 in half so that the joining seam is at the side.
Row 1: [Sc2tog (next st tog with the st behind it)] 8 times, turn – 8 sc. Arm is now closed.
Row 2: Sc in each sc across, turn.
Row 3: Sc in first sc, sc2tog, ch 2, sk next 2 sc (buttonhole), sc2tog, sc in last sc, turn – 4 sc; ch-2 sp.
Row 4: Sc in first 2 sc, sc in each of next 2 chs, sc in last 2 sc, turn.
Row 5: Sk first sc, sc in next 3 sc, sk next sc, sl st in last sc.
Fasten off.
Legs
With MC, begin with adjustable ring.
Rnd 1: Work 6 sc into ring, join with sl st to beg sc – 6 sc.
Rnd 2: Ch 1, 2 sc into each sc around, join with sl st to beg sc – 12 sc.
Rnd 3: Ch 1, sc in first sc, 2 sc in next sc, (sc in next sc, 2 sc in next sc) around, join with sl st to beg sc – 18 sc.
Rnd 4: Ch 1, sc in first 2 sc, 2 sc in next sc, (sc in next 2 sc, 2 sc in next sc) around, join with sl st to beg sc – 24 sc.
Rnds 5-7: Ch 1, sc in each sc around, join with sl st to beg sc.
Rnd 8: Ch 1, sc in first 4 sc, sc2tog, (sc in next 4 sc, sc2tog) 3 times, join with sl st to beg sc – 20 sc.
Rnd 9: Ch 1, sc in first 3 sc, sc2tog, (sc in next 3 sc, sc2tog) 3 times, join with sl st to beg sc using CC1 – 16 sc.
Rnd 10: With CC1, sc in blo of each sc around, join with sl st to beg sc.
Rnd 11: With CC2, sc in blo of each sc around, join with sl st to beg sc.
Rnd 12: With CC3, sc in blo of each sc around, join with sl st to beg sc.
Rnd 13: With CC2, sc in blo of each sc around, join with sl st to beg sc.
Stuff Leg. Stuff lower MC portion of Leg firmly, and striped part lightly. Cont to stuff Leg every couple of inches.
Rep Rnds 10-13 once, then rep Rnds 10-11, once more.
Stuff Leg one final time.
Button Tab
Work as for Arms Button Tab.
Finishing
Eyes
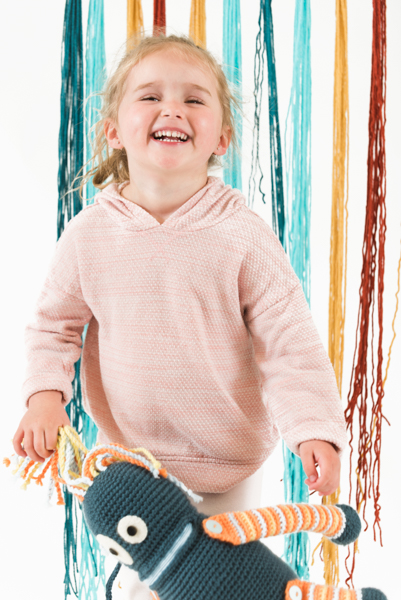
Out of white felt, cut a circle with a 1¼” diameter for Left Eye, and an oval that is 1¼” wide x 2¼” tall. Sew to Head, using photos as a guide. Out of white felt, cut 2 circles that are 3/8” in diameter. Sew or glue to white pieces for pupils.
Hair Tie
With MC, ch 80.
Row 1: Sl st in bottom bump of second ch from hook and in each ch across. Fasten off.
Tack to Head just at the back seam just below lower row of hair. Tie in a bow around fringe hair.
Weave in ends. 