


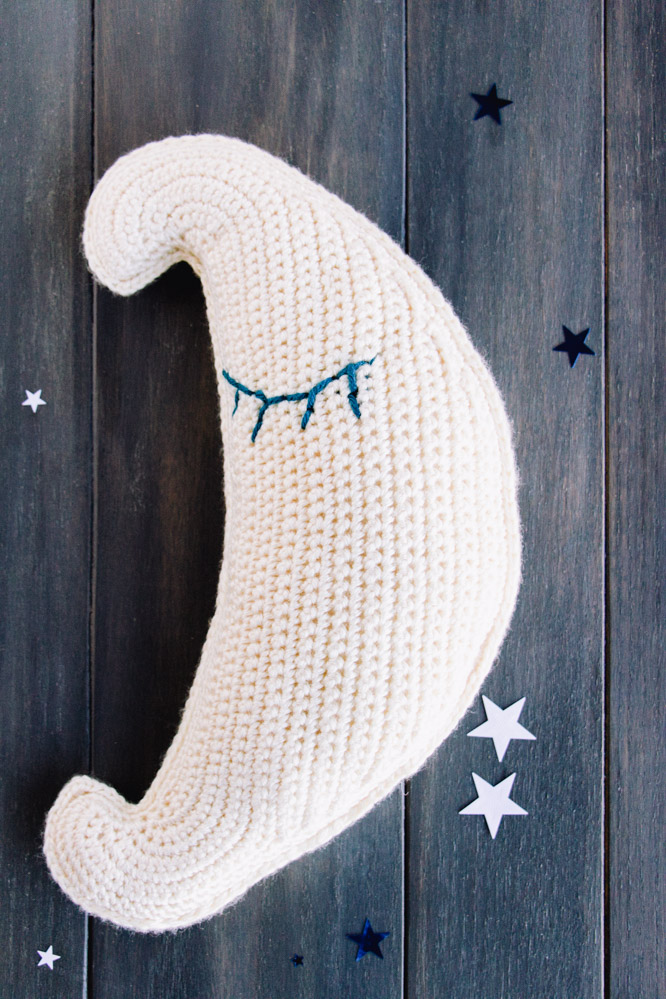
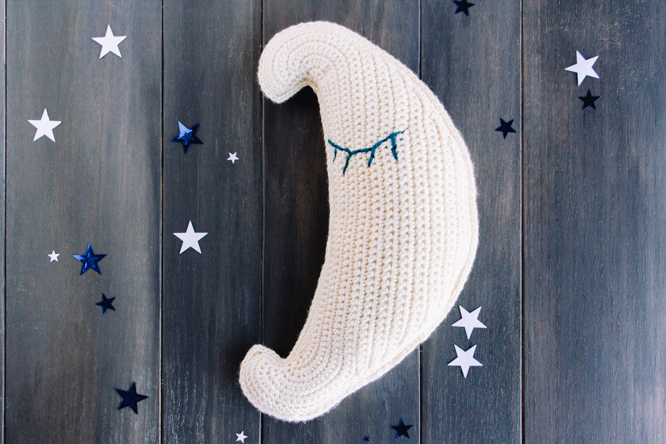
Catch some z’s during your next trip with this waxing crescent moon. This cute pillow can serve as décor in a nursery or as a little neck pillow in the car.
Skill Level: Easy
Size: Approximately 14” tall x 5” wide before stuffing.
Gauge: 20 sts = 4” [10 cm].
Exact gauge is not critical for this project. Stitches should be small so fiber filling doesn’t show.
Materials
 Yarn: Red Heart Soft (100% Acrylic; 256 yards [234 meters]/141 grams): 4601 Off White (CA, 1 ball), 9518 Teal (CB, small amount)
Hooks: Size US F-5 (3.75 mm) crochet hook
Notions: Tapestry needle, fiber filling
Pattern Notes
This pillow is made with simple increases, seaming, and embroidered details.
Pattern
Back Panel
With CA and beginning at center, ch 46.
Row 1: Turn, sk 1 ch, sc in next 45 ch. (45 sts)
Row 2: Turn, ch 1, 2 sc in each of first 3 sts, sc in each st across to last 3 sts, 2 sc in each of last 3 sts. (51 sts)
Row 3: Rep Row 2. (57 sts)
Row 4: Rep Row 2. (63 sts)
Row 5: Rep Row 2. (69 sts)
Row 6: Rep Row 2. (75 sts)
Row 7: Rep Row 2. (81 sts)
Row 8: Rep Row 2. (87 sts)
Row 9: Rep Row 2. (93 sts)
Row 10: Turn, ch 1, sc in first 68 sts, sl st in next st, sk 24 sts. (69 sts)
Row 11: Turn, sl st in first st, sc in next 45 sts, sl st in next st, sk 22 sts. (47 sts)
Row 12: Turn, sl st in each of first 2 sts, sc in next 43 sts, sl st in next st, sk next st. (46 sts)
Row 13: Turn, sl st in each of first 2 sts, sc in next 42 sts, sl st in next st, sk next st. (45 sts)
Row 14: Turn, sl st in each of first 2 sts, sc in next 41 sts, sl st in next st, sk next st. (44 sts)
Row 15: Turn, sl st in each of first 3 sts, sc in next 38 sts, sl st in next st, sk 2 sts. (42 sts)
Row 16: Turn, sl st in each of first 3 sts, sc in next 34 sts, sl st in next st, sk 3 sts. (38 sts)
Row 17: Turn, sl st in each of first 3 sts, sc in next 31 sts, sl st in next st, sk 3 sts. (35 sts)
Row 18: Turn, sl st in each of first 3 sts, sc in next 28 sts, sl st in next st, sk 3 sts. (32 sts)
Row 19: Turn, sl st in each of first 3 sts, sc in next 25 sts, sl st in next st, sk 3 sts. (29 sts)
Row 20: Turn, sl st in each of first 3 sts, sc in next 21 sts, sl st in next 2 sts, sk 3 sts. (26 sts)
Row 21: Turn, sl st in each of first 3 sts, sc in next 18 sts, sl st in next 2 sts, sk 3 sts. (23 sts)
Row 22: Turn, sl st in each of first 3 sts, sc in next 15 sts, sl st in next 2 sts, sk 3 sts. (20 sts)
Edging
Rnd 1: Turn, sc in first 20 sts, turn to work along side of rows, [sc in side of next row, sc in next 3 sts across row] 3 times, [sc in side of next row, sc in next st across row] twice, sc in side of next row, sc in next 22 sts across row, turn to work along shaped edges, sc in side of each of next 5 rows, [sc2tog in side of next 2 rows] twice, sc in side of next row, turn to work along unworked side of foundation chain. Sc in next 45 sts across row, turn to work along shaped edges, sc in side of next row, [sc2tog in side of next 2 rows] twice, sc in side of next 5 rows, turn to work along top rows, sc in next 23 sts, [sc in side of next row, sc in next 3 sts across row] 4 times, place marker.
Rnd 2: Sc in each st around to marker, move up marker, sl st to join.
Fasten off.
Front Panel
Rep as for Back Panel but do not fasten off.
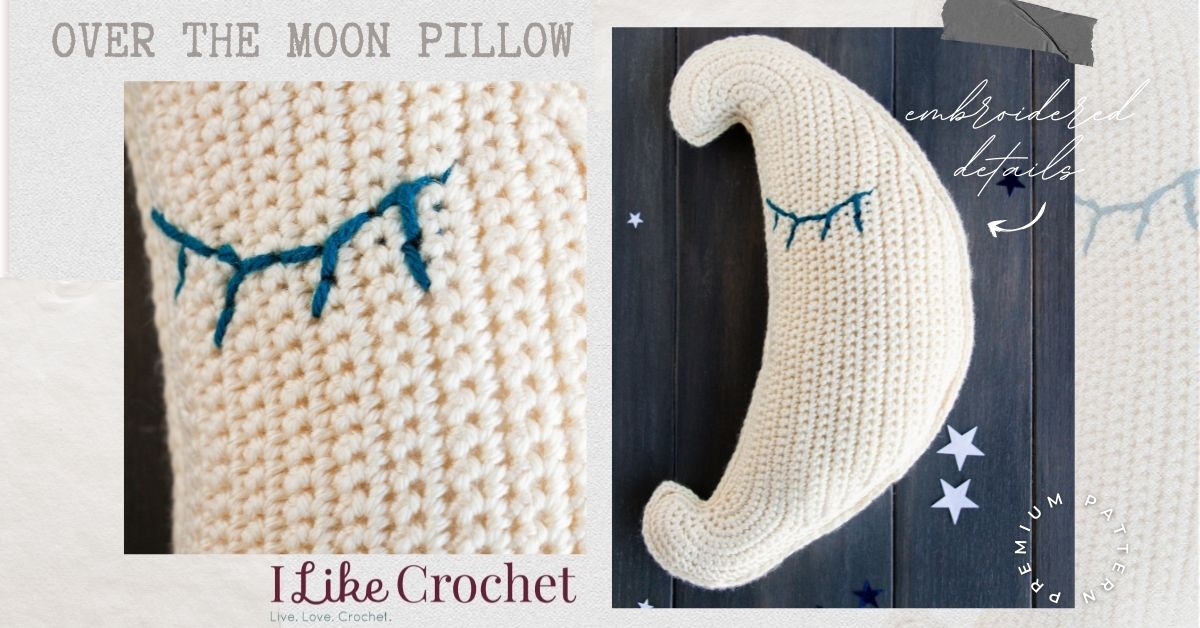
Sleepy Eye with Eyelashes
Thread yarn needle with CB. Embroider sleepy eye with eyelashes with backstitch on Front Panel.
Fasten off and weave in ends on wrong side of Front Panel.
Finishing
Assembly
Place Front Panel right side up on top of Back Panel so stitch markers are in same position. Lining up stitches and joining by working through both layers, sc in next 58 sts, 3 sc in corner point, sc in next 8 sts around the edge, stuff corner with fiber filling, sc in next 53 sts, 3 sc in corner point, sc in next 10 stitches, stuff corner with fiber filling, sc in next 24 sts, continuing to stuff as you seam the project together every few rows. Join with sl st to first st.
Fasten off.
With yarn needle, weave in ends on inside of pillow.
Hi on the rows that at the place it SC in next number of stitches, slip stitch in next stitch skip 3 . Do you slip stitch to the end of the row.
Hello Barbara! I’ve reached out to the designer for advice and she or I will reply as soon as possible. Thanks! – Nicola, Editor
If you are asking about Rows in the Back Panel, you will only crochet into the stitches listed. For example, Row 10 of the Back Panel reads: “Turn, ch 1, sc in first 68 sts, sl st in next st, sk 24 sts. (69 sts).” What this means is that you will work 1 single crochet into each of the first 68 stitches. Then you will work 1 slip stitch into the next stitch. Then you will skip (do not crochet into) the next 24 stitches. In other words, you will only crochet into the stitches that the pattern directs you to crochet into (by working 68 sc and 1 sl st). Hope this helps. – Nicola, Editor