


What better stitch to use for a coffee mug cozy than the bean stitch? Soft, puffy and complete with a buttoned closure, this mug cozy puts the “fun” in functional.
Skill Level: Easy
Size: 3.5” / [9 cm] height x 8.5” / [21.5 cm] length (when open)
Gauge: 3 sc = 0.75” / [2 cm]
Materials
Yarn: Garnstudio DROPS Paris (100% Cotton; 82 yards [75 meters]/50 grams): 65 (A, 1 ball), 59 (B, 1 ball), 62 (C, 1 ball), 66 (D, 1 ball)
Hook: US size 7 (4.5 mm)
Notions: Tapestry needle, three 0.6” / [1.5 cm] wooden buttons, stitch marker
Special Stitches
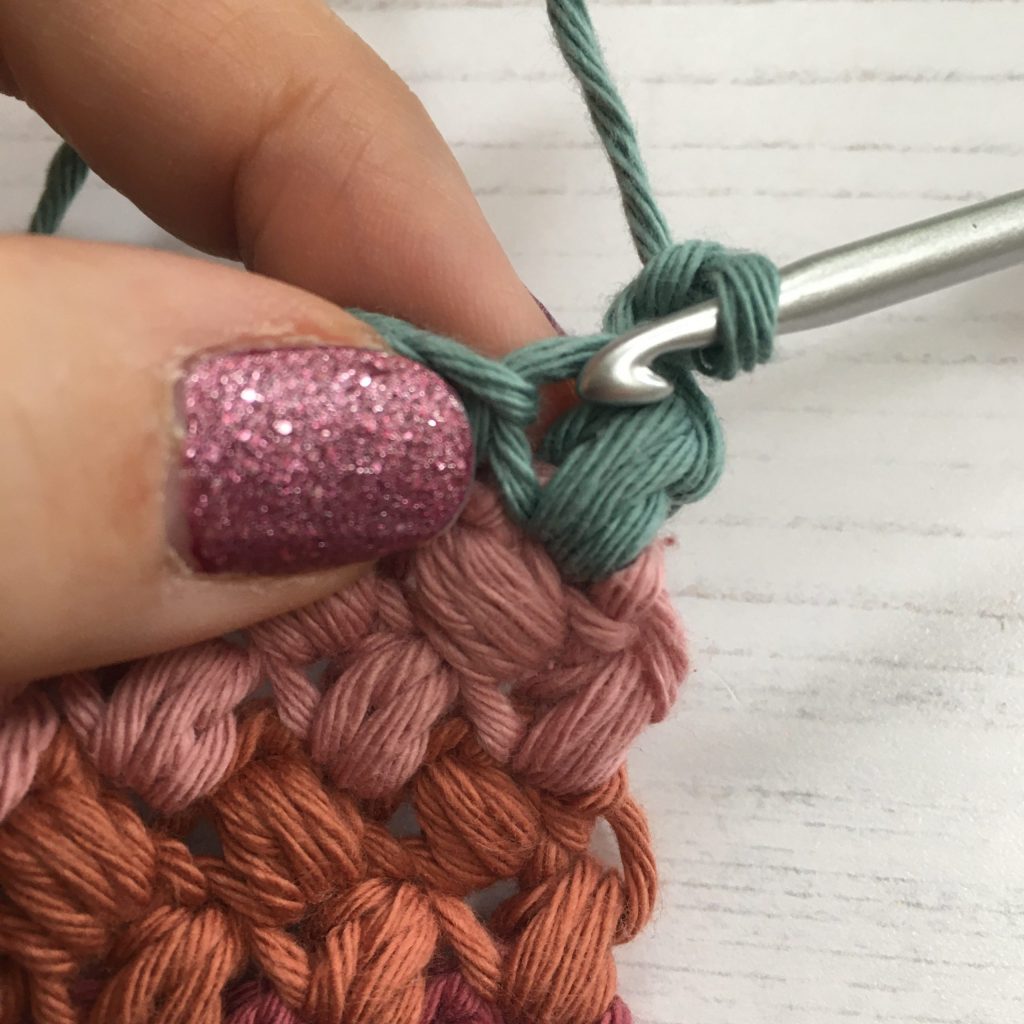
When doing a bean stitch, it’s important to not yo when starting the stitch as that’s what makes the ‘beans’ lean to one side.
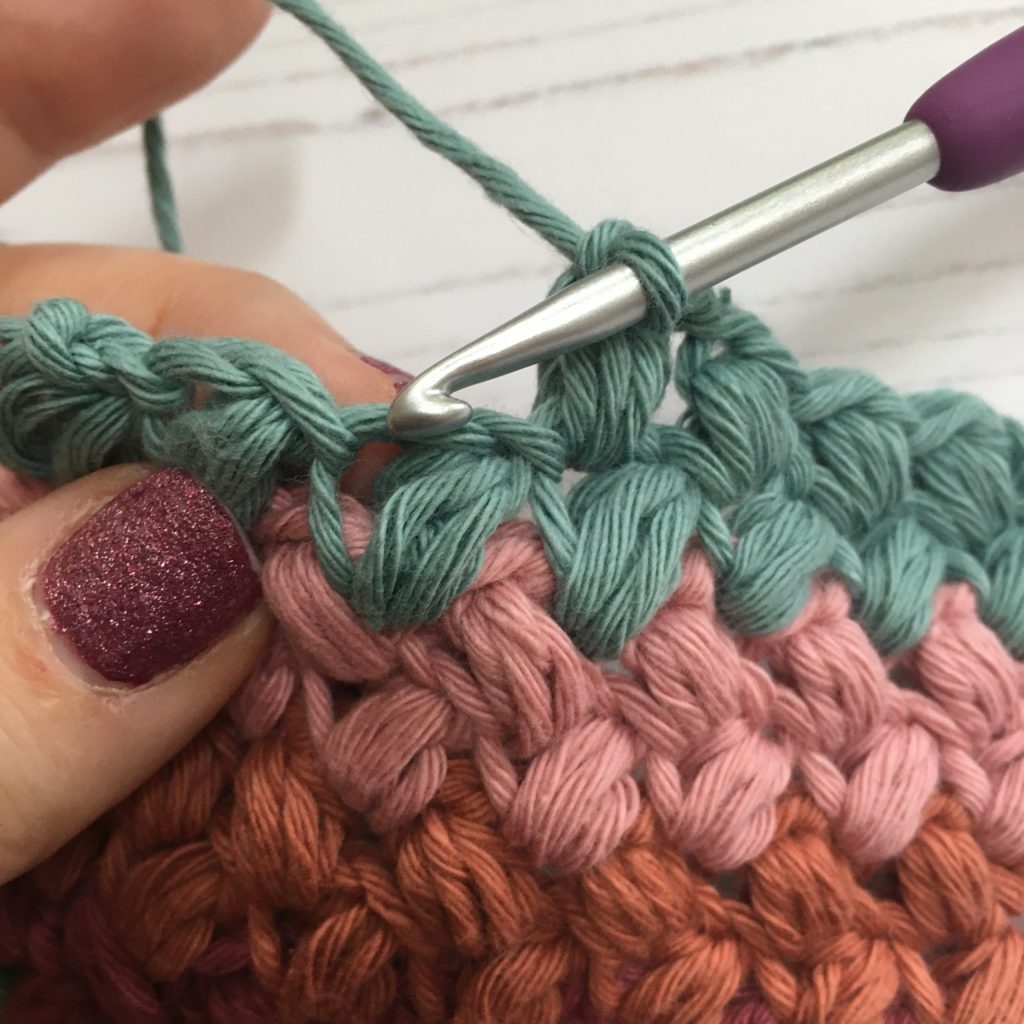
Bean Stitch 1 (BS1): Ch 1, insert hook in st, pull up a lp the size of a ch 1 (2 lps on hook), yo, pull up a lp, insert hook in same st, yo pull up a lp (4 lps on hook), yo, pull up a lp, insert hook in same st, yo pull up a lp (6 lps on hook), yo and pull through all lps on hook, ch1 to secure the st.
Bean Stitch 2 (BS2): Work the same as Bean Stitch 1 except start with a ch 2 and pull up the lps the size of the ch 2.
Placement of the stitches
You should work your ‘bean’ into the bean of the previous row;
Pattern Notes
Ch 1 and ch 2 at the start of a row does not counts as a st.
Pattern
With A, ch 14.
Row 1: Sc in 2nd ch from hook, sc in each st across until end, turn. (13 sts)
Rows 2-3: Ch 1, sc in each st across until end, turn. (13 sts)
Row 4: Fasten off A, rejoin B to top of last st, ch 1, [BS1, sk next st] 3 times, [BS2, sk next st] 4 times, turn. (7 beans made)
Tip: Add a stitch marker on the beg of Row 4 to help show which side the smaller beans (BS1) should be.
Row 5: Ch 2, [BS2, sk next st] 4 times, [BS1, sk next st] 3 times, turn.
Rows 6-7: Fasten off B, rejoin C to top of last st, ch 1, rep Rows 4-5.
Fasten off C, rejoin D to top of last st.
Rows 8-9: Ch 1, rep Rows 4-5.
Fasten off D, rejoin A to top of last st.
Rows 10-11: Ch 1, rep Rows 4-5.
Fasten off A, rejoin B to top of last st.
Rows 12-13: Ch 1, rep Rows 4-5.
Fasten off B, rejoin C to top of last st.
Rows 14-15: Ch 1, rep Rows 4-5.
Fasten off C, rejoin D to top of last st.
Rows 16-17: Ch 1, rep Rows 3 & 4
Fasten off D, rejoin A to top of last st.
Rows 18-19: Ch 1, rep Rows 4-5.
Fasten off A, rejoin B to top of last st.
Rows 20-21: Ch 1, rep Rows 4-5.
Fasten off B, rejoin C to top of last st.
Rows 22-23: Ch 1, rep Rows 4-5.
Fasten off C, rejoin D to top of last st.
Row 24: Ch 1, sc in each st along (including skipped sps) across until end, turn. (13 sts)
Row 25: Ch 1, sc in the first 2 sts, [ch 1, sk next st, sc in the next 3 sts] 2 times, ch 1, sk next st, sc in the last 2 sts, turn. (3 button holes made)
Row 26: Ch 1, sc in each st along (including ch-1 sps) across until end, turn. (13 sts)
Fasten off.
Finishing
Weave in ends.
Using 2 plied strands of yarn A, line up the button holes with the place the buttons need to be on row 2 and sew button into place.
I’m not understanding the bean stitch 2. Is it ch2 between the stitches
I bought my stuff to learn I think I have added I’m lost I can’t do it.i feel terrible cause I can’t figure it out…
What a cute idea
I LOVE CRAFTS AND I WOULD LIKE TO GUIVE MY FRIENDS SOMETHING LIKE THAT
How do I like or favorite patterns?
Hello! This is currently a function we are working on implementing in the near future. In the meantime, we recommend using your web browser’s book mark tool or Pinterest for saving your favorite patterns. Hope this helps for now! – Nicola
Looks very interesting!!