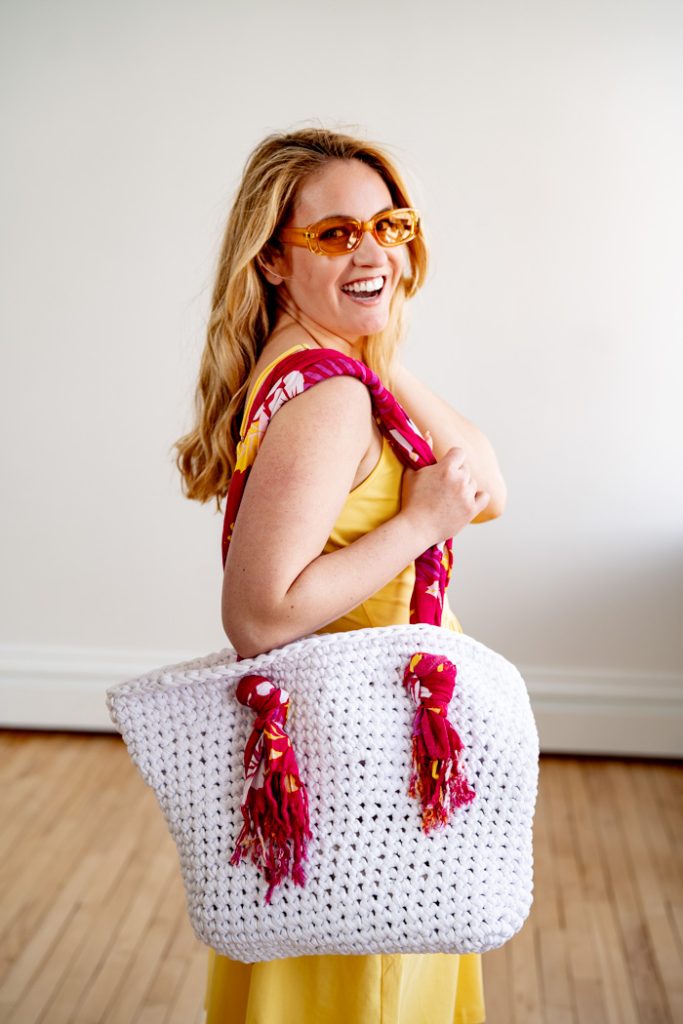
Bring playful texture and upcycled flair to your summer wardrobe with the Rosy Knots Tote. This casual-chic bag is worked in oversized single crochet stitches using sturdy t-shirt yarn, giving it a clean, modern shape with a soft structure. The real showstopper? A vibrant, repurposed scarf tied into stylish handles—adding a rosy pop of color and a carefree, beach-day vibe. Head to the farmers market or lounge seaside. This tote is the perfect blend of function, fashion and feel-good making.
Skill Level: Beginner
Size: 14” tall x 21” wide (measured flat at widest part)
Gauge: 5 sts and 6 rows = 3” [7.62 cm] in sc worked in the round.
Materials
 Yarn: Hoooked Zpagetti (90% high quality recycled cotton/10% other recycled fibers; 131.233 yards [120 meters]/380 grams): White Wedding Dress 2 balls
Hook: US size P/16 (11.5 mm) crochet hook
Notions: Stitch markers (4), tapestry needle; scarf or fabric 41” x 64”, ultra firm stabilizer 9” x 14”, needle and thread (optional)
Abbreviations
M = marker
PM = place marker
Pattern Notes
Pattern is worked from the bottom up in continuous rounds.
Stitch markers in ch-1 spaces are to help identify where bag handles are inserted.
Pattern
Bag
Ch 19.
Rnd 1: Sc in 2nd ch from hook, PM, sc in each st across to last st, 3 sc in last st (PM in 1st and 3rd st), turn to other side of foundation ch, sk the st with the 3 sc, sc in each st across to last st, 2 sc in last st (PM in 1st of these 2 sts), do not join. (38)
Rnd 2: 2 sc in st with M (PM in 2nd st), sc in each st to next M, 2 sc in st with M (PM in 1st st), sc in each st to next M, 2 sc in st with M (PM in 2nd st), sc in each st to next M, 2 sc in st with M (PM in 1st st). (42)
Rnd 3: Sc in 1st st, 2 sc in st with M (PM in 2nd st), sc in each st to next M, 2 sc in st with M (PM in 1st st), sc in each st to next M, 2 sc in st with M (PM in 2nd st), sc in each st to next M, 2 sc in st with M (PM in 1st st). (46)
Rnd 4: Sc in each st around working 2 sc in each st with M. (50)
Rnds 5-10: Sc in each st around.
Rnd 11: Sc in each st around working 2 sc in a st on each side of bag near middle of each wide side. (52)
Rnds 12-13: Sc in each st around.
Rnds 14-18: Sc in each st around working 2 sc in a st on each side of bag staggered in middle of each wide side. (62)
Rnd 19: Sc in each st around working 2 sc in a st on each end of bag. (64)
Rnds 20-22: Sc in each st around working 2 sc in a st on each side of bag near middle of each wide side. (70)
Rnd 23: Sc in each of next 15 sts, ch 1, sk 1 st (PM in st below ch-1), sc in each of next 12 sts, ch 1, sk 1 st, PM, sc in each of next 21 sts, ch 1, sk 1 st, PM, sc in each of next 12 sts, ch 1, sk 1 st, PM, sc in each of next 6 sts. (66 sc, 4 ch-1)
Rnd 24: Sc in each st and ch around. (70)
Rnds 25-26: Sc in each st around.
Sl st in next st. Fasten off.
Finishing
1. Cut fabric into 2 pieces each 20.5” x 64”. Hem all sides of each piece of fabric if needed.
2. Fold bag flat to 14” tall x 21” wide.
3. With 1 piece of fabric, feed one end through one hole (from inside of bag to outside of bag) and tie a knot in fabric outside bag near end of fabric. With other end of same piece of fabric, weave through other hole on same side of bag (from inside of bag to outside of bag) and tie a knot in fabric outside of bag near end of fabric. Repeat for second piece of fabric on other side of bag. For shorter handles, tie a second knot over existing knots.
4. Optional: for firmer base, cut 2 pieces of ultra firm stabilizer to match width and length of rnds 1-4. Sew stabilizer pieces together and place in bottom of bag.


Sac de ville