


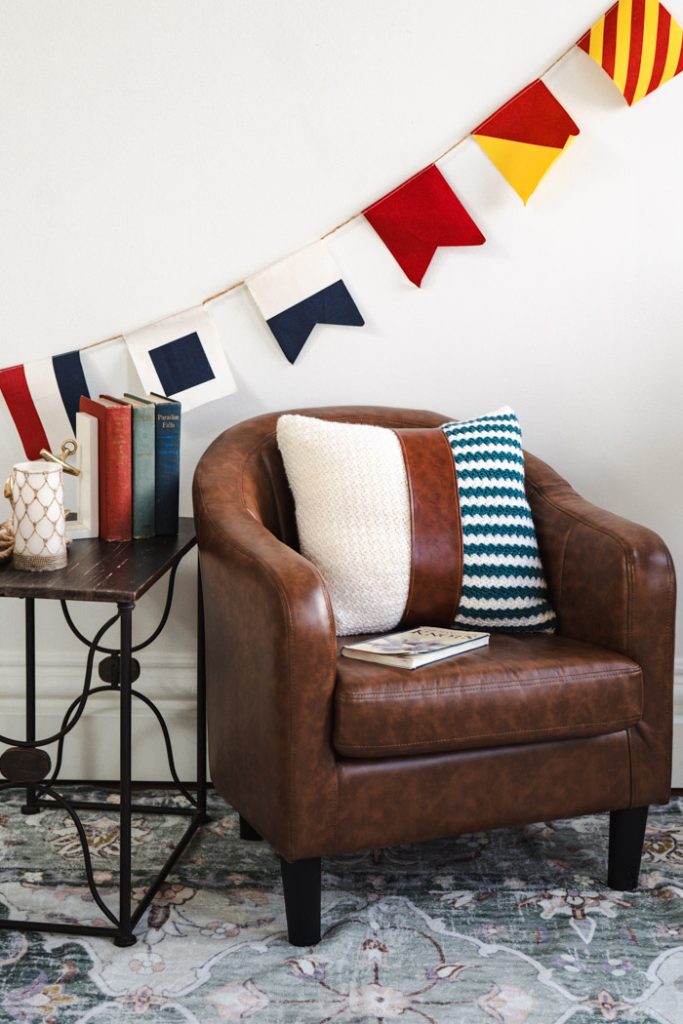
Simplicity meets sophistication in the Leather & Stripe Pillow, where crisp harbor hues blend with cozy textures. Featuring a subtle yet striking stitch pattern that shines in both solid and striped sections, this design brings a fresh take on classic coastal style. The standout leather wrap adds a warm, tactile finish — making this pillow the perfect accent for a welcoming, laid-back space.
Skill Level: Easy
Size: 18” x 18”
Gauge: 16 sts and 14 rows = 4” [10 cm] in Bud Pattern.
Materials
 Yarn: Cascade Yarns Pacific (60% acrylic, 40% superwash merino wool; 213 yards [195 meters]/100 grams): #2 White (MC), 3 skeins; #182 Mallard Blue (CC), 1 skein
Hook/Needles: US size I/9/5.5 crochet hook
Notions: Tapestry needle
Faux Leather: 37” x 4”
Pillow Form: 18” x 18”
Needle & Thread
Sewing Machine & Thread (optional)
Binder Clips (optional): 10
Abbreviations
Dc2tog = double crochet 2 together
Dc2tog prev/next = double crochet 2 together previous and next stitch
Special Stitches
Double crochet 2 together previous next (dc2tog prev/next): yarn over, insert hook in previous stitch, yarn over, draw up a loop, insert hook in next st, yarn over, draw up a loop, yarn over, draw through all 3 loops on hook.
Gauge Pattern:
Ch 25
Row 1: Sc in 2nd ch from hook, *dc in next st, sc in next st, rep from * across to last st, dc in last st, turn. (12 sc, 12 dc)
Row 2: Ch 1, *(sc and dc) in next st, sk 1 st, rep from * across to last 2 sts, sc in next st, dc2tog prev/next (see Special Stitches), turn. (12 sc, 11 dc, 1 dc2tog prev/next)
Rows 3-8: Rep row 2.
Pattern Notes
This pattern is worked in 2 flat panels in rows.
Do not cut yarn at color change. Chain 1 in new color at beginning of row dropping old color. Pick up old color when needed for the next stripe. This will leave a long tail along the edge which will later be covered by the faux leather fabric.
Finished crochet piece will be 17” x 17” before inserting pillow form. This gives a nice snug fit so crochet fabric doesn’t sag.
Pattern
Solid Panel
With MC, ch 65.
Row 1: Sc in 2nd ch from hook, *dc in next st, sc in next st, rep from * across to last st, dc in last st, turn. (32 sc, 32 dc)
Row 2: Ch 1, *(sc and dc) in next st, sk 1 st, rep from * across to last 2 sts, sc in next st, dc2tog prev/next (see Special Stitches), turn. (32 sc, 31 dc, 1 dc2tog prev/next)
Rows 3-54: Rep row 2.
Fasten off. Weave in ends.
Stripe Panel
Repeat as for Solid panel alternating colors (see Pattern Notes) after every 2 rows.
For example:
Rows 1-2: MC (white)
Rows 3-4: CC (mallard blue)
Rows 5-6: MC
Rows 7-8: CC
Continue alternating colors until you have 27 stripes. First and last stripe will be MC.
Fasten off. Weave in ends.
Joining
- Place panels side by side with solid panel on left and striped panel on right with stripes horizonal. With MC, join A to A (see Assembly Diagram) with whip stitch across.
- With MC, join B to B (see Assembly Diagram) with whip stitch across. This will form a cylinder.
- Fold cylinder flat so the front of the pillow is solid on half and striped on the other half (front and back of pillow will each be half solid and have striped). See finished picture for example of striping.
- With MC, close top of pillow with whip stitch across.
- Insert pillow form into pillow.
- With MC, close bottom of pillow with whip stitch across.
Finishing
- Cut faux leather to 4” x 37” length.
- Bring 4” ends together to form a ring, sew together with ½” seam allowance.
- Fold edge of faux leather under a generous ¼”. Hold in place with binder clips. Hem with straight stitch. Repeat for second edge.
- Place in center of pillow to cover transition where stripes meet solid panels. Tack in place with needle and thread if desired.
Just had total rotatorcuff surgery with biceps muscle involvement 2 was. ago and have to wait only 6 more weeks until I can again crochet.
Think I will try it soon.
Certainly looks beautiful!! Thank you for the pattern.