


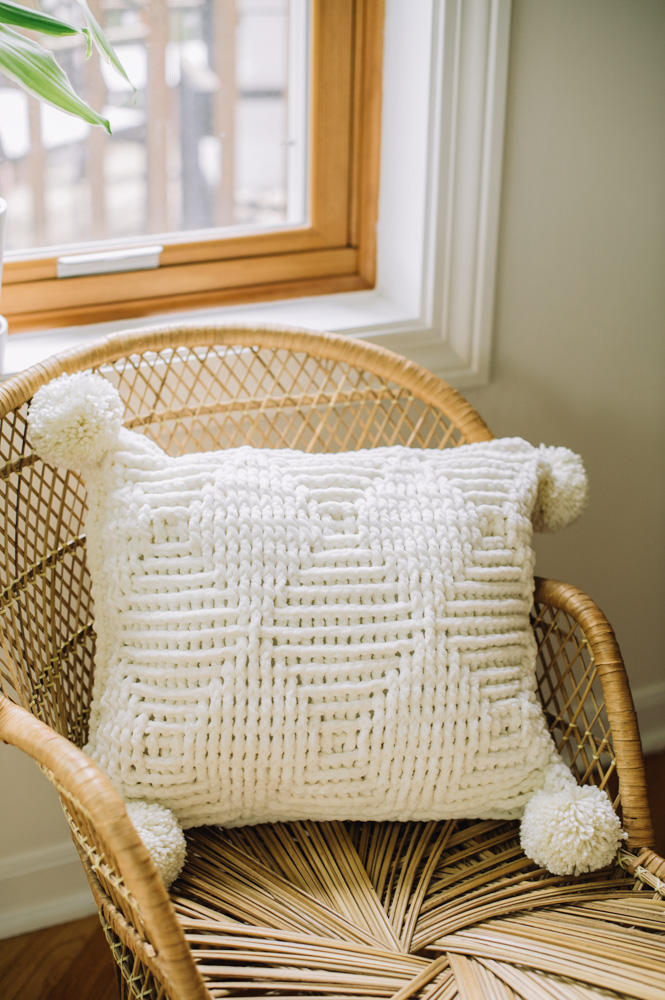
A repeating pattern of double crochet post stitches creates this pillow’s distinctive diamond design. Bulky weight chenille yarn provides strong stitch definition and plush texture, while large pom poms in a complementary worsted-weight yarn add a textural contrast.
Time: Day Project
Skill Level: Intermediate
Size: 17” wide, 15” high
Gauge: 10½ sts and 7 rows = 4” [10 cm] in dc post st pattern
Materials
Yarn:
 For pillow panels: Premier Parfait (100% polyester; 192 yards [175 meters]/100 grams): #30-1 Cream (A, 3 skeins)

For pompoms: Premier Anti Pilling Everyday Worsted (100% acrylic; 180 yards [165 meters]/100 grams): #100-02 Cream (B, 1 skein)
Hook/Needles: US size I/9 (5.5 mm)
Notions: Tapestry needle, polyester fiberfill, 3¾”-diameter pompom maker
Pattern Notes
The pillow front and back are worked separately and then joined together with single crochet.
Pattern
Pillow Panel (make 2)
With A, ch 47.
Row 1 (RS): Dc in 4th ch from hook (skipped 3 ch count as first dc) and in each rem ch across, turn. (45 dc)
Row 2: Ch 2 (counts as hdc throughout), hdc in next st, FPdc around next 13 sts, [BPdc around next st, FPdc around next 13 sts] twice, hdc in next st, hdc in top of tch, turn. (4 hdc, 39 FPdc, 2 BPdc)
Row 3: Ch 2, hdc in next st, FPdc around next st, BPdc around next 11 sts, [FPdc around next 3 sts, BPdc around next 11 sts] twice, FPdc around next st, hdc in next st, hdc in top of tch, turn. (4 hdc, 8 FPdc, 33 BPdc)
Row 4: Ch 2, hdc in next st, BPdc around next 2 sts, FPdc around next 9 sts, [BPdc around next 5 sts, FPdc around next 9 sts] twice, BPdc around next 2 sts, hdc in next st, hdc in top of tch, turn. (4 hdc, 27 FPdc, 14 BPdc)
Row 5: Ch 2, hdc in next st, FPdc around next 3 sts, BPdc around next 7 sts, [FPdc around next 7 sts, BPdc around next 7 sts] twice, FPdc around next 3 sts, hdc in next st, hdc in top of tch, turn. (4 hdc, 20 FPdc, 21 BPdc)
Row 6: Ch 2, hdc in next st, BPdc around next 4 sts, FPdc around next 5 sts, [BPdc around next 9 sts, FPdc around next 5 sts] twice, BPdc around next 4 sts, hdc in next st, hdc in top of tch, turn. (4 hdc, 15 FPdc, 26 BPdc)
Row 7: Ch 2, hdc in next st, FPdc around next 5 sts, BPdc around next 3 sts, [FPdc around next 11 sts, BPdc around next 3 sts,] twice, FPdc around next 5 sts, hdc in next st, hdc in top of tch, turn. (4 hdc, 32 FPdc, 9 BPdc)
Row 8: Ch 2, hdc in next st, BPdc around next 6 sts, FPdc around next st, [BPdc around next 13 sts, FPdc around next st] twice, BPdc around next 6 sts, hdc in next st, hdc in top of tch, turn. (4 hdc, 3 FPdc, 38 BPdc)
Row 9: Rep Row 7.
Row 10: Rep Row 6.
Row 11: Rep Row 5.
Row 12: Rep Row 4.
Row 13: Rep Row 3.
Row 14: Rep Row 2.
Rows 15-26: Rep Rows 3-14.
Fasten off.
Finishing
Place pillow front and back together with RS of front panel and WS of back panel facing out, matching corners. Working through both panels, join A in top right corner, 2 sc in corner, sc in each st across top edge of pillow, 2 sc in corner, rotate work, (sc, ch 1) in each row-end across side, 2 sc in corner, rotate work, sc in each st across bottom edge, 2 sc in corner, stuff pillow, rotate work, (sc, ch 1) in each row-end across side, join with sl st to beg sc. Fasten off. Weave in ends.
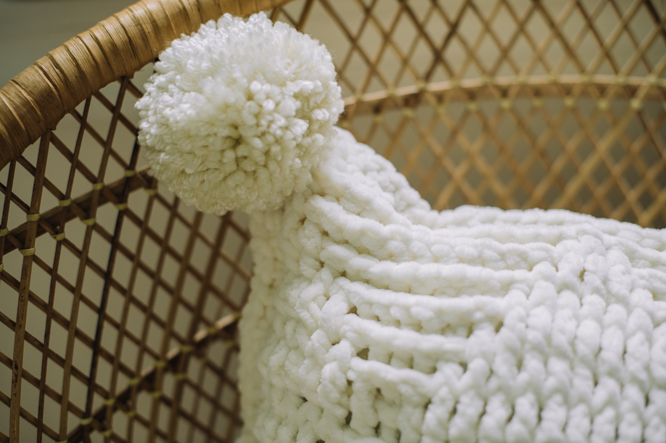
With B, make 4 pompoms following manufacturer’s instructions and fasten one to each corner of the pillow.
Will this work up ok with 2 colors?
Hi Carol! When I designed this pillow I intended for the texture to create the diamond pattern. Making it with two colors is an interesting idea. If you want to give it a try, here’s what I’d suggest: on the RS rows, use color A for the back post stitches and color B for the front post stitches. On the WS rows, use color A for the front post stitches and color B for the back post stitches. Keep in mind that color changes worked with post stitches don’t always create clean transitions. I hope this helps–good luck!
How can I print this pattern?
Hi Gloria! You are welcome to save this pattern by copying and pasting into a word document or by printing the pattern via the printer icon on the left hand side of your screen. Hope this helps! – Nicola, Editor