


Inspired by the traditional mittens that were once knitted for woodsmen in the north of Sweden, these thick, cozy mittens make the perfect unisex gift. If made using 100% non-superwash wool and crocheted to a tight tension, they have the additional benefit of being water resistant.

Skill Level: Easy
Sizes: 1 (2, 3, 4, 5) to fit Child Small (Child Large, Adult Small, Adult Medium, Adult Large)
5.75 (7, 8, 8.5, 9)” circumference x 6 (6.75, 8.75, 9.75, 10.25)” length to fit 5 (6.5, 7.5, 8, 8.5)” hand circumference x 4 (5.25, 6.5, 7.5, 7.75)” length
0.5” (child) and 1” (adult) positive ease hand circumference recommended.
Shown in size Adult Small
Gauge: 12 sts and 18 rows = 4” [10 cm] in split sc st after gentle wet blocking
Materials
Yarn:
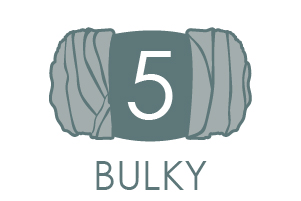 O-Wool Chunky Merino (100% Organic Merino; 146 yards [133 meters]/100 grams): Basalt 1 (1, 2, 2, 2) skeins
Hook: US size H/8 (5.0 mm)
Notions: Removable stitch marker, extra yarn for embroidery, tapestry needle
Special Stitches
Split sc (split single crochet): Insert hook between v-shaped legs of next st, yo, pull up a lp to height of sc, yo, pull through both lps on hook.
Split sc2tog (split single crochet 2 together): (Insert hook between v-shaped legs of next st, yo, pull up a lp to height of sc) twice, yo, pull through all 3 lps on hook.
Pattern Notes
This pattern is worked in the round from the bottom up. A gap is left on the inside left or right of the mitten and the thumb added afterwards.
Straightforward decreases round off the tips of the mitten hand and thumb.
Simple embroidery can be added to the cuff after blocking, if desired.
Unless otherwise stated, ch 1 at the beginning of each round do not count as a stitch.
Unless otherwise stated, join each round with a slipped stitch and pull taught.
Pattern
Right Mitten
Hand
Cuff
 Ch 18 (23, 25, 28, 29).
Rnd 1: Sc in 2nd ch from hook, sc in each st to end, join to work in the rnd with sl st in first sc, taking care not to twist the work. (17 (22, 24, 27, 28) sc)
Next 2 (3, 5, 5, 5) Rnds: Ch 1, split sc in each st around, join with sl st.
Next Rnd: Ch 1, split sc in each st around, do not join with sl st.
Next Rnd: Sl st in BL of first st and PM to mark beg of rnd, sl st in BL of each st around, do not join with sl st. (17 (22, 24, 27, 28) sl st)
Rep last rnd once more.
Rnd 6 (7, 10, 10, 10): Ch 1, sc in BL in each st around 7 (7, 8, 8, 8). (17 (22, 24, 27, 28) sc)
Next 4 (5, 7, 8, 9) Rnds: Ch 1, split sc in each st around.
Thumbhole
Rnd 11 (12, 18, 19, 20): Ch 1, split sc in first st, sk next 3 (4, 5, 6, 6) sts, ch 3 (4, 5, 6, 6), split sc in each st around. (17 (22, 24, 27, 28) sts)
Next Rnd: Ch 1, split sc in next st, sc in next 3 (4, 5, 6, 6) ch, split sc in each st around.
Next 9 (14, 15, 19, 20) Rnds: Ch 1, split sc in each st around, PM in st 9 (11, 12, 14, 15) on last rnd.
Shape Tip
Note: Move marker up each rnd.
Sizes 1 (2, -, -, -) only
Next Rnd (Dec): Ch 1, split sc in next st, split sc2tog, split sc in each st until 2 sts rem before marker, split sc2tog, split sc in marked st, split sc in next st, split sc2tog, split sc in each st until 3 sts rem before end of rnd, split sc2tog, split sc in last st. (13 (18) sts; 4 sts dec’d)
Next Rnd: Ch 1, split sc in each st around.
Rep last 2 rnds once more. (9 (12) sts).
Final Rnd: Ch 1, split sc2tog around, leaving a long tail, cut yarn. Fasten off.
Sizes – (-, 3, 4, 5) only
Next Rnd (Dec): Ch 1, split sc in next st, split sc2tog, split sc in each st until 2 sts rem before marker, split sc2tog, split sc in marked st, split sc in next st, split sc2tog, split sc in each st until 3 sts rem before end of rnd, split sc2tog, split sc in last st. (- (-, 20, 23, 24) sts; 4 sts dec’d)
Next Rnd: Ch 1, split sc in each st around.
Rep last 2 rnds twice more. (- (-, 12, 15, 16) sts)
Final Rnd: Ch 1, split sc2tog around, leaving a long tail, cut yarn. Fasten off.
Thumb
Rnd 1: Attach yarn to bottom left corner of thumbhole and work 1 sc into side, 3 (4, 5, 6, 6) sc into ch sts, 1 sc into side, 3 (4, 5, 6, 6) split sc into skipped sts (8 (10, 12, 14, 14) sc).
Rnd 2: Ch 1, split sc 1 in each st to end.
Rnd 3: Ch 1, split sc2tog, split sc 1 in next 2 (3, 4, 5, 5) sts, split sc2tog, split sc 1 in each st to end (6 (8, 10, 12, 12) sts; 2 sts dec).
Next 2 (3, 4, 5, 6) Rnds: Ch 1, split sc in each st around.
Size 1 only
Final Rnd: Ch 1, split sc in next st, (split sc2tog) around. Leaving a long tail, cut yarn and fasten off.
Size 2 only
Next Rnd: Ch 1, (split sc2tog, split sc in next st) twice, split sc2tog. (5 sts; 3 sts dec’d).
Final Rnd: Ch 1, split sc in next st, (split sc2tog) around, leaving a long tail, cut yarn. Fasten off.
Sizes – (-, 3, 4, 5) only:
Next Rnd: Ch 1, *split sc2tog, split sc in next st; rep from * around. (– (-, 7 (8, 8) sts; – (-, 3 (4, 4) sts dec’d).
Next Rnd: Ch 1, split sc in each st around.
Final Rnd: Ch 1, split sc, (split sc2tog) around, leaving a long tail, cut yarn. Fasten off.
Left Mitten
Work same as Right Mitten to Thumbhole.
Thumbhole
Rnd 11 (12, 18, 19, 20): Ch 1, split sc in each st until 4 (5, 6, 7, 7) sts rem, sk next 3 (4, 5, 6, 6) sts and ch 3 (4, 5, 6, 6), split sc in last st. (17 (22, 24, 27, 28) sts)
Next Rnd: Ch 1, split sc in each st until ch sts, sc in next 3 (4, 5, 6, 6) ch, split sc in last st. (17 (22, 24, 27, 28) sts)
Cont same as Right Mitten.
Thumb
Work same as Right Mitten, starting from bottom right corner of Thumbhole.
Finishing
Using a tapestry needle, thread tail through remaining sts at top of Hand and Thumb. Pull tight to close and weave in tail on the inside.
Weave in any remaining ends.
Hand wash in cold water and dry flat, untwisting and shaping mitten so that the thumb lies flat on the inside, but do not stretch.
Once dry, add embroidery to Cuff if desired.
These mittens are soooo cute!