


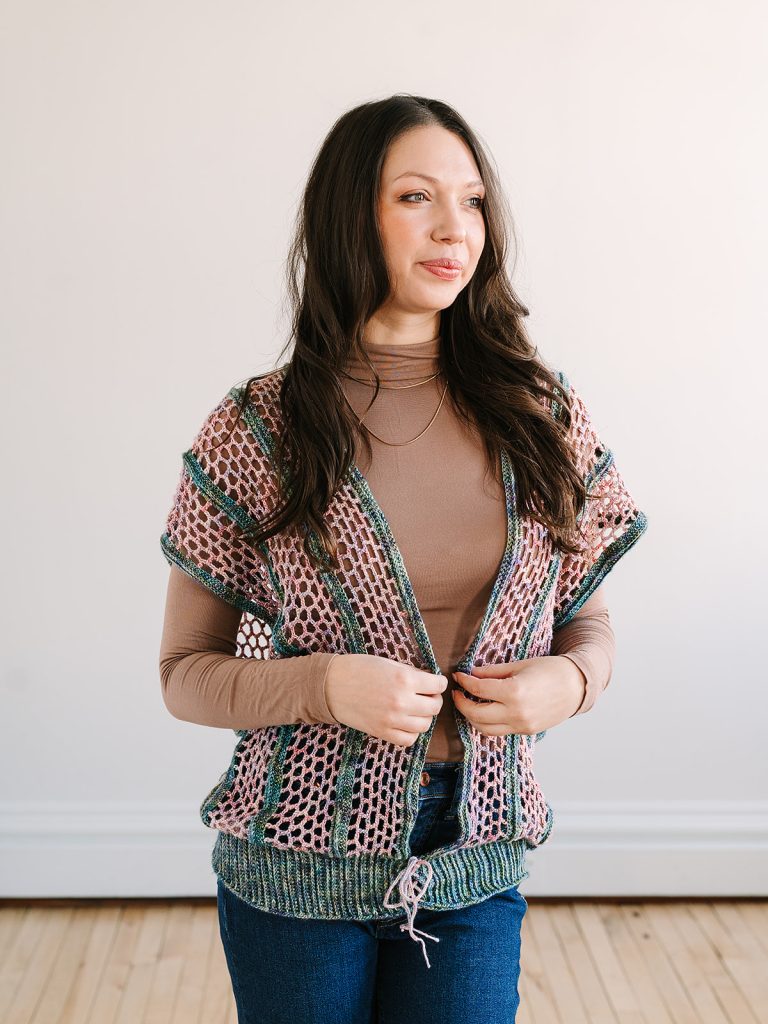
Meet the Twilight Mesh Top, a versatile layering piece for the changing seasons. Inspired by the dusky hues of a cool spring evening, this design features an airy fabric and a flowing silhouette created with two simple rectangles for an easy, enjoyable crochet experience. A cinched waistband gathers the fabric at just the right place, creating a billowing effect that is both flattering and comfortable. Wear it pinned at the front or open for a relaxed look that transitions effortlessly from day to evening.
Time: 40 Hour Project
Skill Level: Beginner
Sizes: Sizes are written as XS (S, M, L, XL) Approximately 74 (78, 82, 86, 86) inches long measured from shoulder to waist.
Gauge: 2 inches = 12 dc, 5.5 inches = 8 rows
Materials
 Yarn: Silky Merino from Malabrigo Yarn, Size 3 Light Weight, 4 oz Skeins of Indiecita, main color (MC) (purple and blues) and Rosalinda, contrasting color (CC) (creamy pink). Indiecita 4 (4, 5, 5, 6), Rosalinda 3 (3, 4, 4, 5) skeins.
Hook: US Size E-4 / 3.5 mm
Notions: Stitch Markers, scissors, small needle for weaving in ends
Pattern Notes
This is a super simple pattern to create and can be easily completed in a single weekend. The honeycomb mesh crochet is easy to create with an off centered mesh pattern. The first mesh space in each row is half the size of the other mesh spaces allowing for the mesh to off-set on each row. The pattern repeat for the two panels that make up the top is an easy to remember eight-row repeat with six rows of the honeycomb mesh crochet and two rows of the double crochet. If you want a more custom fit measure from the top of your waistline to the top of your shoulder and multiply that by 2. Then create a foundation chain to that measurement making sure the foundation chain is a multiple of 4, then add 3 more to the foundation.
Pattern
Top Body
Make 2 rectangles
Foundation Chain: With MC Chain 238 (282, 322, 362, 362) plus 5 chs.
Row 1: Dc in 4th ch from hook (the 4 skipped stitches count as the 1st dc), and each chain across. Turn. (239 (283, 323, 363, 363) dc).
Row 2: Ch 4 (counts as a stitch here and throughout), FPdc in each dc across. (239 (283, 323, 363, 363) FPdc).
Row 3: Change to CC, ch 5 (counts as dc plus ch-1 sp here and throughout), skip 1 dc, dc in next dc, *ch 4, skip the next 3 dc, dc in next dc*, repeat from * to * to end. The first chain space is smaller than the rest to allow for the repeat on row 4. (60 (71, 81, 91, 91) ch-sps, 61 (72, 82, 92, 92) dc).
Row 4: Ch 5, dc in the first ch-4 space, *ch 4, skip the next dc, dc in the next ch-4 space*, repeat from * to * across all ch-4 sps, ch 4, sk ch-1 sp, dc in last st. (60 (71, 81, 91,91) ch-sps).
Row 5 – 8: Repeat row 4
Row 9: Change color to MC, ch 4, *3 dc in ch-4 space, dc in next dc*, repeat from * to * to ch-1 sp, 1 dc in ch-1 sp, dc in last st. (239 (283, 323, 363, 363) dc).
Row 10: Ch 4, FPdc in each dc across (239 (283, 323, 363, 363) FPdc).
Row 11 – 26 (26, 34, 34, 42): Repeat rows 3 through 10. You will have 3 (3, 4, 5) panels total bordered with 2 rows of double crochet.
Waist Band
To make the waist band you will measure your waist where you want the bottom of the top to sit. You will crochet the waist band to the length of your waist measurement.
Foundation Chain: Ch 24
Row 1: Dc in 4th chain from hook, dc in each ch across, turn. (21 dc)
Row 2: Ch 4, bpdc in each dc across, turn. (21 bpdc)
Row 3: Ch 4, fpdc in each dc across, turn. (21 fpdc)
Repeat rows 2 & 3 until the band reaches the length of your waist measurement.
Crochet the Tie
Chain 60 to create the tie.
Alternatively: You could also make the tie out of ribbon or a decorative cord. Using a lucet tool is another great option for creating cording. I used a lucet to create the tie shown in the sample.
Assembly
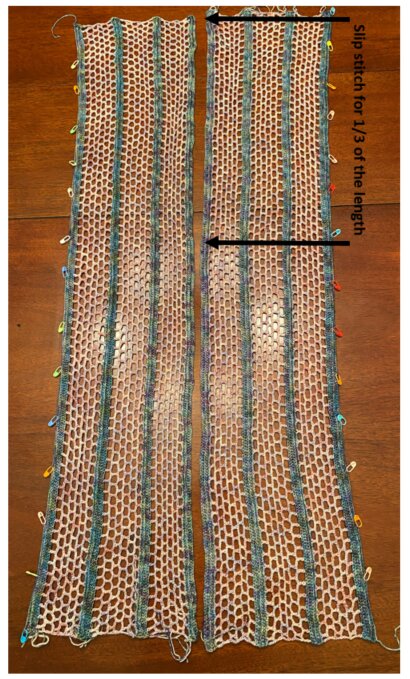
Block the 2 panels prior to assembly.
Lay the two crocheted rectangles side by side. Slip stitch the two rectangles together for ⅓ of the length. The last row of each panel should be slip stitched together. This means you will have to rotate one panel 180 degrees.
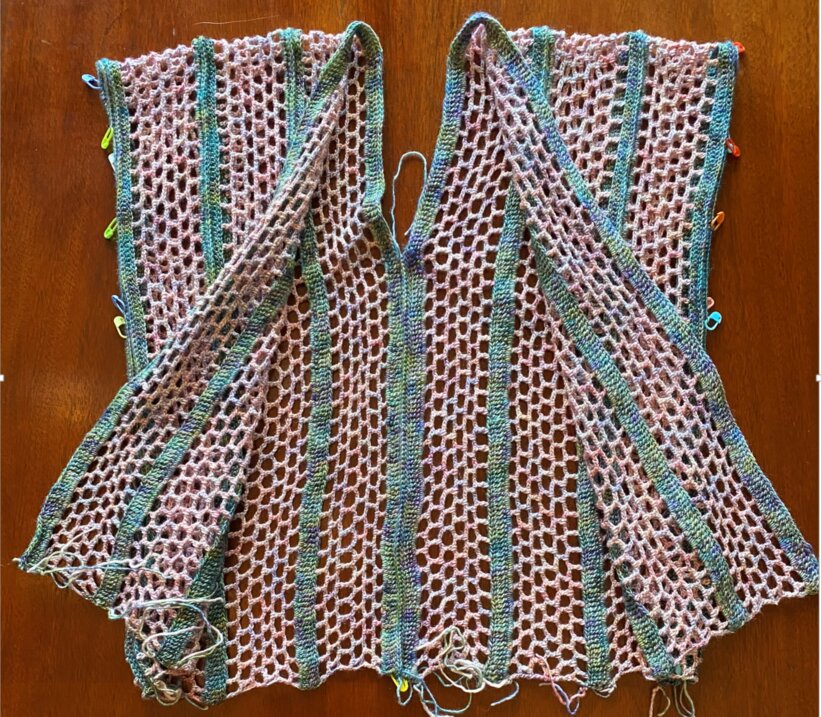
Next, fold the top in half. Slip stitch the two sides together from the bottom for 40 stitches. (This is your side seam under the arm.) Pin the waist band to the bottom of the top aligning the two ends of the waist band with the bottom edge of the front of the top. The ridges on the waist band and top are the right side and should face up. The waist band will be smaller than the bottom of the top so you will need to adjust the top to evenly distribute it over the waist band. Slip stitch the waistband to the bottom edge of the top.

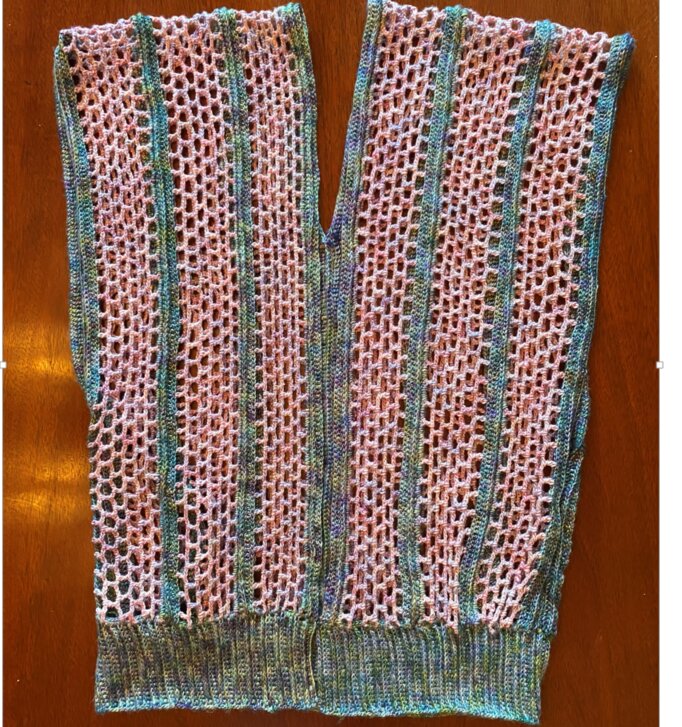
Thread the tie back and forth between the stitches on the front edge of the waist band. Tie in a decorative bow to finish off.
Finishing
Weave in all of your ends and then block your top. Steaming the waist band helps to make it lay flat.