


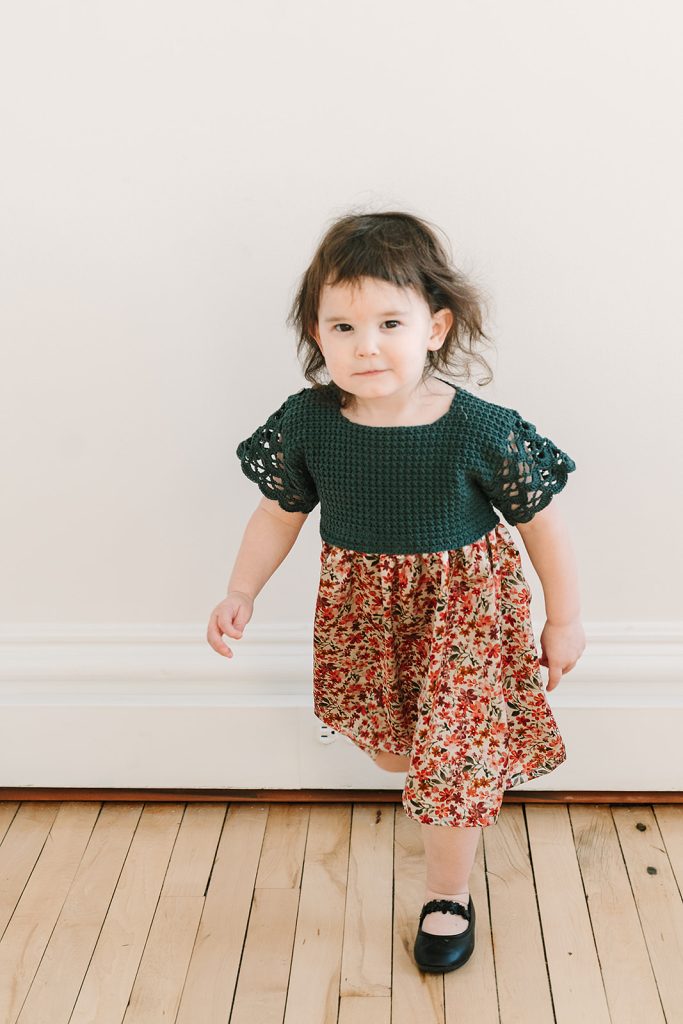
The Child’s Trinity Bloom Dress pairs beautifully with the adult version for a coordinated family look. Available in seven sizes, this dress is perfect for springtime special occasions.
Get ready for your next set of family photos with the Trinity in Bloom Crochet Collection. This coordinated set includes an adult dress, a child’s dress, an adult necktie and a child’s bow tie. Each design is worked in the same yarn and stitch, creating a cohesive matching look. View the complete collection here.
Time: 10-15 hrs
Skill Level: Adventurous Beginner
Sizes: 2 (3, 4, 6) (8, 10, 12) girls, finish garment chest circumference 22 (23, 24, 26) (28, 30, 32)”
Gauge: 24 sts x 16 rows = 4 x 4” in Trinity stitch pattern, with US 4 (2.00 mm) hook
Materials
 Yarn: Brown Sheep Cotton Fine, (80% cotton, 20% wool, 8 oz, 1,000 yards [914 meters] / 1 cone): in color Jaded Mermaid, 1 cone.
Hooks: US 4 (2.00 mm) hook.
Notions: Tapestry needle, tape measure, scissors, 3 small buttons, 0.5 (0.5, 0.5, 0.75) (0.75, 1, 1) yard of satin fabric for the dress skirt, sewing supplies
Stitch Pattern
Trinity Stitch Patt:
Row 1: Ch 1, sc in first st, *sc3tog starting in same st as previous sc, ch 1; rep from * across to last st, sc in last st, turn.
Rep Row 1 for Patt.
Pattern Notes
The bodice of the dress is worked flat in textured Trinity stitch. After sewing up the side and shoulder seams, the sleeves worked top-down, in the round. The fabric skirt is sewn to the bodice using sewing machine.
Pattern
Back
Ch 67 (70, 73, 79) (85, 91, 97), turn.
Foundation Row (RS): Sc in 2nd ch from hook, sc across. (66 (69, 72, 78) (84, 90, 96) sc).
Begin working Trinity Stitch pattern.
Work in Patt until piece measures 7 (7.5, 8, 8.5) (8.5, 9, 9.5)”
Fasten off.
Front
Work as for the Back until piece measures 5 (5.5, 6, 6.5) (6.5, 8, 9)”, ending with WS row.
Began neck shaping as follows:
Left Front
Row 1 (RS): Work in Patt over first 22 (23, 24, 26) (28, 30, 32) sts, ending with sc3tog, turn.
Row 2 (WS): Ch 1, sc3tog, ch 1, work in Trinity Stitch across to last st, sc in last st. (20 (21, 22, 24) (26, 28, 30) sts).
Row 3 (RS): Work in Patt across, ending with sc3tog, turn.
Row 4 (WS): Rep Row 2. (18 (19, 20, 22) (24, 26, 28) sts).
Work even in Patt, until the Front measures 7 (7.5, 8, 8.5) (8.5, 9, 9.5)”.
Fasten off.
Right Front
With RS facing, skip 22 (23, 24, 26) (28, 30, 32) sts after the Left Front for center Neck, join yarn to next st.
Row 1 (RS): Ch 1, sc3tog, ch 1, work in Trinity Stitch across to last st, sc in last st. (21 (22, 23, 25) (27, 29, 31) sts).
Row 2 (WS): Work in Patt across 20 (21, 22, 24) (26, 28, 30) sts, ending with sc3tog, turn. (19 (20, 21, 23) (25, 27, 29) sts).
Row 3 (RS): Ch 1, *sc3tog, ch 1; rep from * across to last st, sc in last st. (18 (19, 20, 22) (24, 26, 28) sts).
Work even in Patt, until the Front measures 7 (7.5, 8, 8.5) (8.5, 9, 9.5)”
Sizes 2 (3, 4, 6) (—, —, —) only
Buttonhole Row: Ch 1, sc 3, *ch 2, sk 2, sc 4; Rep from * once more, ch 2, sk 2, sc across.
Next Row: Ch 1, sc across working 2 sc sts in each ch-2 sp.
All sizes:
Fasten off.
Assembly
Line up the Front and Back pieces together, matching at shoulders and sides. Using a tapestry needle, sew together using a whip stitch the Left shoulder seam and Right shoulder seam for last 3 sizes only. Measure 2” from bottom edge of each side, and place marker. Sew the side seams starting at the bottom edge to the marker using a whip stitch. For smaller sizes, slightly overlap the armhole corner edge of the Right Shoulder and secure together at the end.
Sleeves
With RS facing, join yarn at the underarm.
Set-up Rnd: Ch 1, 64 (72, 80, 88) (88, 96, 104) sc around armhole edge to underarm, sl st to first sc.
Begin working in Lace Patt as follows:
Rnd 1: Ch 1, * sc, ch 3, sk 3, 2 dc in next st, ch 3, sk 3; Rep from * around, sl st to first sc.
Rnd 2: Ch 5, sc in first ch-3, *sk 2 dc, ch 3, sc in next ch-3, ch 5, sk sc, sc in next ch-3; Rep from * around ending with ch 3, sk 2 dc, sc in next ch-3, ch 2, sl st to first ch-5.
Rnd 3: Ch 3, 4 dc in first ch-3, *sk sc, sc in ch-3, sk sc, 9 dc in ch-5; Rep from * around, ending with 5 dc in the last ch-3, sl st to top of first dc.
Rnd 4: Ch 1, sc 2, * ch 5, sk 3 dc, sk sc, sk 3 dc, sc 3; Rep from * around, ending with ch 5, sk 3 dc, sk sc, sk 3 dc, sc 1, sl st to first sc.
Rnd 5: Ch 3, dc, * ch 3, sk sc, sc in ch-5, ch 3, sk sc, 2 dc in next sc; Rep from * around, ending with ch 3, sk sc, sc in ch-5, ch 3, sk sc, sl st to top of ch-3.
Rnd 6: Ch 3, sk dc, * sc in next ch-3, ch 5, sk sc, sc in next ch-3, ch 3, sk 2 dc; Rep from * around, ending with sc in next ch-3, ch 5, sk sc, sc in last ch-3, sl st to first ch-3.
Rnd 7: Ch 1, sc, * sk sc, 9 dc in ch-5, sk sc, sc in ch-3; Rep from * around, ended with sl st to first sc.
Rnd 8: Ch 5, * sk 3 dc, sc in next 3 dc, ch 5, sk 3 dc, sk sc; Rep from * around, ending with ch 2, sl st to first ch-5.
Rep Rnds 1-3 once more.
Fasten off.
Finishing
Weave in the ends. Steam-block the Bodice to open up the lace. Sew the buttons along the Right Shoulder seam opposite the buttonholes.
From the fabric, cut the skirt the width of the fabric by 14 (15, 16, 18) (20, 23, 26)”. With RS together, sew the short sides together to form a tube. Fold ¼” double hem along the bottom edge and sew along the fold to finish the bottom hem. Use a zigzag stitch to finish the top edge of the skirt to prevent fraying. Sew a gathering stitch along the top edge using the largest stitch size on the machine setting. Pull the bobbin threads to gather the fabric to fit the bodice circumference. Position the skirt along the inside edge of the bodice, overlapping approximately ½”, and baste by hand to secure in place. Sew two rows of stitches along the bodice and skirt edges to secure the skirt to the bodice. Remove the basting stitches and trim any loose threads.