


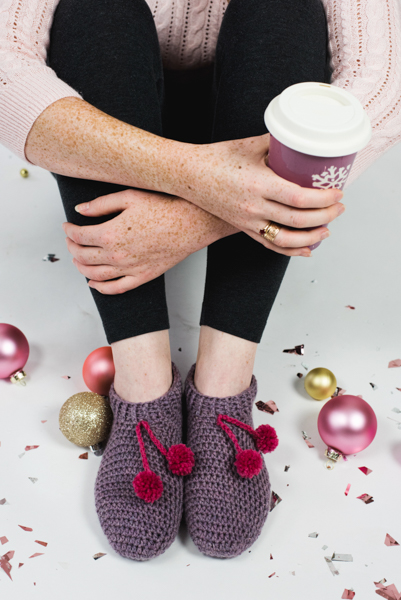
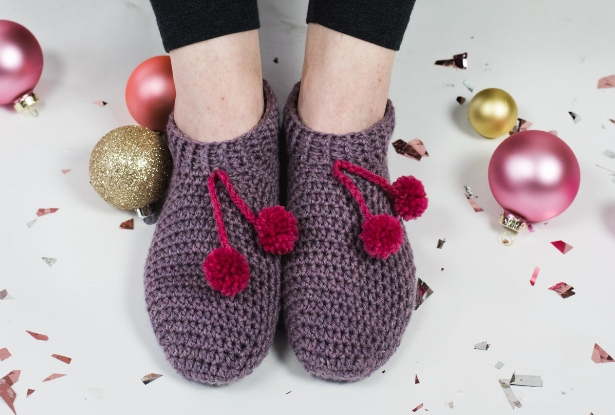
Cozy slippers crocheted in worsted weight 100% superwash wool are a perfect quick gift for the holidays. Each slipper is worked without cutting yarn, leaving just two tails to weave in at the end. A pair of slippers can easily be made from just one skein of worsted weight yarn!
Skill Level: Intermediate
Size: Women’s size 7.5/8”
0.5” negative ease recommended
Gauge: 8 sts and 6 rows = 2” [5 cm] in continuous hdc rnds
Materials
Yarn:
 Berroco Ultra Wool (100% Superwash Wool; 219 yards [200 meters]/100 grams): #33123 Iris (1 ball), (optional) #33148 Peony (about 8 grams for pom pom decoration)

Hook: US size 7 (4.5 mm)
Notions: Lockable stitch markers (4 each in 2 different colors), tapestry needle, (optional) 1” pom-pom maker.
Special Stitches
Single Crochet 2 together (sc2tog): Insert hook in first st, yo, pull up a lp, insert hook in 2nd st, yo, pull up a lp, yo, pull lp through all 3 lps on hook.
Half Double Crochet 2 together (hdc2tog): Yo, insert hook in first st, yo, pull up a lp, insert hook in 2nd st, yo, pull up a lp, yo, pull lp through all 4 lps on hook.
Place Stitch Marker (PM): Insert stitch marker in indicated st or sp.
Pattern Notes
This pattern is worked toe-up in the round, then worked in alternating rows with decreases to create opening for foot and shaping for heel.
Ribbed cuff is worked around the opening in joined rounds and fastened off with a long tail that is used to seam back of heel cup.
You will need 2 colors of stitch markers: one color for marking the toe increases and the second color for marking the end of round. If working 2 at a time, use opposite colors for the 2nd slipper.
Move up st markers in Heel Cup to decrease st just made.
Start of hdc rows uses (sc, ch 1) instead of ch-2 turning ch for first st, there is no turning chain for the sc. When working back in next row and reach beginning of previous hdc row make last st into top of ch-1.
Pattern
Row 1: Ch 8, working in back bar, sc in 2nd ch from hook and each ch back to start. (7 sc)
Rnd 2: Ch 1, turn, sk first st, sc next st, hdc next 4 sts, 4 hdc in next st, continue along bottom of Row 1, sk first st, hdc next 5 sts, 4 hdc next st. PM in st numbers 7, 9, 16 and 18. Last st marker indicates both last st of Rnd and increase point so should be a different color. (1 sc, 17 hdc)
Rnds 3-6: (Hdc in each st until reach marked st, 2 hdc in marked st, move stitch marker up to 2nd st just made) 4 times. (34 hdc at end of Rnd 6)
Rnds 7-18: Hdc in each st around.
Rnd 19: Hdc in next 31 sts, sk next 3 sts, PM in next st.
Note: Work over these 31 sts for Foot Opening and Heel Cup.
Foot Opening and Heel Cup
Row 1: Ch 1, turn, sc in each st to end of row, last sc worked in marked st. (31 sc)
Row 2: Turn, (sc, ch 1) in first st (counts as first hdc throughout, move st marker up to ch 1), hdc in each st to end of row. (31 hdc)
Rows 3-4: Rep Rows 1-2.
Row 5 (Sc Decrease): PM in 8th st from each end of row, ch 1, turn, sc next 7 sts, sc2tog at marked st and next, sc in each st until 1 st rem unworked before next marked st, sc2tog using unworked st and marked st, sc next 7 sts. (27 sc, 2 sc2tog)
Row 6: Turn, (sc, ch 1) in first st (counts as first hdc throughout, move st marker up to ch 1), hdc in each st to end of row.
Rows 7-11: Rep Row 5-6, ending with a Row 5 (count at end of Row 11 is 21 sc, 2 sc2tog)
Row 12 (Hdc Decrease): PM in 8th st in from each end of row, turn, sc in first st, ch 1, hdc in next 6 sts, hdc2tog using marked st and next st, hdc in each st until 1 st rem unworked before marked st, hdc2tog using unworked st and marked st, hdc next 7 sts. (19 hdc, 2 hdc2tog)
Row 13: Rep Row 5. (17 sc, 2 sc2tog)
Row 14: Rep Row 12, sl st to first st of Row. Do NOT fasten off. (15 hdc, 2 hdc2tog)
Note: Hole at back of heel will be sewn shut with ending tail after cuff is finished.
Cuff
Worked in the round continuously around the opening for foot.
Rnd 1: Ch 2, turn to work around opening for foot, work 48 hdc evenly placed around opening, sl st to beginning ch-2 of Rnd. (48 hdc)
Rnds 2-3: Ch 2, (FPhdc next st, BPhdc next st) 23 times, FPhdc next st, BPhdc next st capturing beg ch-2 in st, sl st to top of beginning ch-2 of Rnd. (1 ch-2, 24 FPhdc, 24 BPhdc)
Rnd 4: Ch 2, (FPhdc next st, BPhdc next st) 23 times, FPhdc next st, BPhdc next st capturing beg ch-2 in st, sl st to first FPhdc of Rnd. (24 FPhdc, 24 BPhdc)
Fasten off leaving a 10” tail.
Finishing
Using 10” ending tail from Cuff, weave down wrong side of last BPhdc column until reach heel opening, then use tail to whip stitch tops of Row 14 hdc to close opening on back of heel. Weave tail in to secure and cut off excess yarn.
Weave in beginning tail at toe.
Pom-Pom Tassel (optional)
Make 2 chains of 25 sts, leaving 5” tails at beginning and end.
Make 4, 1” diameter pom poms, leaving tails from tie.
Use crochet hook to pull one chain length through stitch at bottom front of cuff, pull though until even length. Tie length of chain firmly. Repeat on other slipper.
Use tapestry needle to pull one end of crochet chain tail under tie of a pom-pom. Tie chain tail to 1 pom-pom tail in a square knot. Repeat with other pom pom tail.
Trim tails to blend with length of pom-pom yarn.
Repeat this with each pom-pom until all are attached to slippers.
Great Pattern!!!! Is there a way to make them larger? I have a few men that I would like to make them for. Thanks for the pattern.
From the designer: I haven’t updated the pattern with different sizes. But I made bigger slippers for my son by using a heavier yarn and appropriate size hook for the yarn to make them. The fabric is pretty stretchy so there is some wiggle room also.
thank you so much for this pattern. I can’t wait to make it.
Thanks so much for nice pattern.