




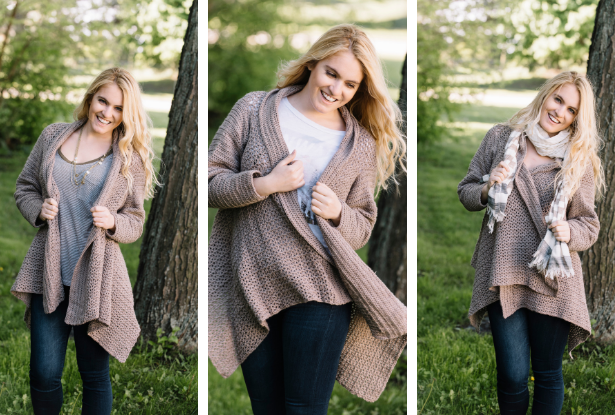
Designed to be worn with almost anything, the Breezy Peasy Crochet Cardigan is the easiest cardigan to crochet. Add this pattern to your repertoire and you’ll be making one in every color. Dressed up or down, you’ll be quite pleased with the versatility of this piece
Skill Level: Easy
Sizes: Small (Medium, Large, X-Large)
Length including collar: 27.5 (29, 30.5, 32)”
Complete rectangle width: 55 (57.5, 60, 62.5)”
Back width: 15 (16, 17, 18)”
Sleeves length: 19 (19, 19.5, 19.5)”
Wrist Circumference: 7 (8, 9, 10)”
Gauge: 9 rows and 6 V-sts = 4” [10 cm]
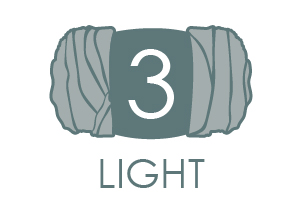 Yarn Berroco Vintage DK (52% Acrylic, 40% Wool, 8% Nylon; 290 yards [266 meters]/100 grams): #2015 Oat (7 (7, 7, 8) balls)
Hooks: US size H/8 (5.00 mm)
Notions: Tapestry needle, one 5/16” sew-on snap (optional), sewing thread and needle to attach snap (optional)
Special Stitches
V-st = (dc, ch 1, dc) all in next st.
Hdc dec = work 2 hdc together
Pattern Notes
Optional: Substitute starting ch and Row 1 with 107 (116, 125, 134) foundation sc.
Ch-3 at beginning of rows counts as a dc.
Long edge of rectangle closest to arm holes will be referred to as “Top Edge” throughout instructions.
Ch-2 at beginning of hdc rows does not count as a stitch.
Ch-1 at beginning of rounds does not count as a stitch.
Pattern
Ch 108 (117, 126, 135).
Row 1: Sc in second ch from hook, sc in each ch across. Turn. (107 (116, 125, 134) sc)
Row 2: Ch 3, sk 1, V-st in next st, [sk 2, V-st in next st] 34 (37, 40, 43) times, sk 1, dc in last st. Turn. (2 dc, 35 (38, 41, 44) V-sts)
Row 3: Ch 3, [V-st in next 35 (38, 41, 44) ch-1 sps, dc in top of ch-3. Turn. (2 dc, 35 (38, 41, 44) V-sts)
Rows 4-44 (46, 48, 50): Rep Row 3.
Row 45 (47, 49, 51): Ch 3, V-st in next 3 (4, 5, 6) ch-1 sps, ch 33 (36, 39, 42), sk 11 (12, 13, 14) V-sts, V-st in next 21 (22, 23, 24) ch-1 sps, dc in top of ch-3. Turn. (2 dc, 24 (26, 28, 30) V-sts, ch-33 (ch-36, ch-39, ch-42) sp)
Row 46 (48, 50, 52): Ch 3, V-st in next 21 (22, 23, 24) ch-1 sps, sk first ch, V-st in next ch, [sk 2, V-st in next ch] 10 (11, 12, 13) times, sk last ch, V-st in next 3 (4, 5, 6) ch-1 sps, dc in top of ch-3. Turn. (2 dc, 35 (38, 41 ,44) V-sts)
Rows 47-80 (49-84, 51-88, 53-92): Rep Row 3.
Row 81 (85, 89, 93): Ch 3, V-st in next 3 (4, 5, 6) ch-1 sps, ch 33 (36, 39, 42), sk 11 (12, 13, 14) V-sts, V-st in next 21 (22, 23, 24) ch-1 sps, dc in top of ch-3. Turn. (2 dc, 24 (26, 28, 30) V-sts, ch-33 (ch-36, ch-39, ch-42) sp)
Row 82 (86, 90, 94): Ch 3, V-st in next 21 (22, 23, 24) ch-1 sps, sk first ch, V-st in next ch, [sk 2, V-st in next ch] 10 (11, 12, 13) times, sk last ch, V-st in next 3 (4, 5, 6) ch-1 sps, dc in top of ch-3. Turn. (2 dc, 35 (38, 41, 44) V-sts)
Rows 83-124 (87-129, 91-124, 95-142): Rep Row 3.
Row 125 (130, 137, 143): Ch 1, [sc in next 2 sts, sc in ch-1 sp] 35 (38, 41, 44) times, sc in last st, sc in top of ch-3. (107 (116, 125, 134) sts)
Fasten off and weave in ends.
Collar
Row 1: Working along Top Edge, sl st in side of first sc at either end, hdc in same st, 2 hdc around end st of each row across, hdc in side of last sc. Turn. (244 (256, 268, 280) hdc)
Row 2: Ch 2, hdc in each st across. Turn. (244 (256, 268, 280) hdc)
Rows 3-13: Rep Row 2.
Fasten off and weave in ends.
Sleeves
Repeat instructions on both sleeve holes.
Rnd 1: Sl st in first dc of first V-st on sleeve hole. Hdc in same st, hdc in ch-1 sp, [hdc in next 2 sts, hdc in ch-1 sp] 10 (11, 12, 13) times, hdc in next st, hdc in next 33 (36, 39, 42) ch, sl st in first st to join. Turn. (66 (72, 78, 84) sts)
Rnd 2: Ch 1, 20 (22, 24, 26) hdc, hdc dec] 3 times, sl st in first st. Turn. (63 (69, 75, 81) sts)
Rnds 3-6: Ch 1, hdc in each st around, sl st in first st. Turn. (63 (69, 75, 81) sts)
Rnd 7: Ch 1, 19 (21, 23, 25) hdc, hdc dec] 3 times, sl st in first st. Turn. (60 (66, 72, 78) sts)
Rnds 8-11: Ch 1, hdc in each st around, sl st in first st. Turn. (60 (66, 72, 78) sts)
Rnd 12: Ch 1, 18 (20, 22, 24) hdc, hdc dec] 3 times, sl st in first st. Turn. (57 (63, 69, 75) sts)
Rnds 13-16: Ch 1, hdc in each st around, sl st in first st. Turn. (57 (63, 69, 75) sts)
Rnd 17: Ch 1, 17 (19, 21, 23) hdc, hdc dec] 3 times, sl st in first st. Turn. (54 (60, 66, 72) sts)
Rnds 18-21: Ch 1, hdc in each st around, sl st in first st. Turn. (54 (60, 66, 72) sts)
Rnd 22: Ch 1, 16 (18, 20, 22) hdc, hdc dec] 3 times, sl st in first st. Turn. (51 (57, 63, 69) sts)
Rnds 23-26: Ch 1, hdc in each st around, sl st in first st. Turn. (51 (57, 63, 69) sts)
Rnd 27: Ch 1, 15 (17, 19, 21) hdc, hdc dec] 3 times, sl st in first st. Turn. 48 (54, 60, 66) sts)
Rnds 28-31: Ch 1, hdc in each st around, sl st in first st. Turn. 48 (54 ,60, 66) sts)
Rnd 32: Ch 1, 14 (16, 18, 20) hdc, hdc dec] 3 times, sl st in first st. Turn. (45 (51, 57, 63) sts)
Rnds 33-36: Ch 1, hdc in each st around, sl st in first st. Turn. (45 (51, 57, 63) sts)
Rnd 37: Ch 1, 13 (15, 17, 19) hdc, hdc dec] 3 times, sl st in first st. Turn. (42 (48, 54, 60) sts)
Rnds 38-41: Ch 1, hdc in each st around, sl st in first st. Turn. (42 (48, 54, 60) sts)
Rnd 42: Ch 1, 12 (14, 16, 18) hdc, hdc dec] 3 times, sl st in first st. Turn. (39 (45, 51, 57) sts)
Rnds 43-46: Ch 1, hdc in each st around, sl st in first st. Turn. (39 (45, 51, 57) sts)
Rnd 47: Ch 1, 11 (13, 15, 17) hdc, hdc dec] 3 times, sl st in first st. Turn. (36 (42, 48, 54) sts)
Rnd 48-51: Ch 1, hdc in each st around, sl st in first st. Turn. (36 (42, 48, 54) sts)
Rnd 52: Ch 1, 10 (12, 14, 16) hdc, hdc dec] 3 times, sl st in first st. Turn. (33 (39, 45, 51) sts)
Rnd 54-57: Ch 1, hdc in each st around, sl st in first st. Turn. (33 (39, 45, 51) sts)
Rnd 58: Ch 1, 9 (11, 13, 17) hdc, hdc dec] 3 times, sl st in first st. Turn. (30 (36, 42, 48) sts)
Rnds 59-64 (64, 66, 66): Ch 1, hdc in next 30 (36, 42, 48) sts, sl st in first st. (30 (36, 42, 48) sts)
Fasten off.
Finishing
Weave in ends.
This looks lovely and I can’t wait to try making this.