


“How do I keep the edges of my pieces nice and straight? I’m really struggling.”
–Stevie LewisDear Stevie,
This is one of the things most beginners struggle with the most, and I’ll admit to still having trouble with it depending on the stitches I am working with. Having nice straight edges on your piece will really make a difference in how it fits and looks. Getting consistently straight edges will come with practice so keep trying if you’re having trouble. A great way to practice getting your edges down is with washcloths since they’re small and portable.
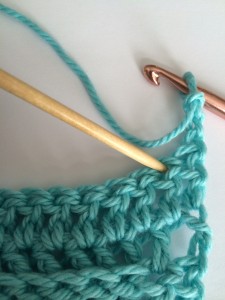
If you are following a pattern, the author will note how turns are handled and this will help you make your edges nice and straight. There are two traditional methods for turning, one more common than the other. Both result in nice neat edges if care is taken in where and how the stitches are done. When you come to the end of a row, you will need to chain the number of stitches indicated on the pattern and then turn the work. It is here that we determine whether we have straight sides or not.
In the most common method, we will skip the first hole (the base of the turning chain) and begin to work across from the second hole onwards. In this case, this turning chain is counted as stitch one of the row. Once at the end on the row, our final stitch will need to be worked into the top chain of the turning chain in the row below.
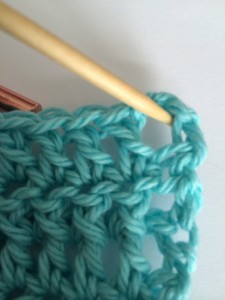
This is a wonderful method that always results in great straight edges. The only disadvantage to this method is that it does leave gaps at the beginning of each row. While these gaps are small and most designers can work them into the design, they can be distracting if you are working something with a more dense stitch pattern.
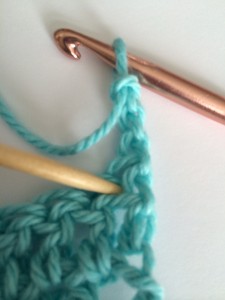
To combat this gap, some patterns will have you work across as usual, but when you make your turning chain and turn to begin the next row, you work your first stitch into the first hole. This hole is at the base of the turning chain, and the chain is not counted as a stitch in this row. Once you work across and you are at your last stitch, you will work into the last stitch of the row, not into the top chain as before. Care must be taken that you have worked all the way across and that you are indeed in the last stitch of the row. Once you are done, you will see that you have a nice and densely stitched row with no gaps at the beginning.
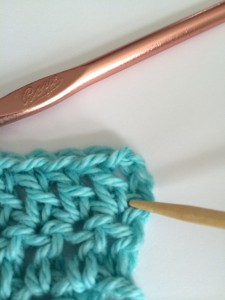
Finally, to help keep your work nice and even, be sure to keep your tension consistent. Having varying tension between your rows will result in uneven rows and wonky edges. Even tension comes with practice, so keep trying!
Happy Crafting,
Chris
Christina Hammond is a crochet professional with more than 30 years of experience designing and tech editing patterns. Do you have a crochet question for Chris? Write us (submissions@ilikecrochet.com) and include “Chris’ Corner” in the subject line.
ALWAYS COUNT YOUR STITCHES…which most people hate to do but you must. Remember that the turning chain or stitch is #1 and count from there. Look at the picture to tell which hole is the FIRST COUNTING STITCH. Most people want to go into the hole before it and that is not right. ALWAYS LOOK and ALWAYS COUNT.
How do you get tassels to stay on the project when washing,i do the tassels as normal with the loop method like on a shawl but everytime i wash it they have come undone and i have to redo most of them before i out it out to dry,please can you help Christine?
Always wash and dry your handmade items in a mesh bag.