


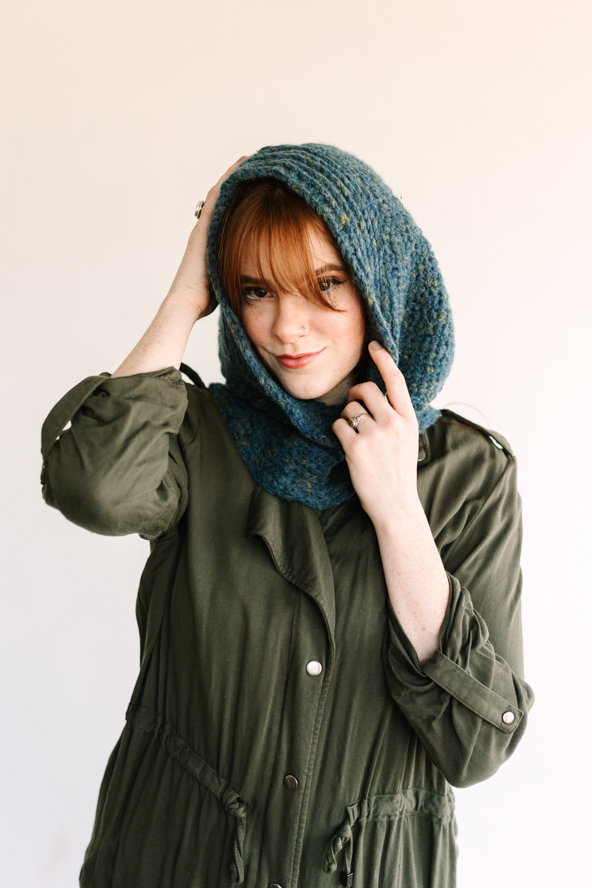
The Kiki Crochet Hood is more than just a hat. It can transform into a cowl, a dickie, or even a hood, offering endless possibilities to suit your style and needs. Crocheted in multiple directions, this project keeps you engaged and ensures a fascinating and enjoyable crochet journey. Embrace the versatility and creativity of the Kiki Crochet Hood. Elevate your Autumn wardrobe with this stylish and functional accessory.
Skill Level: Intermediate
Size: Adult
Gauge: 11 sts and 13 rows = 4” [10 cm] in Single Crochet
Materials
 Yarn: Universal Yarn, Cassatt (35% Baby Alpaca, 35% Wool, 20% Nylon, 10% Viscose; 120 yards [110 meters]/50 grams): #607 Luncheon (3 skeins)
Hook: US Size K (6.5 mm)
Notions: Tapestry needle, locking stitch marker
Pattern Notes
Cowl is worked in the round.
Hood is worked flat to the crown, seamed and then the detail around the face is worked in the round.
If the desired cowl circumference is increased, the number of slip stitches need not be increased, they frame the outline of the final trim around the hood.
If the desired hood length is changed, the number of hdc around the trim should be changed to allow the trim to rest neatly around the neck when not in use and to frame the face without drooping down when worn as a hood. At gauge approximately 4 hdc per inch of hood height were worked, alter to suit desired hood size.
Pattern
Cowl
Ch 90, join with slip stitch and place marker to denote end of round.
Round 1: Into the first stitch hdc, hdc in each ch to end of round, do not sl st to join. Move marker up to denote end of round. (90 sts)
Rounds 2-3: Hdc into the back loop in each st around working continuously, move marker up with each round.
Round 4: *Hdc into the back loop 8 times, skip 1 stitch, repeat from * to end of round. (10 sts decreased)
Rounds 5-12: Repeat Round 2.
Round 13: Hdc into the back loop in each st Continue in pattern until five stitches remain, 1 slip stitch into each of the next five stitches. Do not remove end of round marker.
Hood (worked flat)
Row 1 (RS): Sl st in next 5 stitches, ch 1, sc into next stitch, sc in each st to 10 stitches from marker, ch 1, turn work.
Row 2 (WS): Sc to 10 stitches before the marker, ch 1, turn work. (70 sc)
Begin working back and forth on only these 70 sts.
Row 3: Sc in each st across, ch 1, turn work.
Repeat Row 3 until piece measures 17″/43cm from foundation chain or desired height of hood is completed.
Final row: hdc across, fasten off, do not break yarn.
Draw 36″/1m of yarn off the working yarn ball.
Cut yarn.
With RS facing, fold the hood in half so the WS face each other.
Using tapestry needle, work across the inside edge of piece along the ridge of hdc just worked to seam it.
Fasten off, weave in ends, cut yarn.
Brim (worked in the round)
With RS facing, pull up loop at the marker used to denote the end of Round 13, ch 1, hdc into the selvedge edge stitch of each row to the hood. (approximately 80 sts)
Do not turn work, continue hdc into the back loop in the round a total of 7 rounds stopping two sts before the end of the 7th round, sc in next 2 sts, slip st to join. Fasten off, weave in end.
Finishing
Gently steam the completed hood and allow to air dry.
Do you need to start a new 90 chain for the hood?
From the designer: The piece is worked as one piece. First one makes the cowl then starts the hood from the last stitch worked of the cowl. The two sections are made as one piece, there is no seam until you get to the crown where the piece does have to be seamed.