

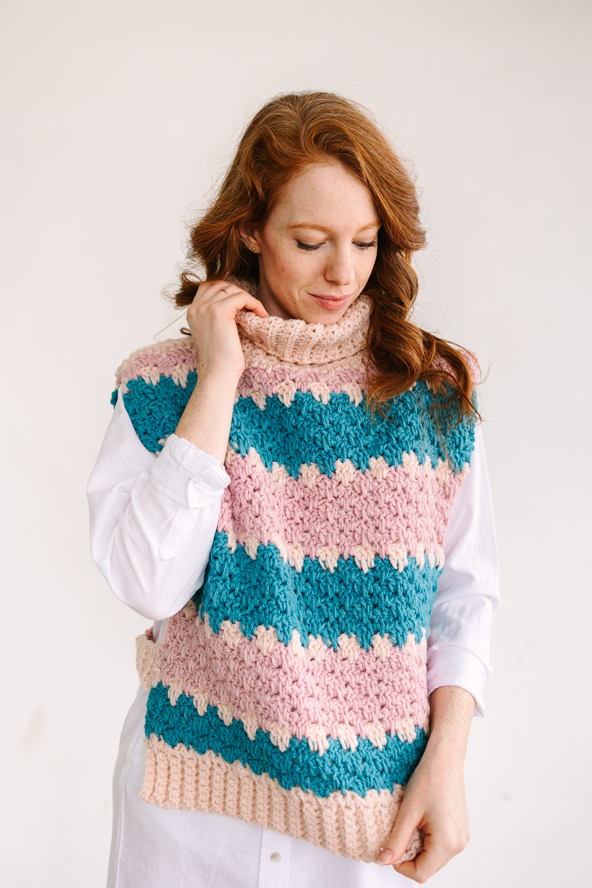
The Gina Oversized Vest showcases the beautiful and straightforward Granny Spike stitch as its main pattern, creating a captivating texture. Whether you prefer a vibrant and eye-catching palette or a more subtle and neutral look, this vest lends itself beautifully to multiple color schemes. The best part? Construction is simple. The Gina Oversized Vest is as easy as joining two rectangles together, allowing you to complete the project in just a weekend. This makes it a perfect choice for beginners or for those who enjoy quick and satisfying crochet projects.
Time: Weekend project
Skill level: Easy
Size: Small (Medium, Large, X-Large, 2X, 3X) to fit Finished Bust 34 (38, 42, 46, 50, 54)”.
Shown in size 38”
4”- 6” ease recommended
Gauge: 11 st X 5 rows Granny Spyke st
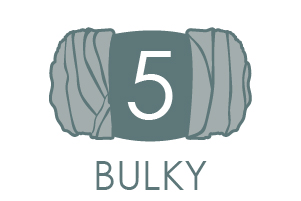 Yarn: Deluxe Cygnet Chunky #5 (100% Superior Acrylic; 170 yards [156 meters]/100 grams): 349 Bisque (CC1), 539 Sorbet (CC2), 449 Seafoam (CC3), 2 skeins of each color.
Hook/Needles: US size J-10 (6.0 mm)
Notions: Tapestry needle, measurement tape, stitch markers (optional)
Special Stitches
Granny Spyke st: (GrS) This is the main stitch of the pattern: A cluster of 3 dc made in a chain space when the middle dc is made on top of the second dc from row below. Dc 1 in ch-space, dc 1 on top of dc from row below in the same ch-1 space, dc 1 last in the same ch-1 space.
This stitch call for multiples of 4+1
Back loop only Single Crochet: BLOSC insert hook in back loop of st, yo and pull up a loop, finish single crochet
Pattern Notes
This pattern is worked in rows.
This pattern is worked with two identical panels joined at the shoulders, collar and two straps on the sides.
It is an oversized Vest.
The Brim is worked first vertically and then the body is worked horizontally.
The Collar is worked separately and attached.
Ch 1 at the beginning of the row does not count as a stitch.
Ch 3 at the beginning of the row does count as 1st st.
The two straps sizes can be modified as a preference.
Pattern
Ribbing (CC1)
Ch 7
Row 1: sc in 2nd ch from hook, sc in next ch and across to end of the chain, ch 1, turn. (6 st)
Row 2: Blosc in first st from hook, Blosc in next st and across to end of the row, ch 1 and turn.
Row 3-38 (50, 68, 80, 92, 104): Repeat row 2.
Do not fasten off and cut your yarn. We will continue horizontally.
Body 1st Panel
Row 1: Lay your work flat horizontally, ch 1, and sc 1 on each st row from the ribbing, change to CC3 at last st of row. (38 (50, 68, 80, 92, 104) st)
Row 2: (CC3) Ch 3 (counts as first dc), turn work, *[dc 3 in next st, ch 1, skip 3 st, dc 3 in next st]*, repeat from * to * to last 4 stitches remaining, ch 1, dc 2 in last st, ch 2 and turn work.
Row 3: (CC3) GrS in first ch-sp from prev row, ch 1, GrS in next ch-sp from prev row, continue to last ch-sp, GrS, ch 1 and, finish with 2 dc in ch-2 starter row space, ch 2 and turn work.
Repeat Row 3 changing colors as following:
Rows 4-5: CC3
Row 6: CC1
Rows 7-12: CC2
Row 13: CC1
Continue the pattern of [6 Rows CC3, 1 Row CC1, 6 Rows CC2, 1 Row CC1] until 36 Total rows are worked.
Row 37: (CC1) This is the finishing row of the first panel. We will work 1 dc on top of every dc from prev row, and 1 spike dc in ch-1 sp to even up the panel.
Dc 1 in next st. dc 1 in next st, dc (spike) on top of the second dc from the prev row in ch-1 space, [dc 1 on next dc from dc 3 cluster, dc 1 in next 2 and again dc 1 spike on ch-1 sp] to the end of the row.
Make a second panel exactly the same
Collar (CC1)
Ch 47
Row 1: Sc in 2nd ch from hook, sc 1 in next ch and across to end of the chain (46 st), ch 1, turn. (46 sc)
Row 2: Blosc in first st from hook, Blosc in next st and across to end of the row, ch 1 and turn.
Row 3-54: Repeat row 2.
Slst two ends to form a circle, fasten off, and leave a long tail to sew the collar to the neckline. And cut your yarn.
Construction
Lay two panels right sides in the middle. Join the shoulders by sewing 12 st on each side. Use a tapestry needle, and sew the back loop from one panel to the front loop of the second panel. Weave in and cut yarn.
Place the collar and sew it to the remaining stitches in the head hole/ neckline. Make sure all stitches are sewn in.
Adding straps on the sides
CC1
1st strap: 5” from the bottom of Vest
Row 1: Insert hook in space 5” from bottom of vest and sc 1, sc in next 4 st, ch 1 and turn work. (5 sc)
Row 2: Hdc 1 in first st from hook, hdc 1 in next and to end of row.
Work between 4-9 rows depending on how much ease you prefer.
Finish by sl stitching to the opposite side on the second panel, fasten off, weave in ends, and cut your yarn.
2nd strap: 9“ from the top (shoulders not collar) work exactly the same as the 1st strap.
Work two more straps exactly the same on the other side of the Vest.
Weave in all your ends of yarn, cut, and enjoy your vest!
Wish your patterns were downloadable
Thank you for your feedback, this is something we are actively working on.