


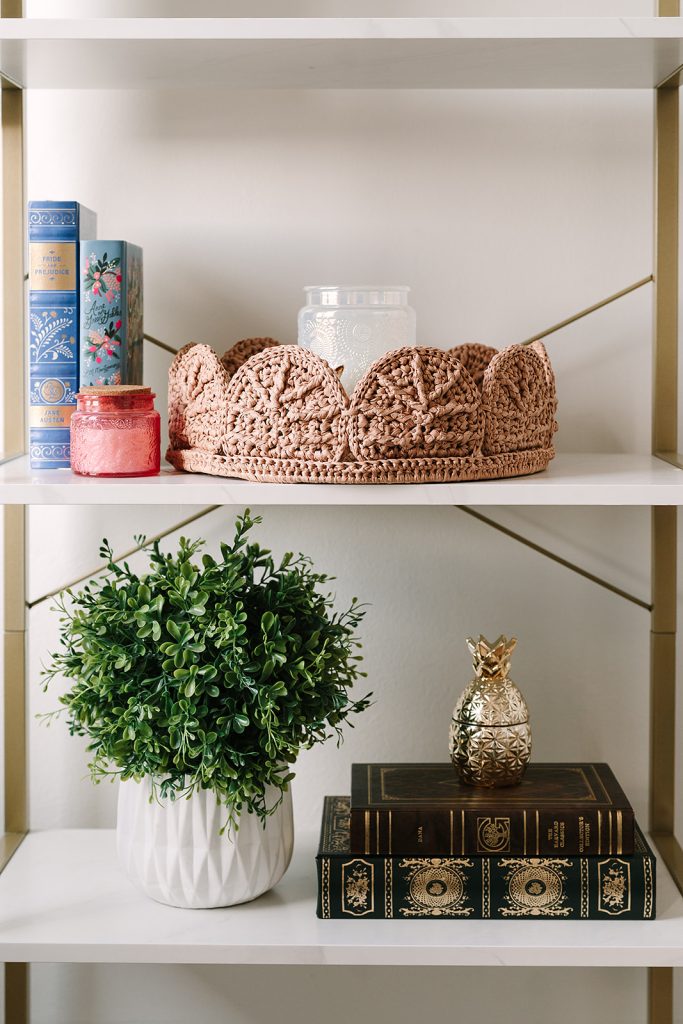
Bring texture and style to your tabletop with the Sandbar Sunrays Scallop Tray. Handcrafted from natural raffia, this tray features a scalloped edge and spoked design that catch the light and add subtle visual interest. Perfect for holding TV remotes, keys or a small grouping of potted plants, it combines practicality with on-trend decorative appeal for any room in your home.
Time: 1 Week Project
Skill Level: Advanced
SIZE 12” diameter x 4.5” inches high
Gauge: Rnds 1-3 of Base = 3.5 inches diameter
Materials
 Yarn: Premier Raffia (00% cellulose rayon; 131 yards [120 meters] / 3.5ounces [100 grams]): 2166-05 Straw (5 balls)
Hook: US size F/4/3.75 mm
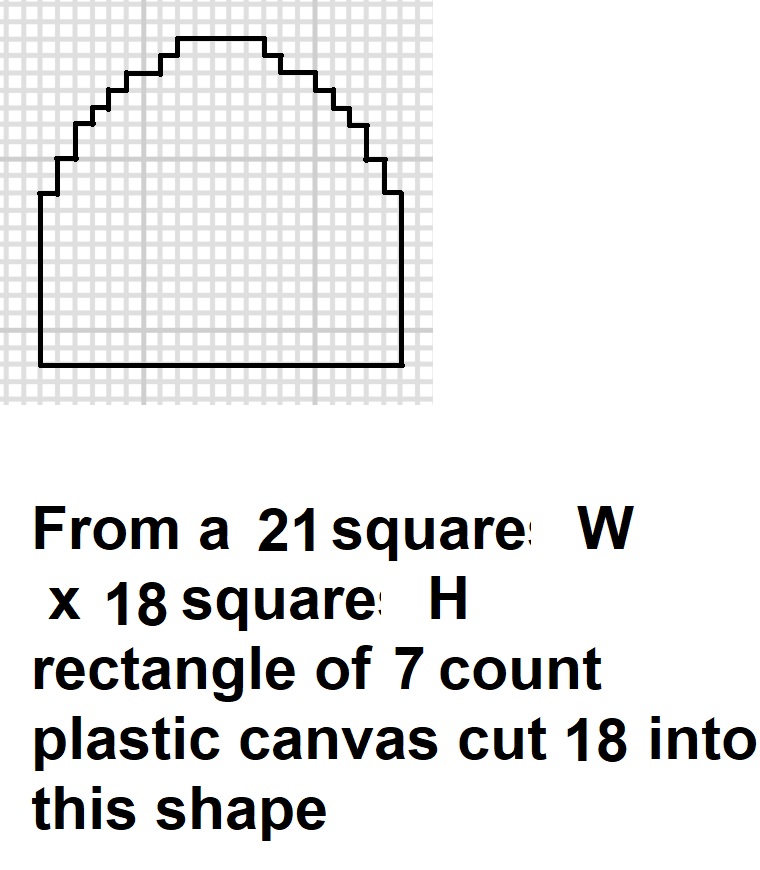
Notions: One 12-inch brass plated metal ring from www.pepperill.com ; 2 (12″ x 18″) sheets of 7 count plastic canvas ; Clover #3031 Medium Quick Locking Stitch Markers, 36 from www.clover-usa.com ; tapestry needle.
Designer Tip: Clover Locking Stitch Markers worked the best to quickly insert around posts of dc’s in Motif Row 1 to easily show where to work FPtr stitches of Row 3 and were also easy to remove either just before or after making the Fptr sts. (Photo 1)
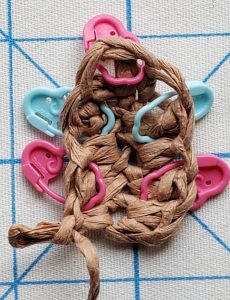
Photo 1
Designer suggests using Clover Amour ergonomic crochet hooks to be kind to one’s hands while working the dense stitches needed for this sturdy basket .
Special Stitches
Front Post Treble Crochet (FPtr): Yarn over twice, insert hook from front to back to front around post of indicated st, yo, pull up lp, [yo, pull through 2 lps on hook] 3 times. (Note: Stitch in previous row directly behind any Fptr just made is skipped and not worked into as a st. See example in Photo 3)
Front Post Double Crochet (FPdc): Yarn over, insert hook from front to back to front around post of indicated st, yo, pull up lp, [yo, pull through 2 lps on hook] twice. (Note: Stitch in previous row directly behind any Fpdc just made is skipped and not worked into as a st. See tops of unworked sts marked in black in Photo 3 example)
Pattern Notes
Base is worked in rnds that are joined and not turned. Motifs are worked in rows.
Chain-2 (ch 2) at beginning of rounds does not count as a stitch.
Weave in ends as work progresses.
Pattern
Base (Make 2)
Rnd 1: Make a magic ring, ch 4 (counts as dc, ch 1), [dc, ch 1] 8 times in ring, join in 3rd ch of beg ch-4. (9 dc)
Rnd 2: Ch 2 (see Pattern Notes), FPdc (see Special Stitches) around beg ch-3 of rnd 1, 2 dc in next ch-1 sp, [FPdc around next st of rnd 1, 2 dc in next ch-1 sp] around, join in top of FPdc. (9 FPdc, 18 dc)
Rnd 3: Ch 2, [FPtr (see Special Stitches) around first FPdc of last rnd, 2 dc in each of next 2 sts] around, join in top of beg ch-2. (9 FPtr, 36 dc)
Rnd 4: Ch 2, [FPtr around first FPtr of last rnd, 2 dc in next st, dc in each of next 2 sts, 2 dc in next st] around, join in top of beg ch-2. (9 FPtr, 54 dc)
Rnd 5: Ch 2, [FPtr around first FPtr of last rnd, 2 dc in next st, dc in each of next 4 sts, 2 dc in next st] around, join in top of beg ch-2. (9 FPtr, 72 dc)
Rnd 6: Ch 2, [FPtr around first FPtr of last rnd, 2 dc in next st, dc in each of next 6 sts, 2 dc in next st] around, join in top of beg ch-2. (9 FPtr, 90 dc)
Rnd 7: Ch 2, [FPtr around first FPtr of last rnd, dc in each of next 3 sts, 2 dc in next st, dc in each of next 2 sts, 2 dc in next st, dc in each of next 3 sts] around, join in top of beg ch-2. (9 FPtr, 108 dc)
Rnd 8: Ch 2, [FPtr around first FPtr of last rnd, 2 dc in next st, dc in each of next 10 sts, 2 dc in next st] around, join in top of beg ch-2. (9 FPtr, 126 dc)
Rnd 9: Ch 2, FPtr around first FPtr of last rnd, dc in next 4 sts, [2 dc in next st, dc in next 2 sts] twice, dc in next 5, *FPtr around next FPtr of last rnd, dc in next 4 sts, [2 dc in next st, dc in next 2 sts] twice, dc in next 5, rep from * around, join in top of first FPtr. (9 FPtr, 153 dc)
Rnd 10: Ch 1, sc in first FPtr and in each st around. (162 sc)
Rep to make 2nd base, do not fasten off at end of Rnd 10.
Rnd 11 (Base Assembly):
Stack bases WS together, having FPtr sts of top layer approximately centered between FPtr sts of bottom layer, place metal ring behind layers, working through both layers in same place where sts of Rnd 10 were made and over metal ring, sc in each st around, join to beg sc. Fasten off. (162 sc)
Motif (Make 18)
Row 1 (RS): Working in back lp of chs, ch 6, sc in 2nd ch from hook, *dc in next ch, sc in next ch, *dc in next ch, (sc, dc, sc) in last ch, working in opposite side of foundation ch, rep from * to * twice. Place a stitch marker around post of each dc made (see Photo 1 of Designer Tip), turn. (5 dc, 6 sc)
Row 2: Ch 1, sc in first 4 sts, [3 sc in next st] 3 times, sc in last 4 sts, turn. (17 sc)
Row 3: Ch 1, sc in first st, FPtr (see Special Stitches) around post of first marked dc in row 1 (see Photo 2), sc in next 2 sts, FPtr around post of next marked dc in row 1, *2 sc in next st, FPtr around next marked dc, *[2 sc in next st, FPtr around same place where last FPdc was made] twice, rep from * to * once, sc in next 2 sts, FPtr around next marked dc, sc in last st, turn. (See Photo 3 which shows sk st directly behind each of fptr sts made.) (7 FPtr, 14 sc)
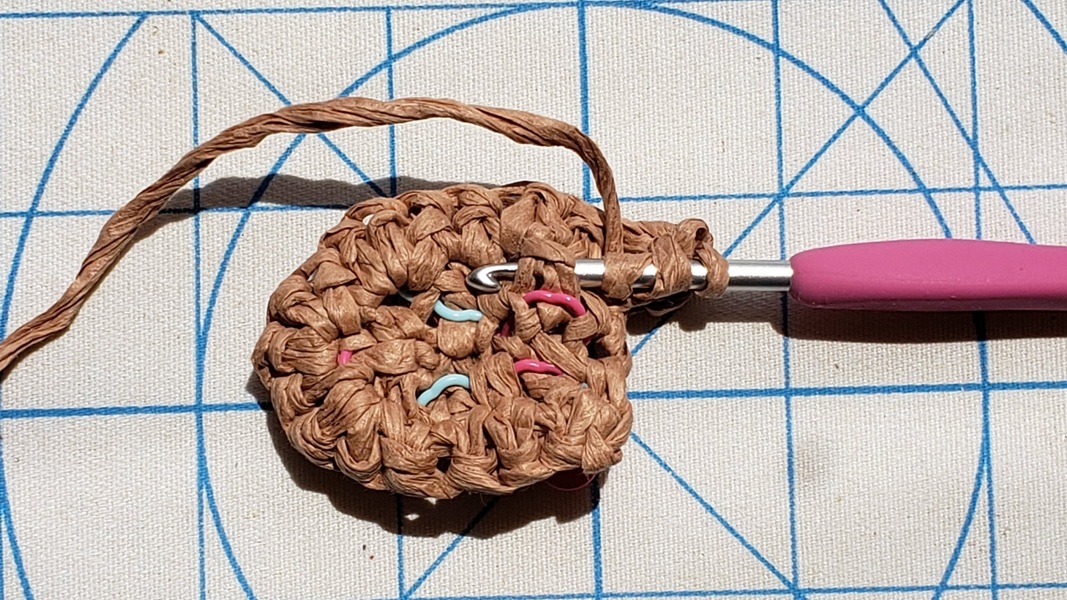
Photo 2

Photo 3
Row 4: Ch 1, sc in first 5 sts, [2 sc in next st, sc in next 2 sts] twice, sc in next st, rep [ ] once, 2 sc in next st, sc in next 5 sts, turn. (25 sts)
Row 5: Working all FPtr around indicated FPtr in row 3, ch 1, sc in first st, FPtr around first FPtr, sc in next 2 sts, [FPtr around next FPtr, sc in next 3 sts] 4 times, FPtr around next FPtr, sc in next 2 sts, FPtr around next FPtr, sc in last st, do not turn. (7 FPtr, 18 sc)
Row 6: With RS facing, working in ends of rows across straight (bottom) edge, do not ch-1, 2 sc in same place where last sc was made, place a st marker in first sc just made, work 8 sc evenly spaced, increasing where necessary across to within last row, 2 sc in end of last row, place a st marker in last sc made, join in first sc of row 5. (12 sc)
Edging Rnd 1: Working all FPdc around indicated FPtr in row 5, ch 1, 2 sc in first st, FPdc around first FPtr, sc in next st, 2 sc in next st, *FPdc around next FPtr, sc in next st, 2 sc in next st, sc in next st, [FPdc around next FPtr, 2 sc in next st, sc in next st,* 2 sc in next st] twice, rep from * to * once, FPdc around next FPtr, 2 sc in last st, join in beg sc. Fasten off. (7 FPdc, 26 sc)
Using scissors, cut 18 motif liners from plastic canvas following cutting chart.
Motif Assembly
Rnd 1: With 2 motifs WS tog and bottom right side edge facing, working through both layers, sl st join (see Special Stitches) in first st to left of marked st, sl st in each st around to within next marked st of bottom edge, insert 2 plastic canvas liners inside motif, working in sts of motif bottom edge, do not ch-1, sc in first marked bottom edge st, place a st marker in sc made, sc in next 10 sts, sc in next marked st, join to beg sl st. Fasten off. (35 sl sts, 12 sc)
With Rnd 11 of Base RS facing, place 2 stitch markers in any st of rnd (1st marked st of base), sk next 10 sc, place a stitch marker in next st, sk next 6 sts, *place a stitch marker in next st, sk next 10 sts, place a stitch marker in next st, sk next 6 sts, rep from * around.
Tray Assembly
Rnd 1: Place right side edge marked st of motif bottom against 1st marked st of Base, working from right to left through both layers in sts of Motif bottom edge and Base, sc join in first marked st, sc in next 10 sts, sc in next marked st, working only in sts of Base, [sc dec in next 2 sts] 3 times,*working from right to left through both layers in sts of Motif bottom edge and Base, sc in next marked st, sc in next 10 sts, sc in next marked st, working only in st of Base, [sc dec in next 2 sts] 3 times, rep from * around to join rem 7 motifs to Base, join in beg sc of rnd. Fasten off.
Finishing
Using photo as stitch placement guide, with outside perimeter of Tray motifs RS facing use raffia and tapestry needle to sew one straight st to join side edges of motifs or where desired. Knot securely and weave in ends between layers of motifs.