


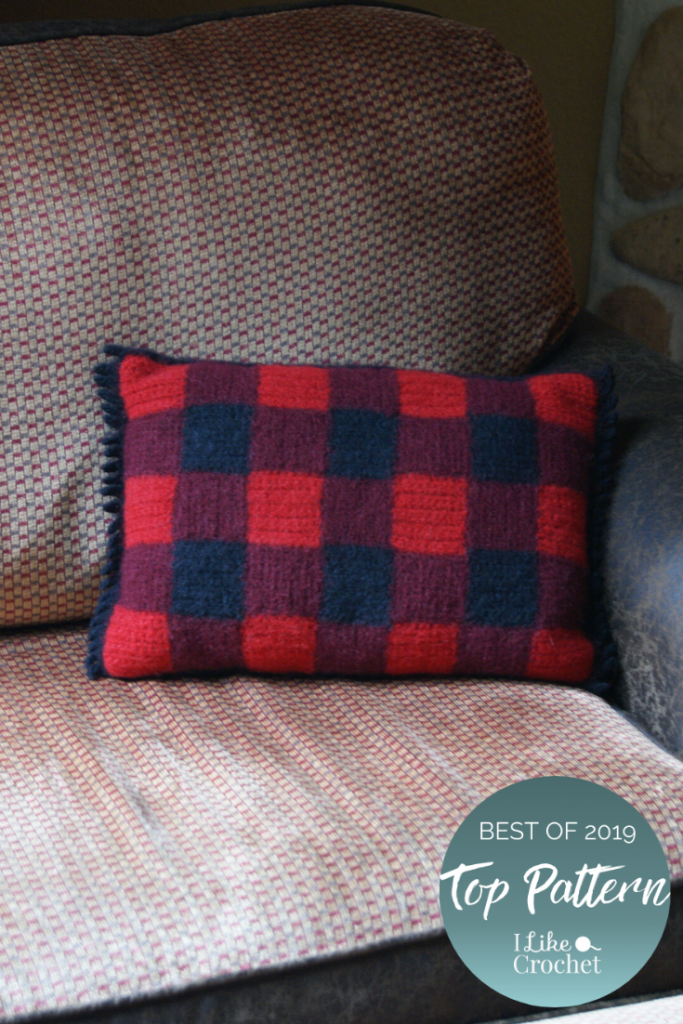
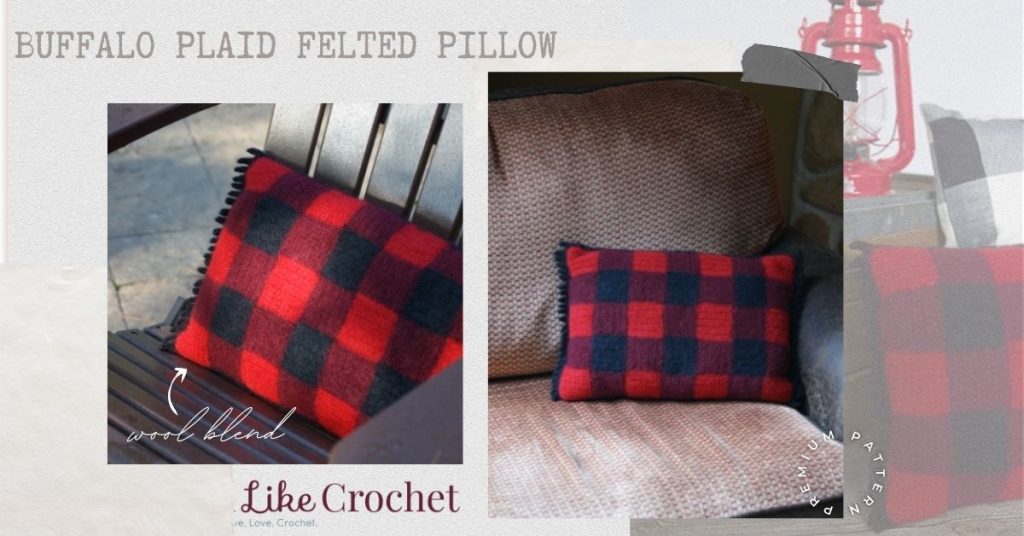
Buffalo plaid is a classic cabin look that evokes a relaxed and cozy lifestyle. This simple pillow is easy to crochet and becomes flannel soft once felted in the washing machine. Give it a try; you’ll love the results!
Skill Level: Easy
Size: Approx. 12” x 16” (excluding fringe edging)
Gauge: 14.5 sts and 16 rows = 4” [10 cm] in sc after wet blocking.
Materials
 Yarn: Brown Sheep Lamb’s Pride Worsted (85% Wool, 15% Mohair; 190 yards [174 meters]/113 grams): M81 Red Baron (A, 2 skeins), M101 Bing Cherry (B, 2 skeins), M05 Onyx (C, 1 skein).
Hook: US size H/8 (5.0 mm)
Notions: Safety pins, tapestry needle, 12” x 16” pillow form, three 1” buttons (La Petite #685), sewing needle and thread.
Special Stitches
Standing sc st (Standing single crochet stitch): With slip knot on hook, insert hook into designated st, yo, pull lp through, yo, pull through both lps on hook.
Pattern Notes
About Felting/Fulling:
Felting/fulling occurs when wool fibers are agitated in hot water. The shocked microscopic scales of the wool catch on to each other and permanently lock together during this process which creates felt (or a denser fabric with less stitch definition).
Regarding yarn substitution, felting/fulling will not happen with cellulose (cotton, linen), synthetic (polyester, acrylic) or silk fibers, only wool. The wool in a wool blend will felt but the blend will not so wool blends are not appropriate for this project. Also, if wool has been processed so that it is a superwash yarn (or wool labeled as washable), it also will not felt. Bleached white wools will not felt either because of the damage to the wool scales during bleaching. All wools behave differently during felting so it’s suggested not to combine yarn from different manufacturers for this project. Brown Sheep Lamb’s Pride yarn felts beautifully (and it comes in a huge range of colors) and is highly recommended if this is your first felting/fulling experience.
This is not to say you cannot use cellulose, synthetic or silk fibers for this pillow design, you just won’t be able to felt/full it. If using a yarn other than Brown Sheep Lamb’s Pride, you may want to make a test swatch of 4 motifs sewn tog and run it through one washing cycle to see how the yarn reacts to felting/fulling.
Since this pillow was designed for the shrinkage that occurs when felting/fulling, if substituting a non-feltable yarn, note that pillow will be approx. 1” wider on both sides. Button loops may need to be adjusted to ch 4 (instead of ch 5) if pillow is not felted/fulled.
Pattern
Front Motif (make 35)
Ch 10.
Row 1 (RS): Sc in 2nd ch from hook and each ch across, turn. (9 sc)
Rows 2-10: Ch 1, sc across.
Fasten off at end of final row.
Make 12 motifs in A, 17 in B, 6 in C.
Note: Leave an 8” tail on both ends of motifs made with B to whipstitch motifs tog when assembling Front of pillow.
Whipstitch motifs RS tog with B following motif directions as indicated in Assembly Diagram.
Weave in ends.
Block 12.5” tall x 17.5” wide.
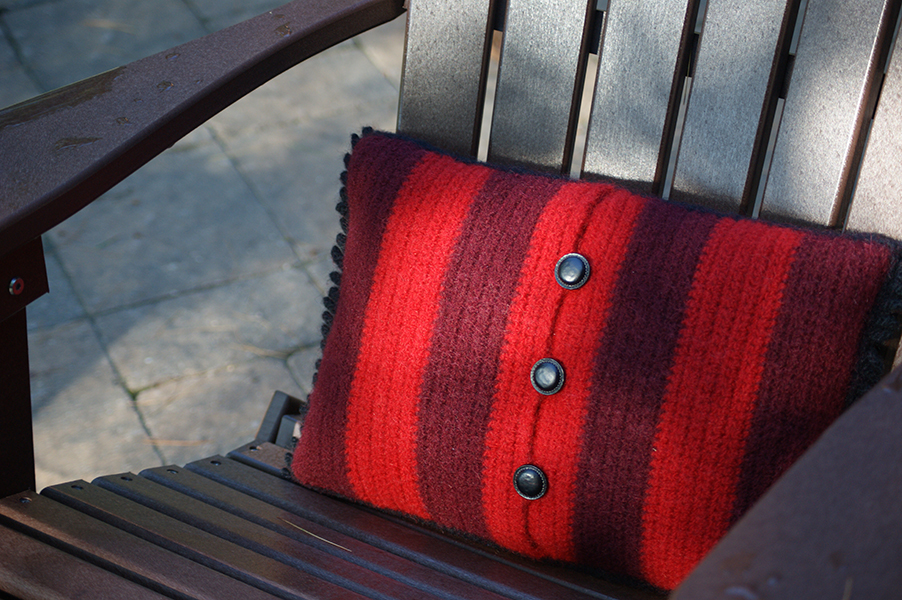
Back
Panel A
With B, ch 46.
Row 1 (RS): Sc in 2nd ch from hook and each ch across, turn. (45 sc)
Rows 2-10: Ch 1, sc across row, turn.
Fasten off at end of final row.
Row 11 (RS): Join A with standing sc st in last st worked of previous row, sc across, turn.
Rows 12-20: Ch 1, sc across row, turn.
Fasten off at end of final row.
Rows 21-30: Rep Rows 11-20 with B.
Row 31-40: Rep Rows 11-20 with A.
Weave in loose ends.
Block 12.5” tall x 10” wide.
Panel B (Button Loop Panel)
With A, ch 46.
Row 1 (RS): Sc in 2nd ch from hook and each ch across, turn. (45 sc)
Rows 2-4: Ch 1, sc across row, turn.
Fasten off at end of final row.
Row 5: Join B with standing sc st in last st worked of previous row, sc across, turn.
Rows 6-14: Ch 1, sc across row, turn.
Fasten off at end of final row.
Row 15-24: Rep Row 5-14 with A.
Row 25-34: Rep Row 5-14 with B.
Weave in loose ends.
Block 12.5” tall x 8.5” wide.
Pillow Assembly
Panel B (Button Loops)
Row 1 (RS): Join A with sl st in bottom ch of beg foundation edge, sl st across, turn. (45 sl st)
Row 2 (WS): Ch 1, sk first sl st, sl st in next 9 sts, ch 5, sk 2 sts, sl st in next 9 sts, ch 5, sk 3 sts, sl st in next 9 sts, ch 5, sk 2 sts, sl st in next 9 sts, sl st in last st.
Fasten off.
Place Panel B (RS) over Panel A (RS) so that Panel B overlaps Panel A at center where colors line up. With B, tack/whipstitch areas where panels overlap (note: tail ends can be used to tack corners before weaving in).
Weave in loose ends.
Mark areas where buttons will be sewn. Sew on buttons. Button closed.
Front
Rnd 1 (RS): Join C with sl st in first sc of row at any corner, sl st across working 9 sl st in each color area, *ch 1, rotate and work 9 sl st in each color area across; rep from * around, ending with ch 1, sl st in first sl st.
Fasten off. Weave in ends.
Note: When working slip stitch edgings after Front and Back have been blocked, keep a looser tension so blocking dimensions are maintained.
Back
Rnd 1 (RS): Join C with sl st in first sc on long side at any corner, *sl st across working 9 sl sts in each color area, ch 1, rotate and work 45 sl st across short side, ch 1, rotate; rep from * 1 more time, ending with sl st in first sl st.
Fasten off. Weave in ends.
Note: When slip stitching across area where Panel B overlaps Panel A, it is not necessary to go through both layers since Panel A is already attached to Panel B.
Finishing
With WS tog, pin Front and Back tog.
Final Rnd: With Front side facing and working through both thicknesses, join C with sl st in ch-1 corner sp along long side, sl st across to next corner, sl st in ch-1 corner sp, *ch 4, sl st in second ch from hook and next 2 ch (one fringe made), sl st in next 2 sts; rep from * across, ending with sl st in corner ch-1 sp after completing final fringe, rotate and sl st across to next corner, sl st in ch-1 corner sp; rep between * one more time, ending with sl st in first sl st of round. (24 fringes on each short side)
Note: The first sl st after creating the first fringe will be made in the first st of the row after the ch-1 corner sp (it’s easy to miss). The first fringe might stick out at an angle but will align with the others when rnd is complete.
Maintain a loose tension when seaming front to back panels in final round.
Felting/Fulling
Blocked measurements before felting/fulling are 12.5” x 17.5”
Blocked measurements after felting/fulling are approx. 11.5” x 16.5”
Run completed (unbuttoned) pillow through one regular hot water cycle (including cold water rinse) in the washing machine. An old tee shirt can be added to help with felting. Periodically remove pillow from the wash to see if pillow has felted/fulled enough.
When pillow has shrunk approx. 1” from its pre-felted size (usually one cycle in a top loader machine), remove from washing machine.
Firmly pull pillow into final exact shape before letting it air dry flat.
Insert pillow and button closed.
Just do a search for “felting crochet” on Youtube. This is the first one I found: https://www.youtube.com/watch?v=ACMt49ZgcGg Although it does feature a washing machine and the process, the author confesses he has never felted anything before but you really don’t have to be an expert to felt something successfully.
What I would not do that the above video does…do not use a towel (the fibers WILL get embedded into the felted wool) and I’m not sure why he was compelled to add baking soda. A tiny bit of regular laundry detergent is fine. I’ve never had an issue with Brown Sheep Yarns bleeding (he uses a different wool).
As long as you start out with something made with wool and run it through a hot water cycle in the washing machine, it is going to felt. Results are unpredictable but that’s part of the fun. My design will not shrink as much as what happens in most videos though because the pre-felted gauge is close to normal gauge. I would suggest making a swatch and running it through the washing machine to see how the process of felting works.
I’ve only felted in a top-loader machine. If you have a front-loader or prefer to felt without a washing machine, search for “front loader felting” or “felt without washing machine” on Youtube.
Hope this helps. Felting is a lot of fun although it may seem scary at first.
Is there a video on this. I have to hear ,see and do with a visual