


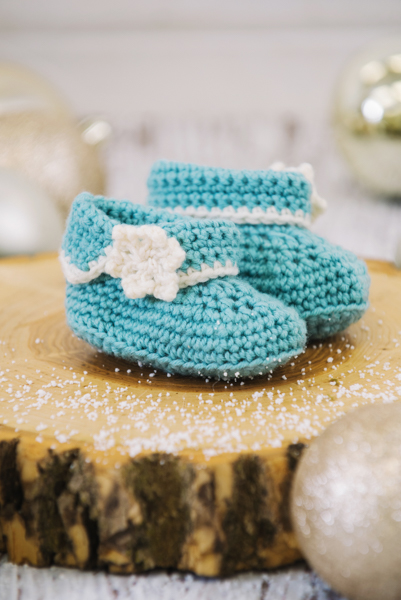
The booties each feature a flipped over cuff, with a tiny snowflake as a frosty embellishment. These tiny booties were created to give a snug fit, resulting in a comfort and cozy fit for the little one.
Skill Level: Intermediate
Size: 0-6 (6-12) months
Finished Sole Length 3½ (4)” / [9 (10) cm]
Shown in size 0-6 months
Gauge: 20 sts and 16 rows = 4” [10 cm] in hdc.
Materials
Yarn:
![]() Debbie Bliss Rialto DK (100% Merino Wool; 115 yards [105 meters]/50 grams): 081 Sea Greem (color A), 1 (1) ball; 002 Ecru (color B), 1 (1) ball.
Debbie Bliss Rialto DK (100% Merino Wool; 115 yards [105 meters]/50 grams): 081 Sea Greem (color A), 1 (1) ball; 002 Ecru (color B), 1 (1) ball.
Hook: US size C/2 (3.0 mm); US size G/6 (4.0 mm)
Notions: Tapestry needle
Abbreviations
st(s) – stitch(es)
magic ring
ch – chain stitch
sl st – slip stitch
sc – single crochet
sc2tog – single crochet 2 together
hdc – half double crochet
dc2tog – double crochet 2 together
Special Stitches
sc2tog (single crochet 2 together)
Insert your hook into the next stitch. Yarn over, and pull back through that stitch (2 loops on hook). Insert your hook into the next stitch. Yarn over, and pull back through that stitch (3 loops on hook).
Yarn over, and pull through all the loops on your hook.
dc2tog (double crochet 2 together)
Yarn over and insert your hook into the next stitch. Yarn over and pull back through that stitch (3 loops on hook). Yarn over, pull through 2 loops (2 loops left on hook). Yarn over, insert your hook into the next st. Yarn over and pull back through that stitch (4 loops on hook). Yarn over, pull through 2 loops (3 loops left on hook). Yarn over, pull through last 3 loops.
Pattern Notes
This pattern is worked in the round from bottom to top. The Cuff section of this pattern is worked in the row from bottom to top.
Pattern
Sole (make 2)
With larger hook and Color A, ch 11 (13).
Rnd 1: Work 2 hdc in 2nd ch from hook, hdc in next 8 (10) sts, work 5 hdc in next st, working on the opposite side of foundation chain, hdc in next 8 (10) sts, work 3 hdc in last st. Do not sl st in first hdc of this rnd – 26 (30) sts.
Rnd 2: Beg in first st from the previous rnd, work 2 hdc in next 2 sts, hdc in next 8 (10) sts, work 2 hdc in next 5 sts, hdc in next 8 (10) sts, work 2 hdc in next 3 sts. Do not sl st in first hdc of this rnd – 36 (40) sts.
Rnd 3: Beg in first st from the previous rnd, (2 hdc in next st, 1 hdc in next st) twice, hdc in next 8 (10) sts, (2 hdc in next st, 1 hdc in next st) 5 times, hdc in next 8 (10) sts, (2 hdc in next st, 1 hdc in next st) 3 times, sl st in first st of this rnd – 46 (50) sts.
Fasten off. Weave in loose ends.
Top of Shoe
Rnd 1: Attach Color A right in the middle of the heel, ch 1, sc in the same st through the backloop only, continue working sts in this rnd and in the backloop only, sc in next 45 (49) sts. Do not sl st in first sc of this rnd – 46 (50) sts.
Rnds 2-3 (4): Beg in first st from the previous rnd, sc in every st around. Do not sl st in first sc of this rnd – 46 (50) sts.
Rnd 4 (5): Beg in first st from the previous rnd, sc in next 14 (16) sts, (sc2tog) 9 times, sc in next 14 (16) sts. Do not sl st in first sc of this rnd – 37 (41) sts.
Rnd 5 (6): Beg in first st from the previous rnd, sc in next 12 (14) sts, (sc2tog, sc in next st) 5 times, sc in next 10 (12) sts. Do not sl st in first sc of this rnd – 32 (36) sts.
Rnd 6 (7): Beg in first st from the previous rnd, sc in next 12 (14) sts, sc2tog, (dc2tog) 3 times, sc2tog, sc in next 10 (12) sts. Do not sl st in first sc of this rnd – 27 (31) sts.
Rnds 7 (8)-11 (13): Beg in first st from the previous rnd, sc in every st around. Do not sl st in first sc of this rnd.
Rnds 12 (14): Beg in first st from the previous rnd, sc in every st around, sl st in first st of this rnd.
Fasten off. Weave in loose ends.
Cuff
Right Bootie
Row 1: Attach Color A to 24th (28th) st of Rnd 11 (13) of Top of Shoe. Turn work, working from the inside of the bootie. Ch 1, sc in same st, sc in next 26 (30) sts. Turn work – 27 (31) sts.
Rows 2-3 (4): Ch 1, sc in same st, sc in next 26 (30) sts. Turn work.
Row 4 (5): Ch 1, sc2tog, sc in next 23 (27) sts, sc2tog. Turn work – 25 (29) sts.
Fasten off. Weave in loose ends.
Right Bootie Border
Rnd 1: Attach Color B to 24th (28th) st of Rnd 11 (13) of Top of Shoe. Turn work, working from the inside of the bootie. Ch 1, sc in same st, sc in every st around the edge of the cuff (2 sts in the corners), sl st in first st of this rnd – 36 (42) sts.
Fasten off. Weave in loose ends.
Left Bootie
Row 1: Attach Color A to 8th (10th) st of Rnd 11 (13) of Top of Shoe. Turn work, working from the inside of the bootie. Ch 1, sc in same st, sc in next 26 (30) sts. Turn work – 27 (31) sts.
Rows 2-3 (4): Ch 1, sc in same st, sc in next 26 (30) sts. Turn work.
Row 4 (5): Ch 1, sc2tog, sc in next 23 (27) sts, sc2tog. Turn work – 25 (29) sts.
Fasten off. Weave in loose ends.
Left Bootie Border
Rnd 1: Attach Color B to 8th (10th) st of Rnd 11 (13) of Top of Shoe. Turn work, working from the inside of the bootie. Ch 1, sc in same st, sc in every st around the edge of the cuff (2 sts in the corners), sl st in first st of this rnd – 36 (42) sts.
Fasten off. Weave in loose ends.
Snowflake
With smaller hook and Color B, create a magic circle.
Rnd 1: *Ch 4, sl st in 2nd ch from hook, ch 2, sl st in 2nd ch from hook, ch 2, sl st in 2nd ch from hook, sl st in 3rd and 4th ch, sl st in magic circle; rep from * 5 more times.
Finishing
Fold over cuff so that the cuff is featured on the outside of the bootie. Sew 1 snowflake onto each cuff, towards the front of the cuff.
Weave in all ends.
HI.isn’t there a mistake: rd 2 for sole ( size 0/6 ) I counted 38 st (?)
There’s a typo in the pattern – you have two “Right Bootie Border” section headings and no “Left Bootie Border” although the instructions are different under each so I’m assuming that piece is correct.
Thank you for bringing this to our attention! We’ve updated the pattern heading. Happy Crocheting! – Nicola, Editor