


I am a big lover of tunisian crochet. I have utilized this style of crochet in many of my designs. To underscore this point, in last August’s edition of ILikeCrochet.com I discussed tunisian crochet as a vehicle for injecting color into a crochet design.
In this second tunisian crochet article, I’d like to introduce a different
I am a big lover of tunisian crochet. I have utilized this style of crochet in many of my designs. To underscore this point, in last August’s edition of ILikeCrochet.com I discussed tunisian crochet as a vehicle for injecting color into a crochet design.
In this second tunisian crochet article, I’d like to introduce a different approach to utilizing tunisian crochet: using it in just a portion of a crochet design. There are times when I see how tunisian crochet can be beautifully incorporated into a design, namely as an edging treatment. It’s a great way for those crafters who may be new to the technique to gain some valuable skills practice while at the same time working up an attractive project.
I particularly like tunisian crochet as an alternative crochet ribbing technique. Tunisian crochet knit and purl stitches behave differently than their knit or crochet counterparts (the latter two provide stretch; the former does not), but the look of ribbing created with these stitches mimics knit ribbing (at least on the right side of the fabric). Tunisian knit and purl stitches provide a wonderful counterpoint to crochet lace created with a traditional crochet hook. The Summer Mist Poncho design in this month’s magazine highlights that contrast beautifully, and I’m going to use the poncho’s design as my backdrop to demonstrate how to work tunisian crochet knit and purl stitches as an edging to lace that’s already been completed with a traditional crochet hook.
Initially, for those who like to use charts, here are the individual tunisian crochet edging stitches’ symbols:

If you’ll notice, each stitch is comprised of two symbols, the top symbol which is common to all three. This is because tunisian crochet rows consist of a forward and backward “pass” on the same side of the fabric. The bottom symbol represents the forward pass; the top symbol represents the backward pass.
Now let’s see how this looks when creating the poncho’s bottom edging.
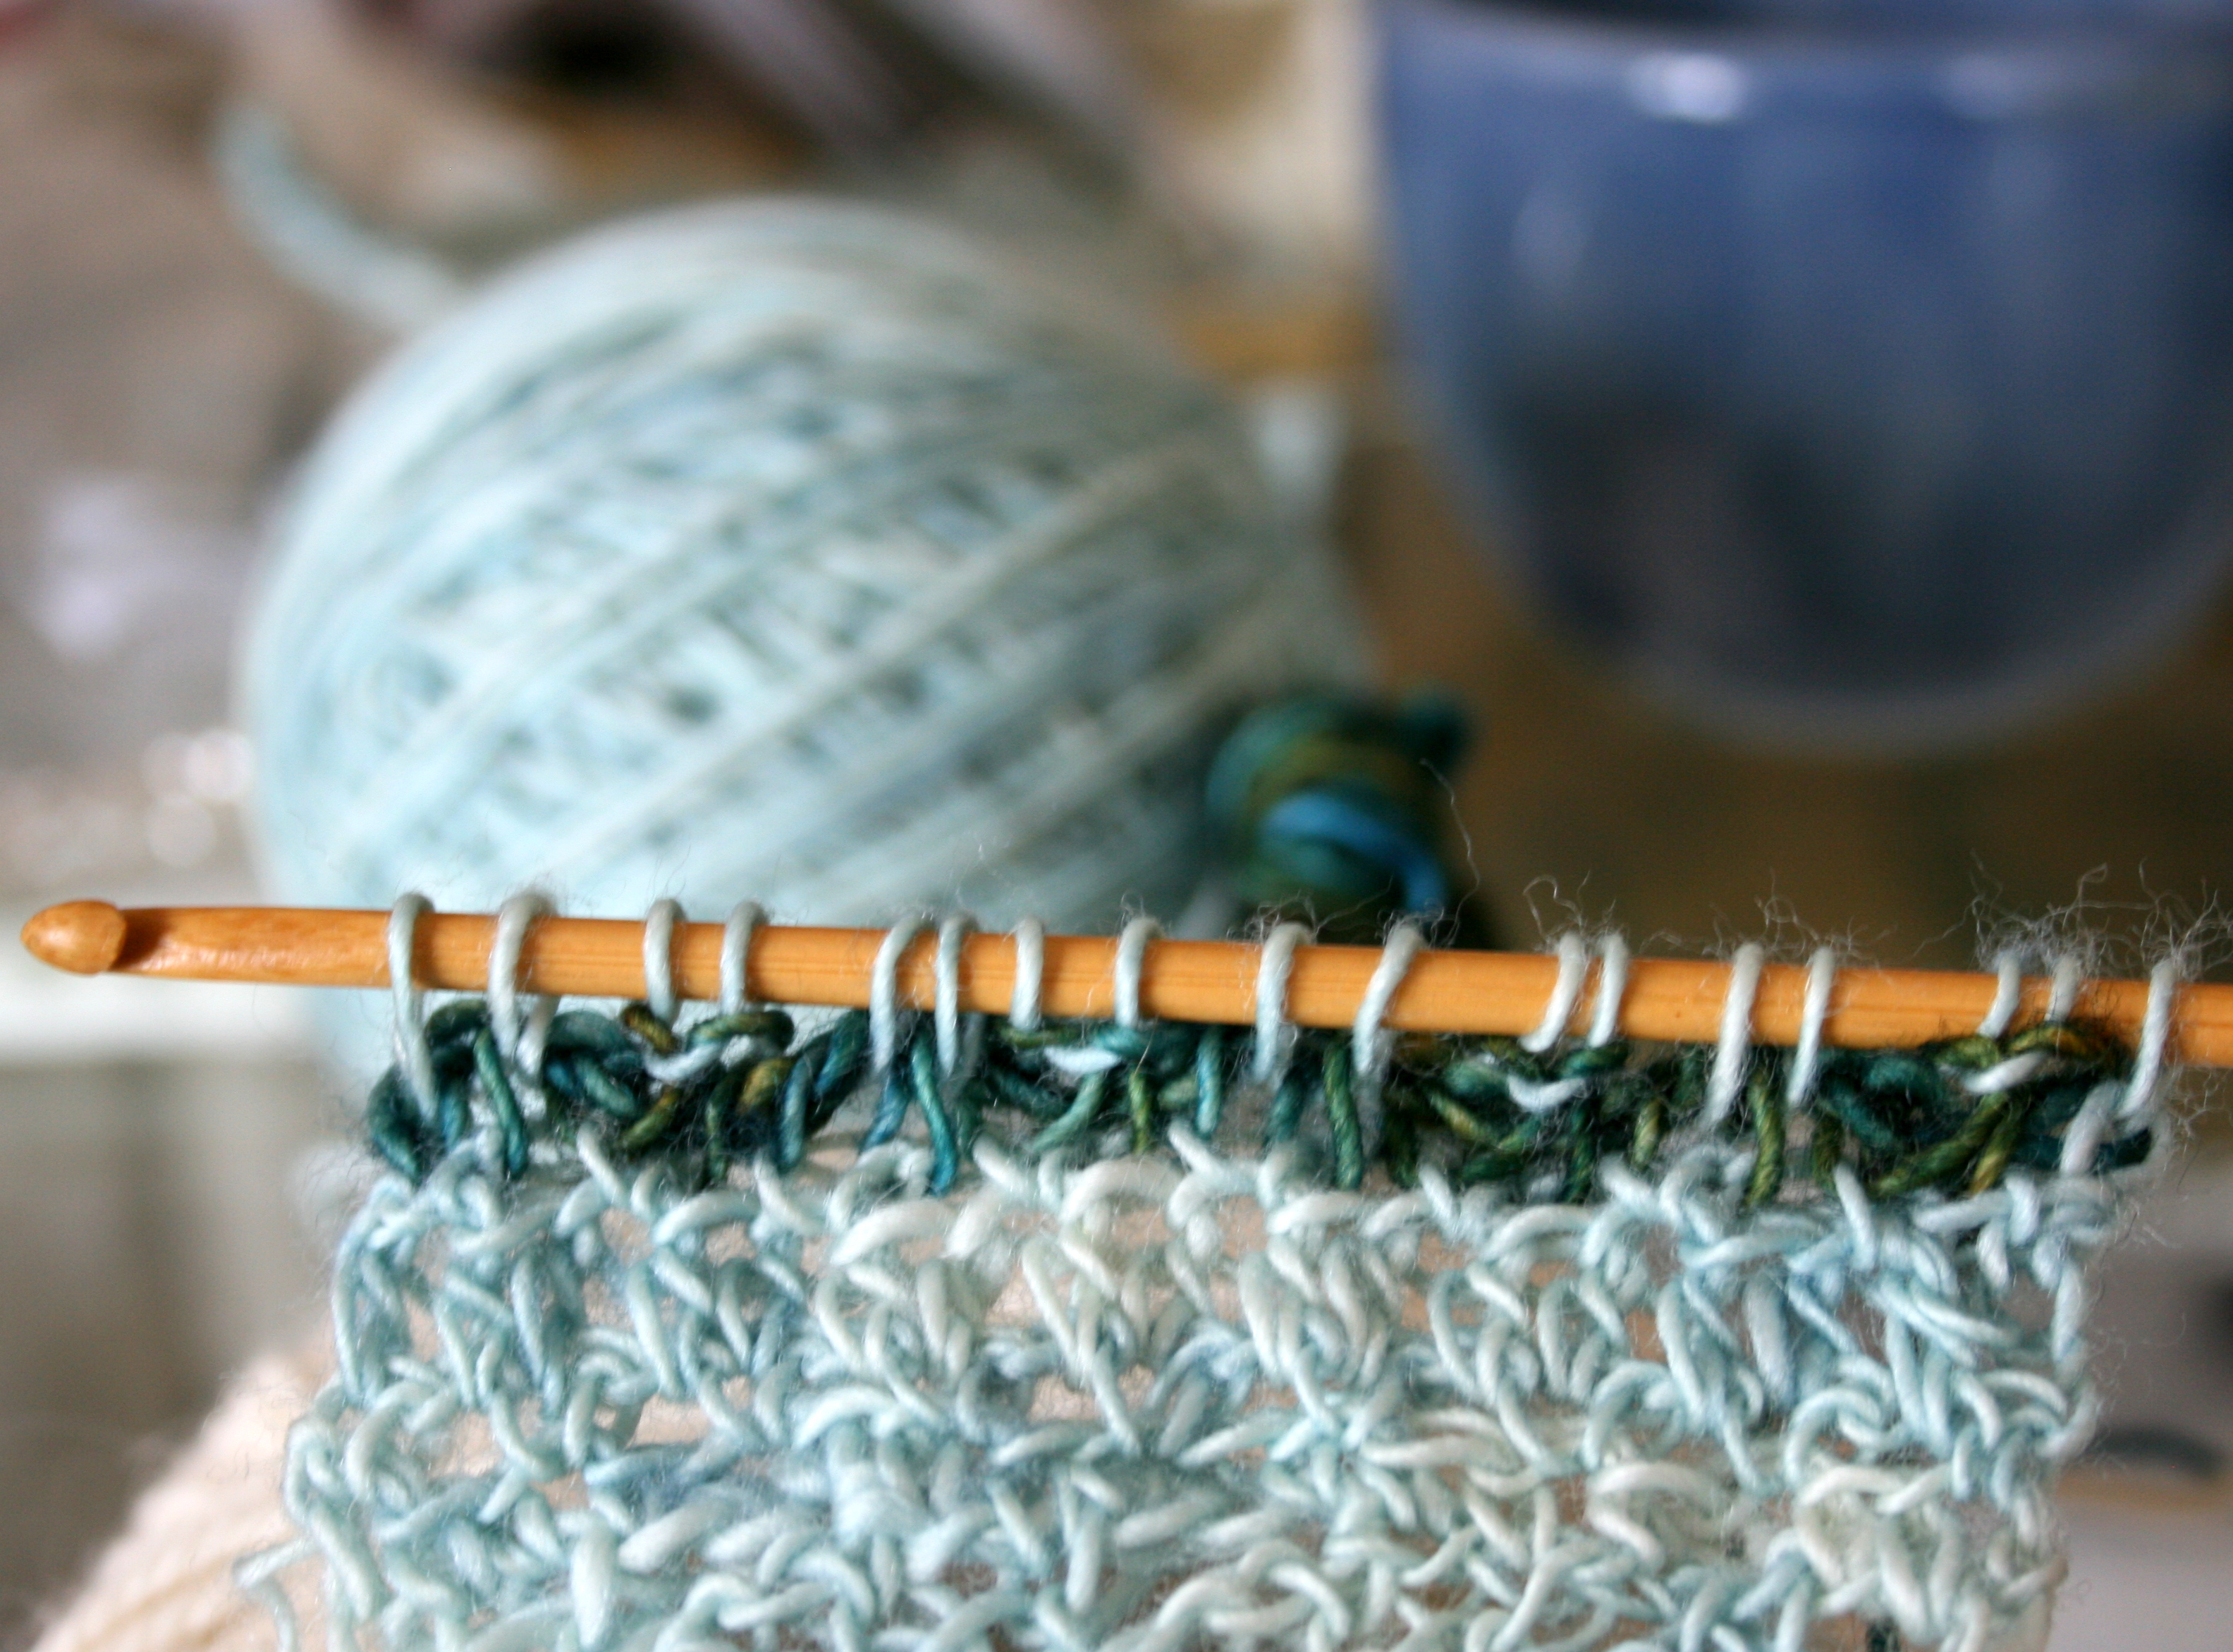
- The initial bottom edging rows, using a traditional crochet hook, have been completed and the project is on the rs with the tunsian crochet hook in the first loop (which acts as the first stitch).

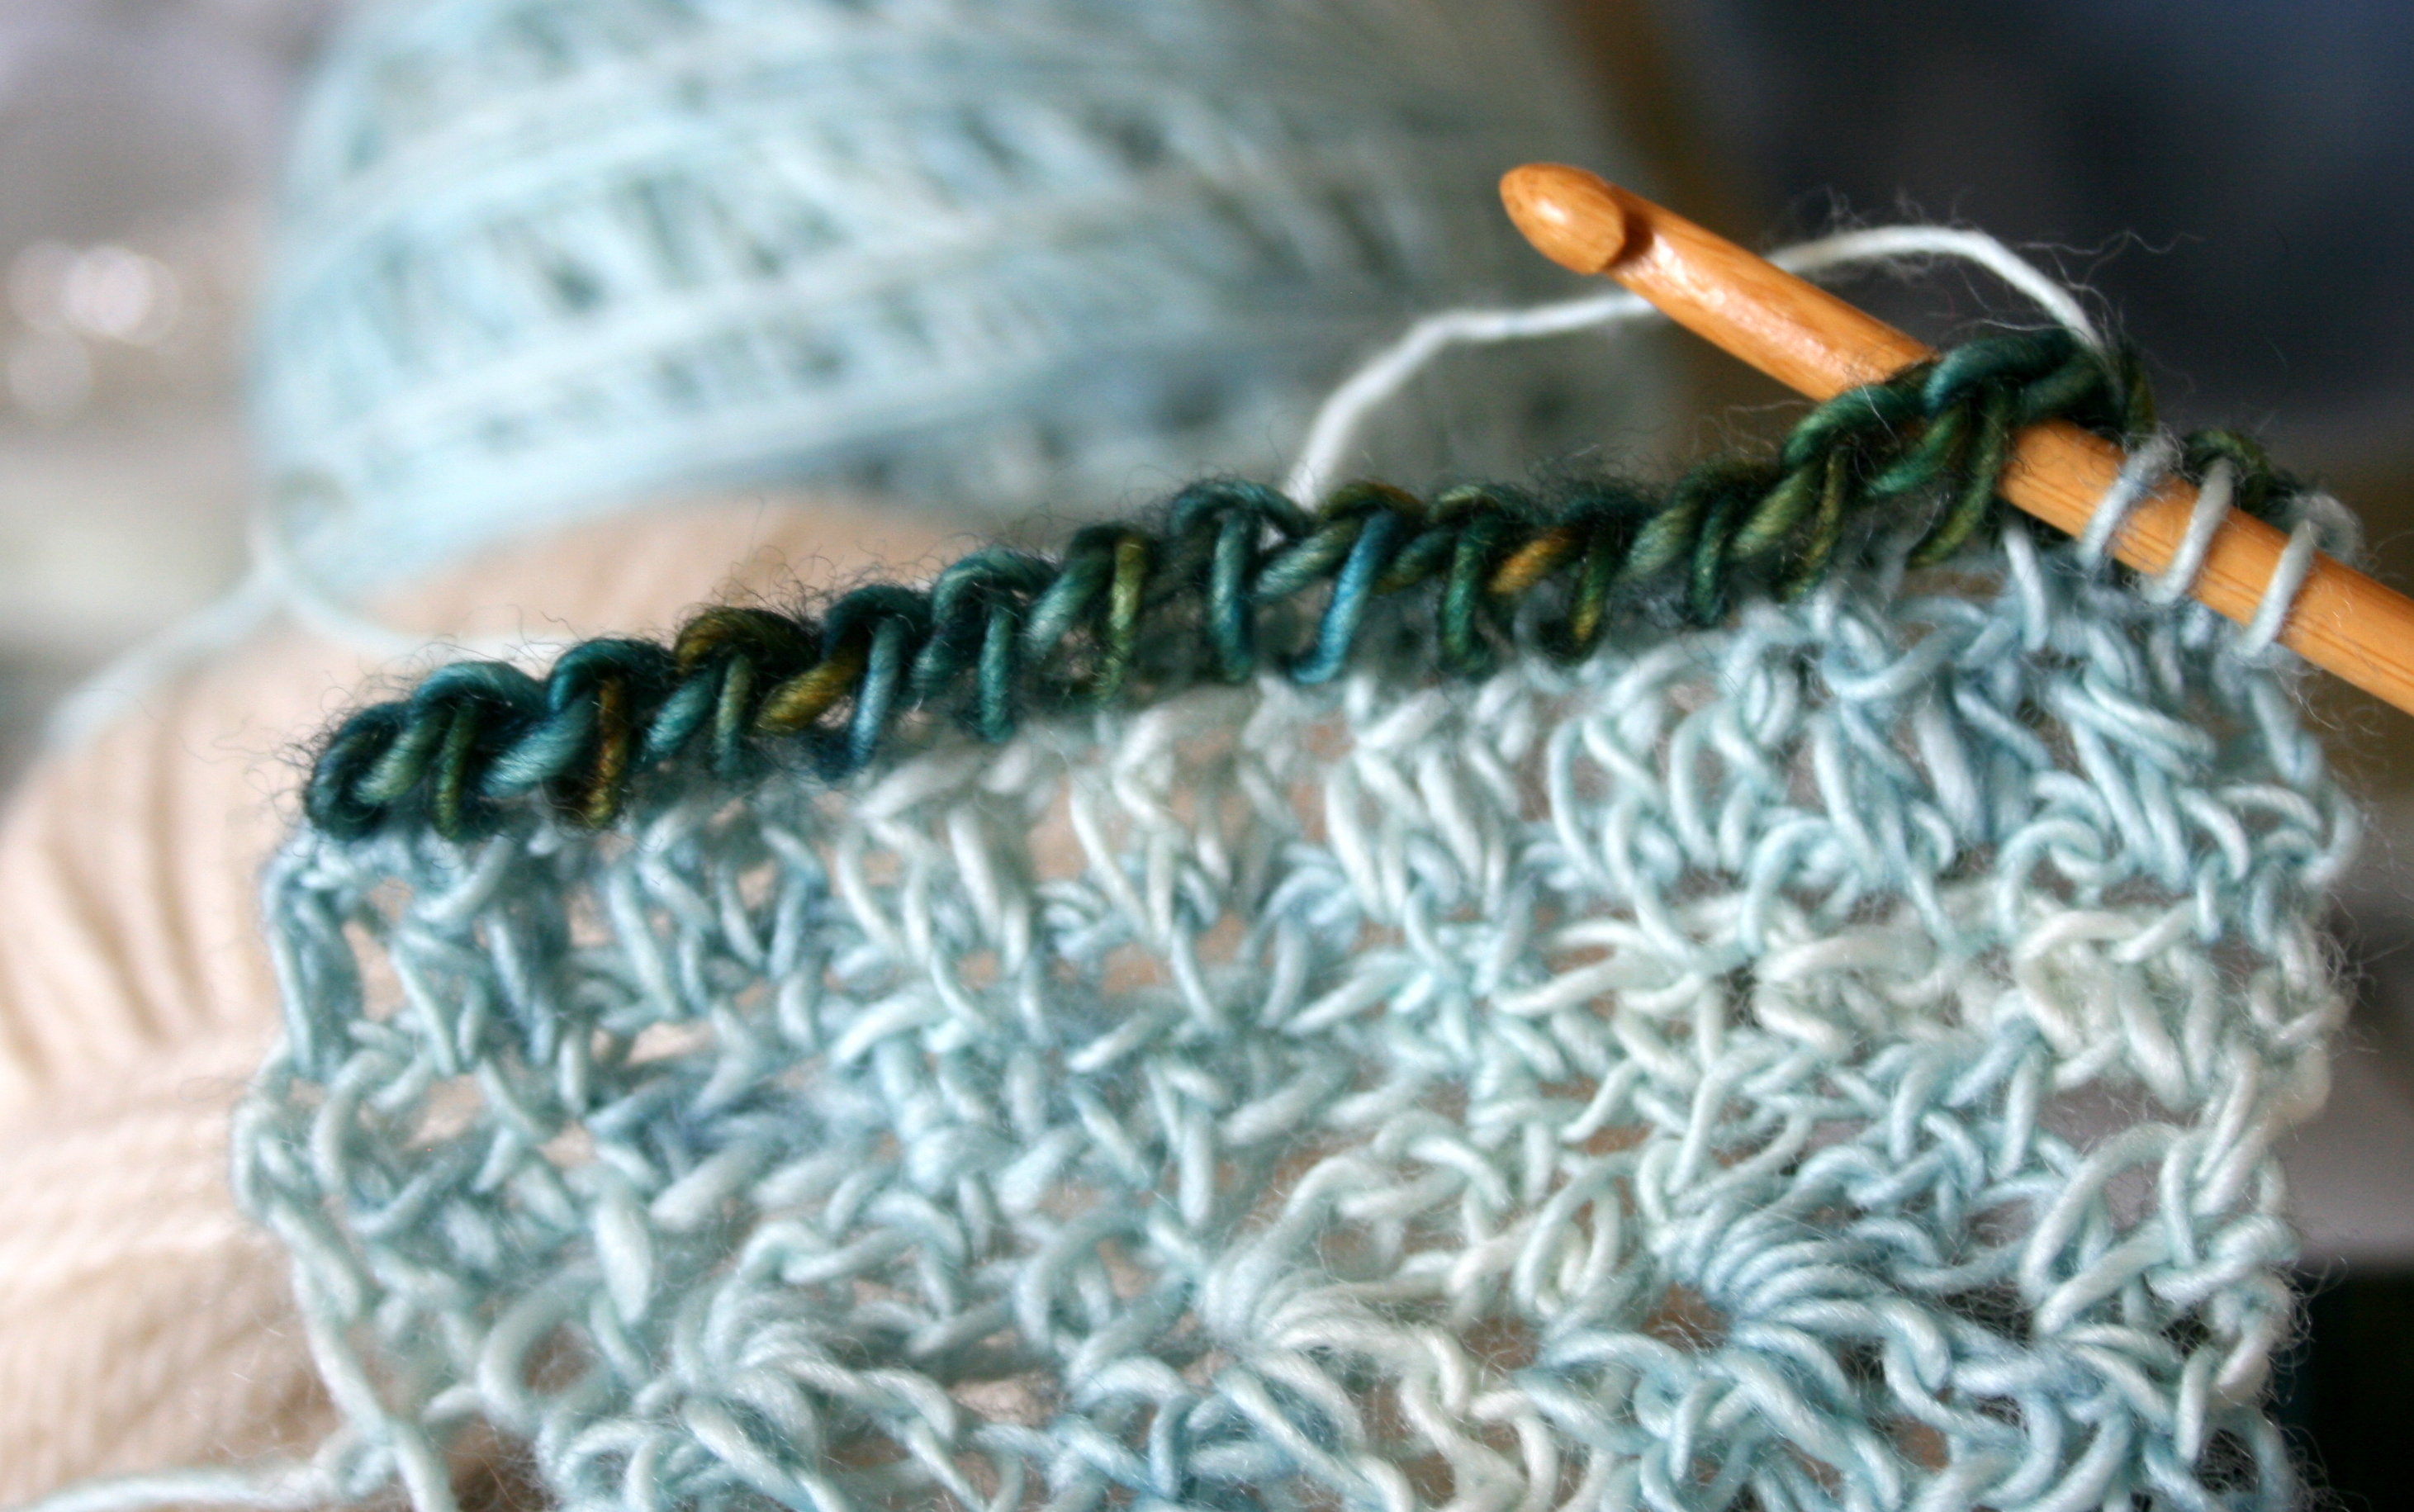
- Begin working the forward pass of the first row (here in a different color for viewing ease) which in tunisian crochet is usually all tunisian simple stitch. Note all the stitches remain on the hook.

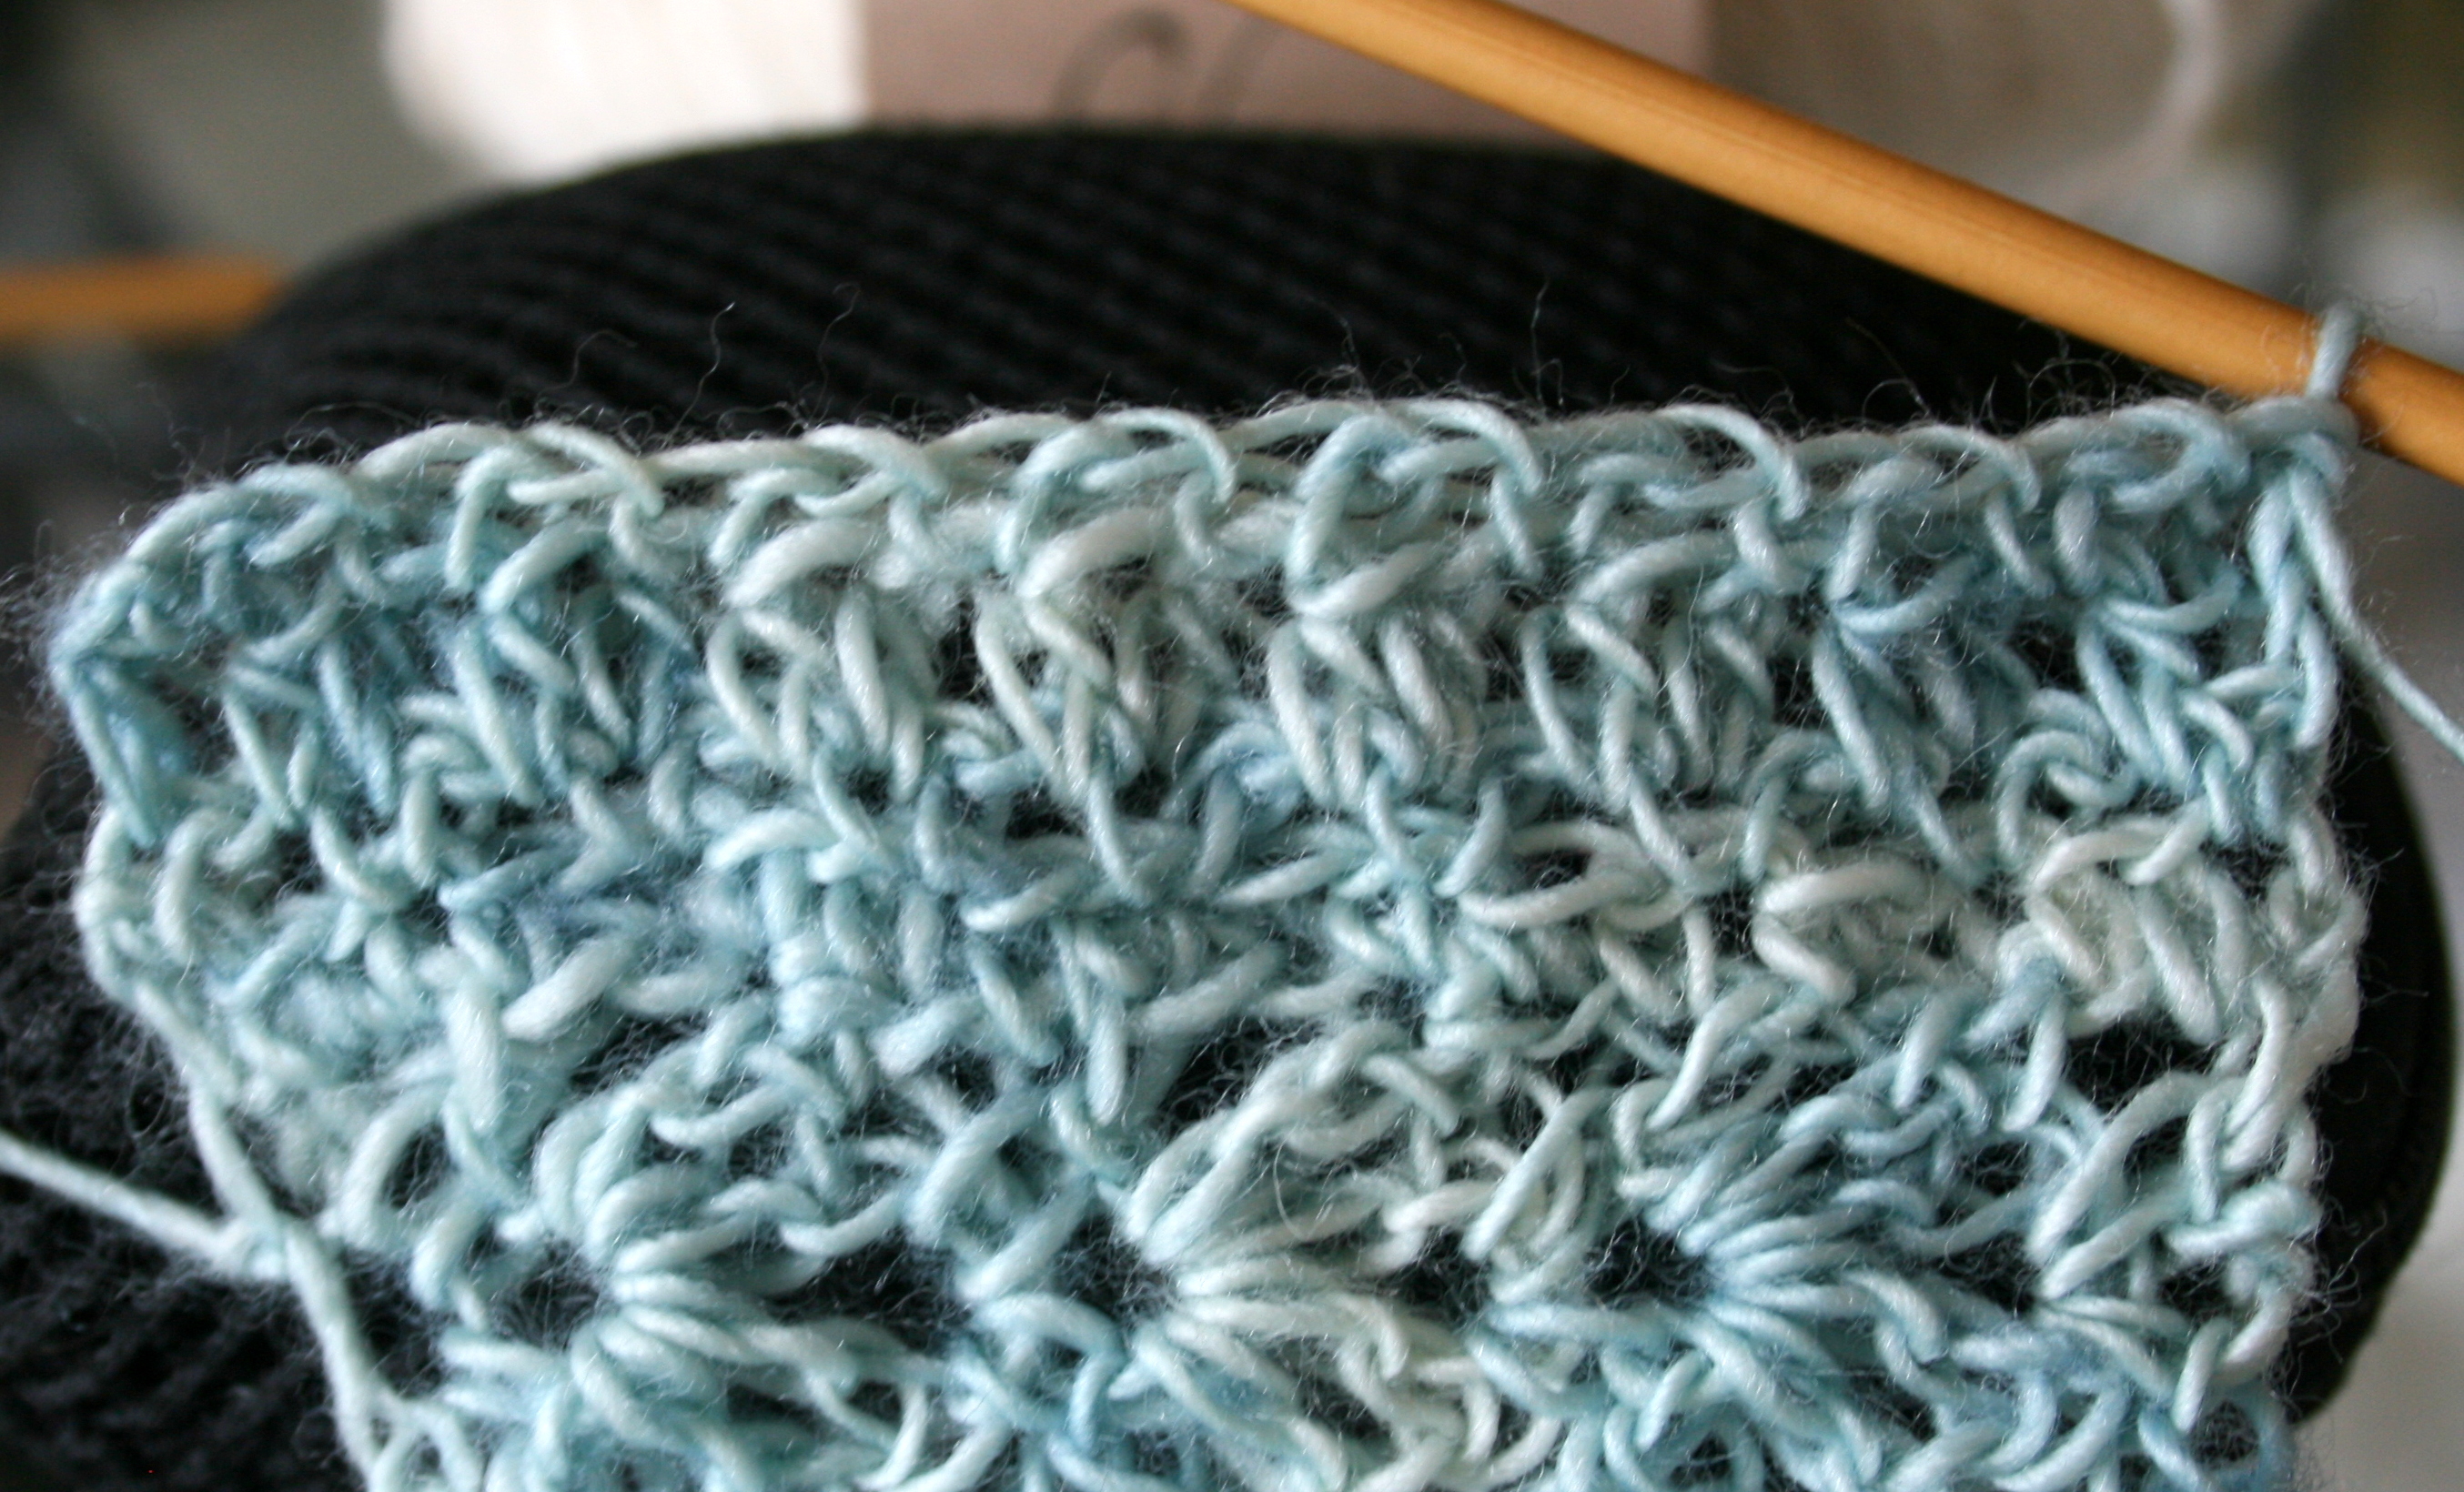
- The completed forward pass of the first row.

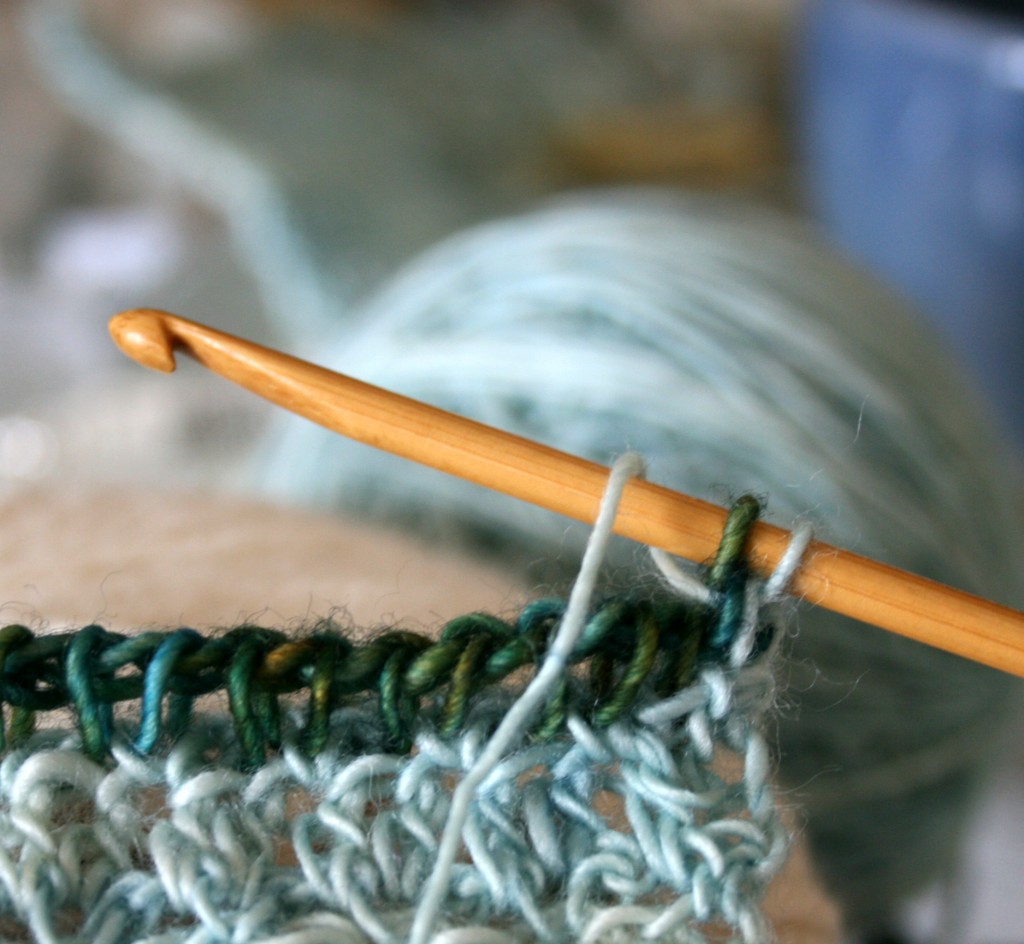
- Complete the backward pass of the first row, which is simply yarn over the hook, through the first lp on the hook, and then *yarn over the hook and through the next two loops on the hook across the remainder of the row. I’ve picked up the lighter colorway so you can better see what the stitches in the next row, i.e., the first row of the tunisian knit and purl pattern), will look like. For the tunisian purl stitch, pull the working yarn to the front of the work and to the right of the stitch to be worked, then place the hook from right to left in the next front vertical bar.


- Yarn over the hook, and pull through the first loop on the hook.

- Here is the first completed purl stitch. Note that the yarn is again in the front of the work, to the right of the next purl stitch to be worked.


- The first two purl stitches are completed, and the first knit stitch is about to be worked. Note that the working yarn is now in the back of the work, and the hook has been inserted from front to back between the vertical bars.

- Here is the first completed knit stitch.

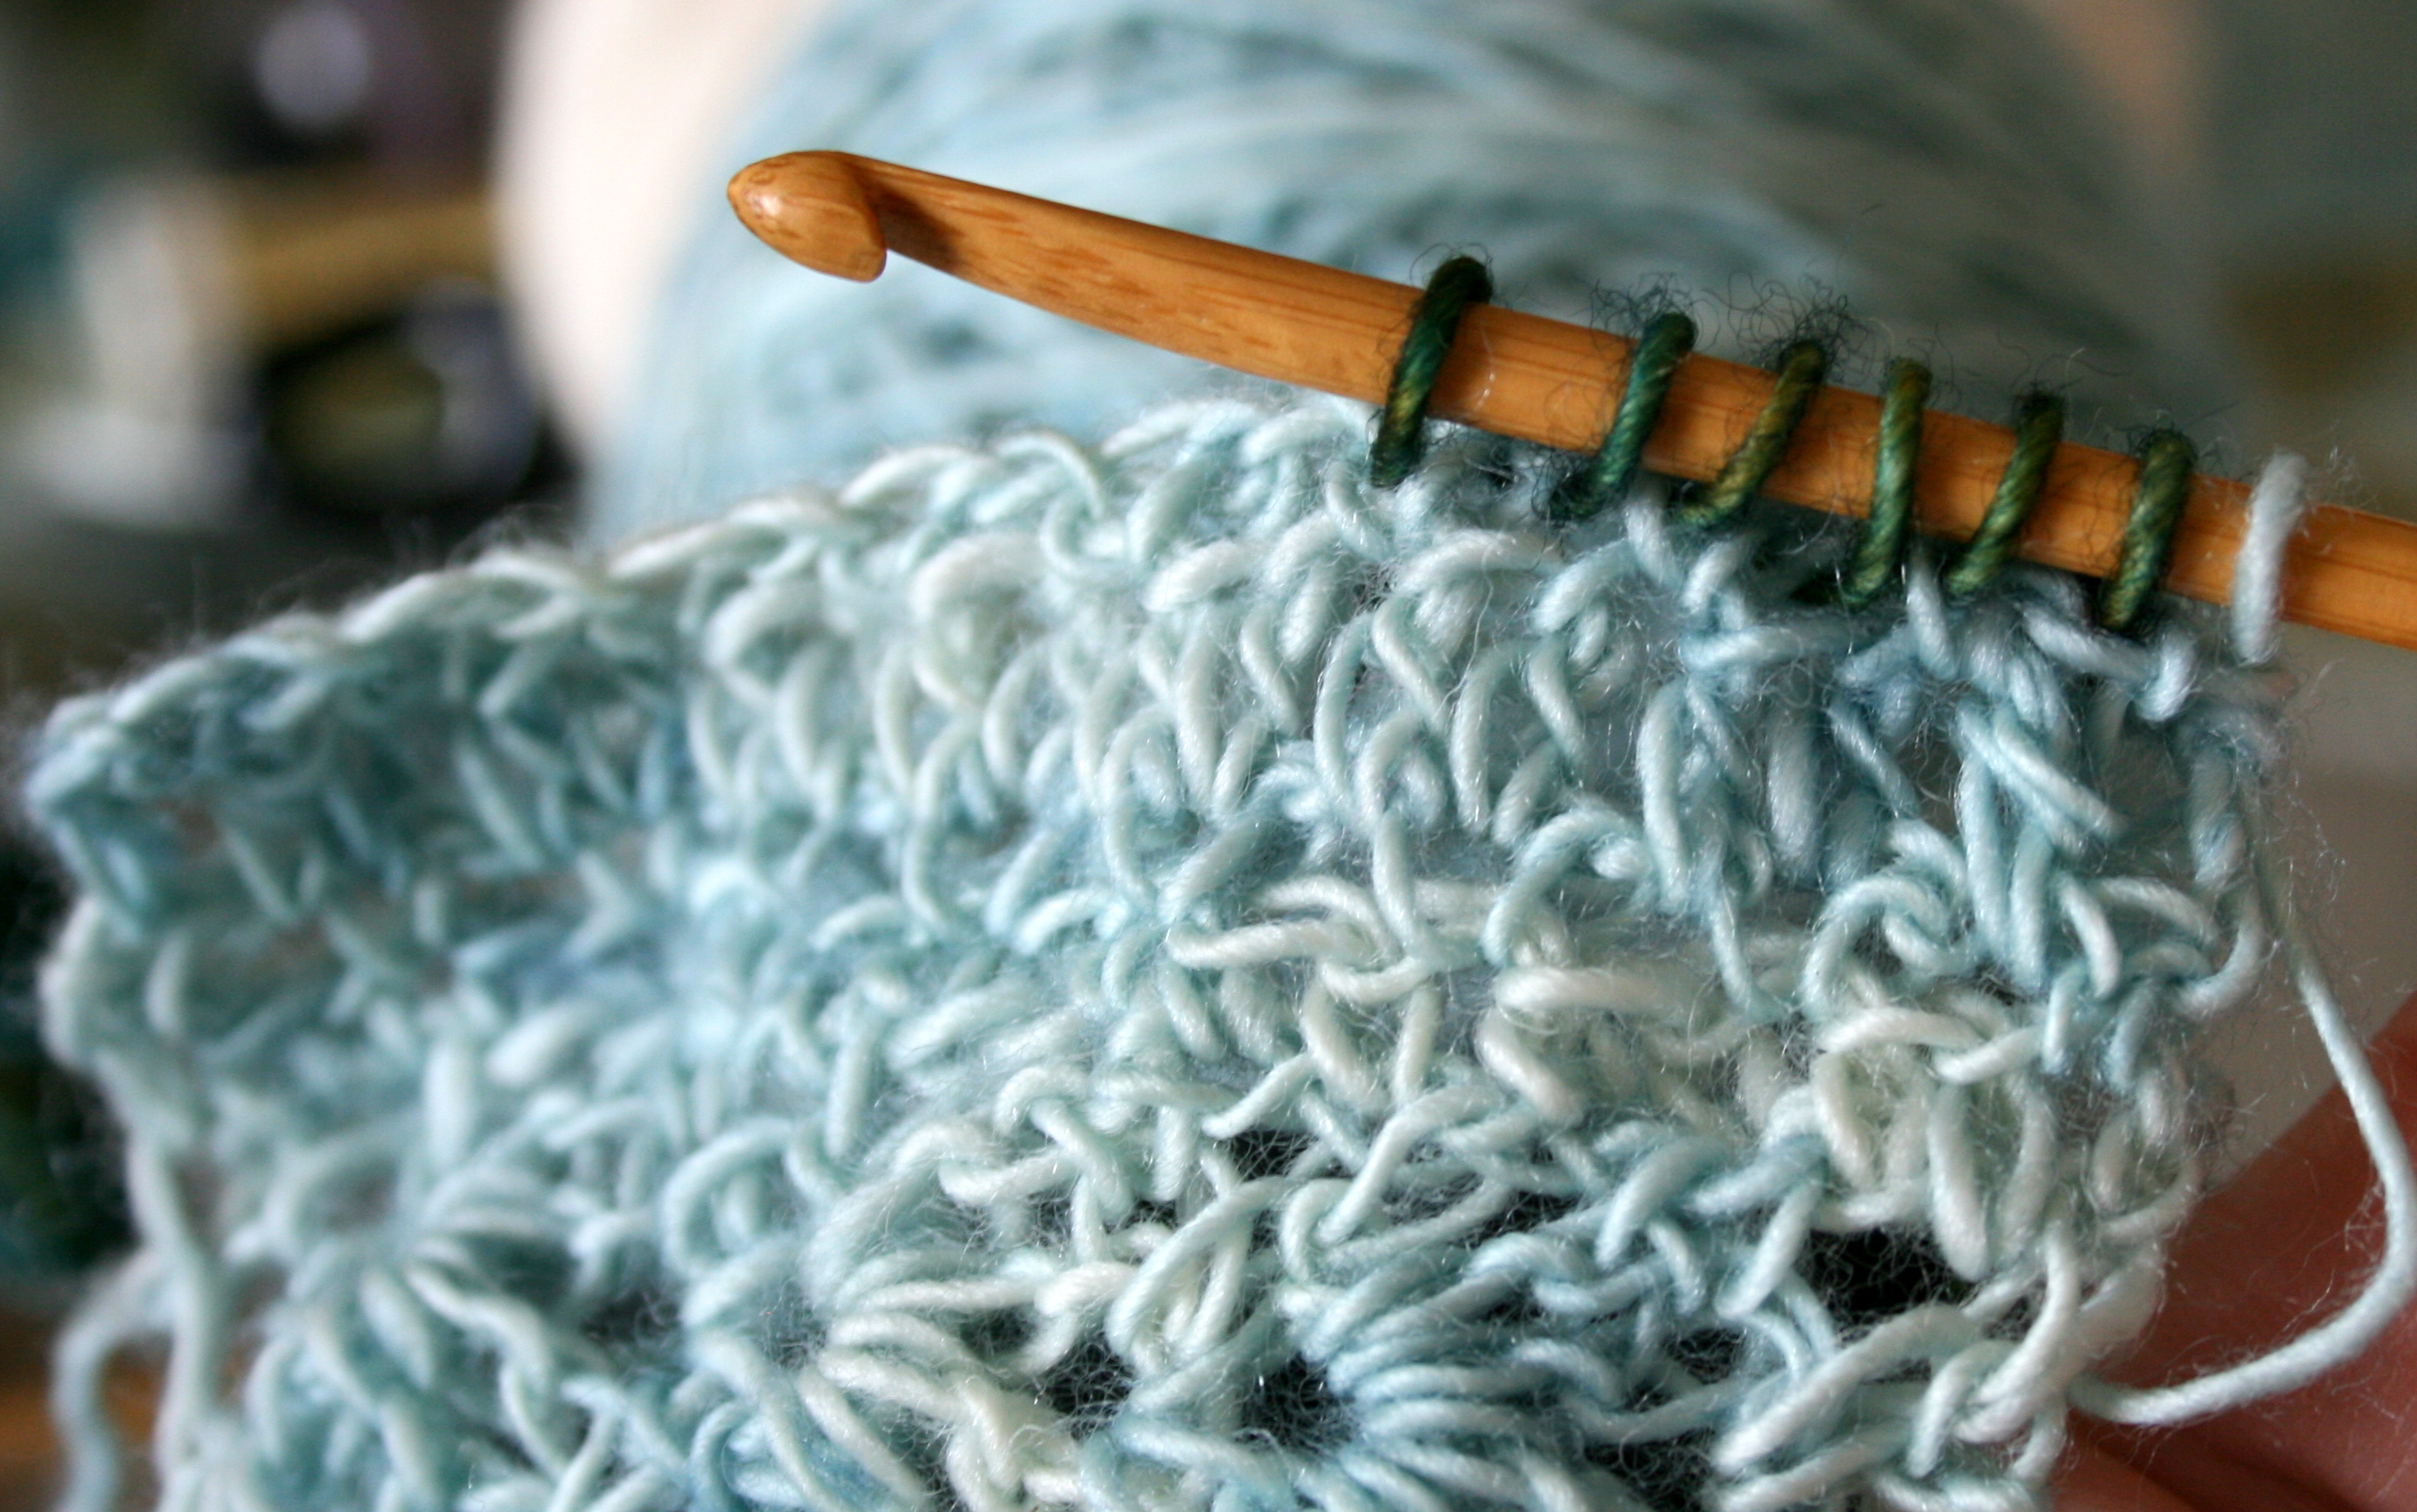
- The forward pass of the first row of tunisian crochet knit 2, purl 2. Even at this early stage, you can see the pattern forming, with the purl stitches’ yarn in front visibly displayed by the lighter colored yarn.
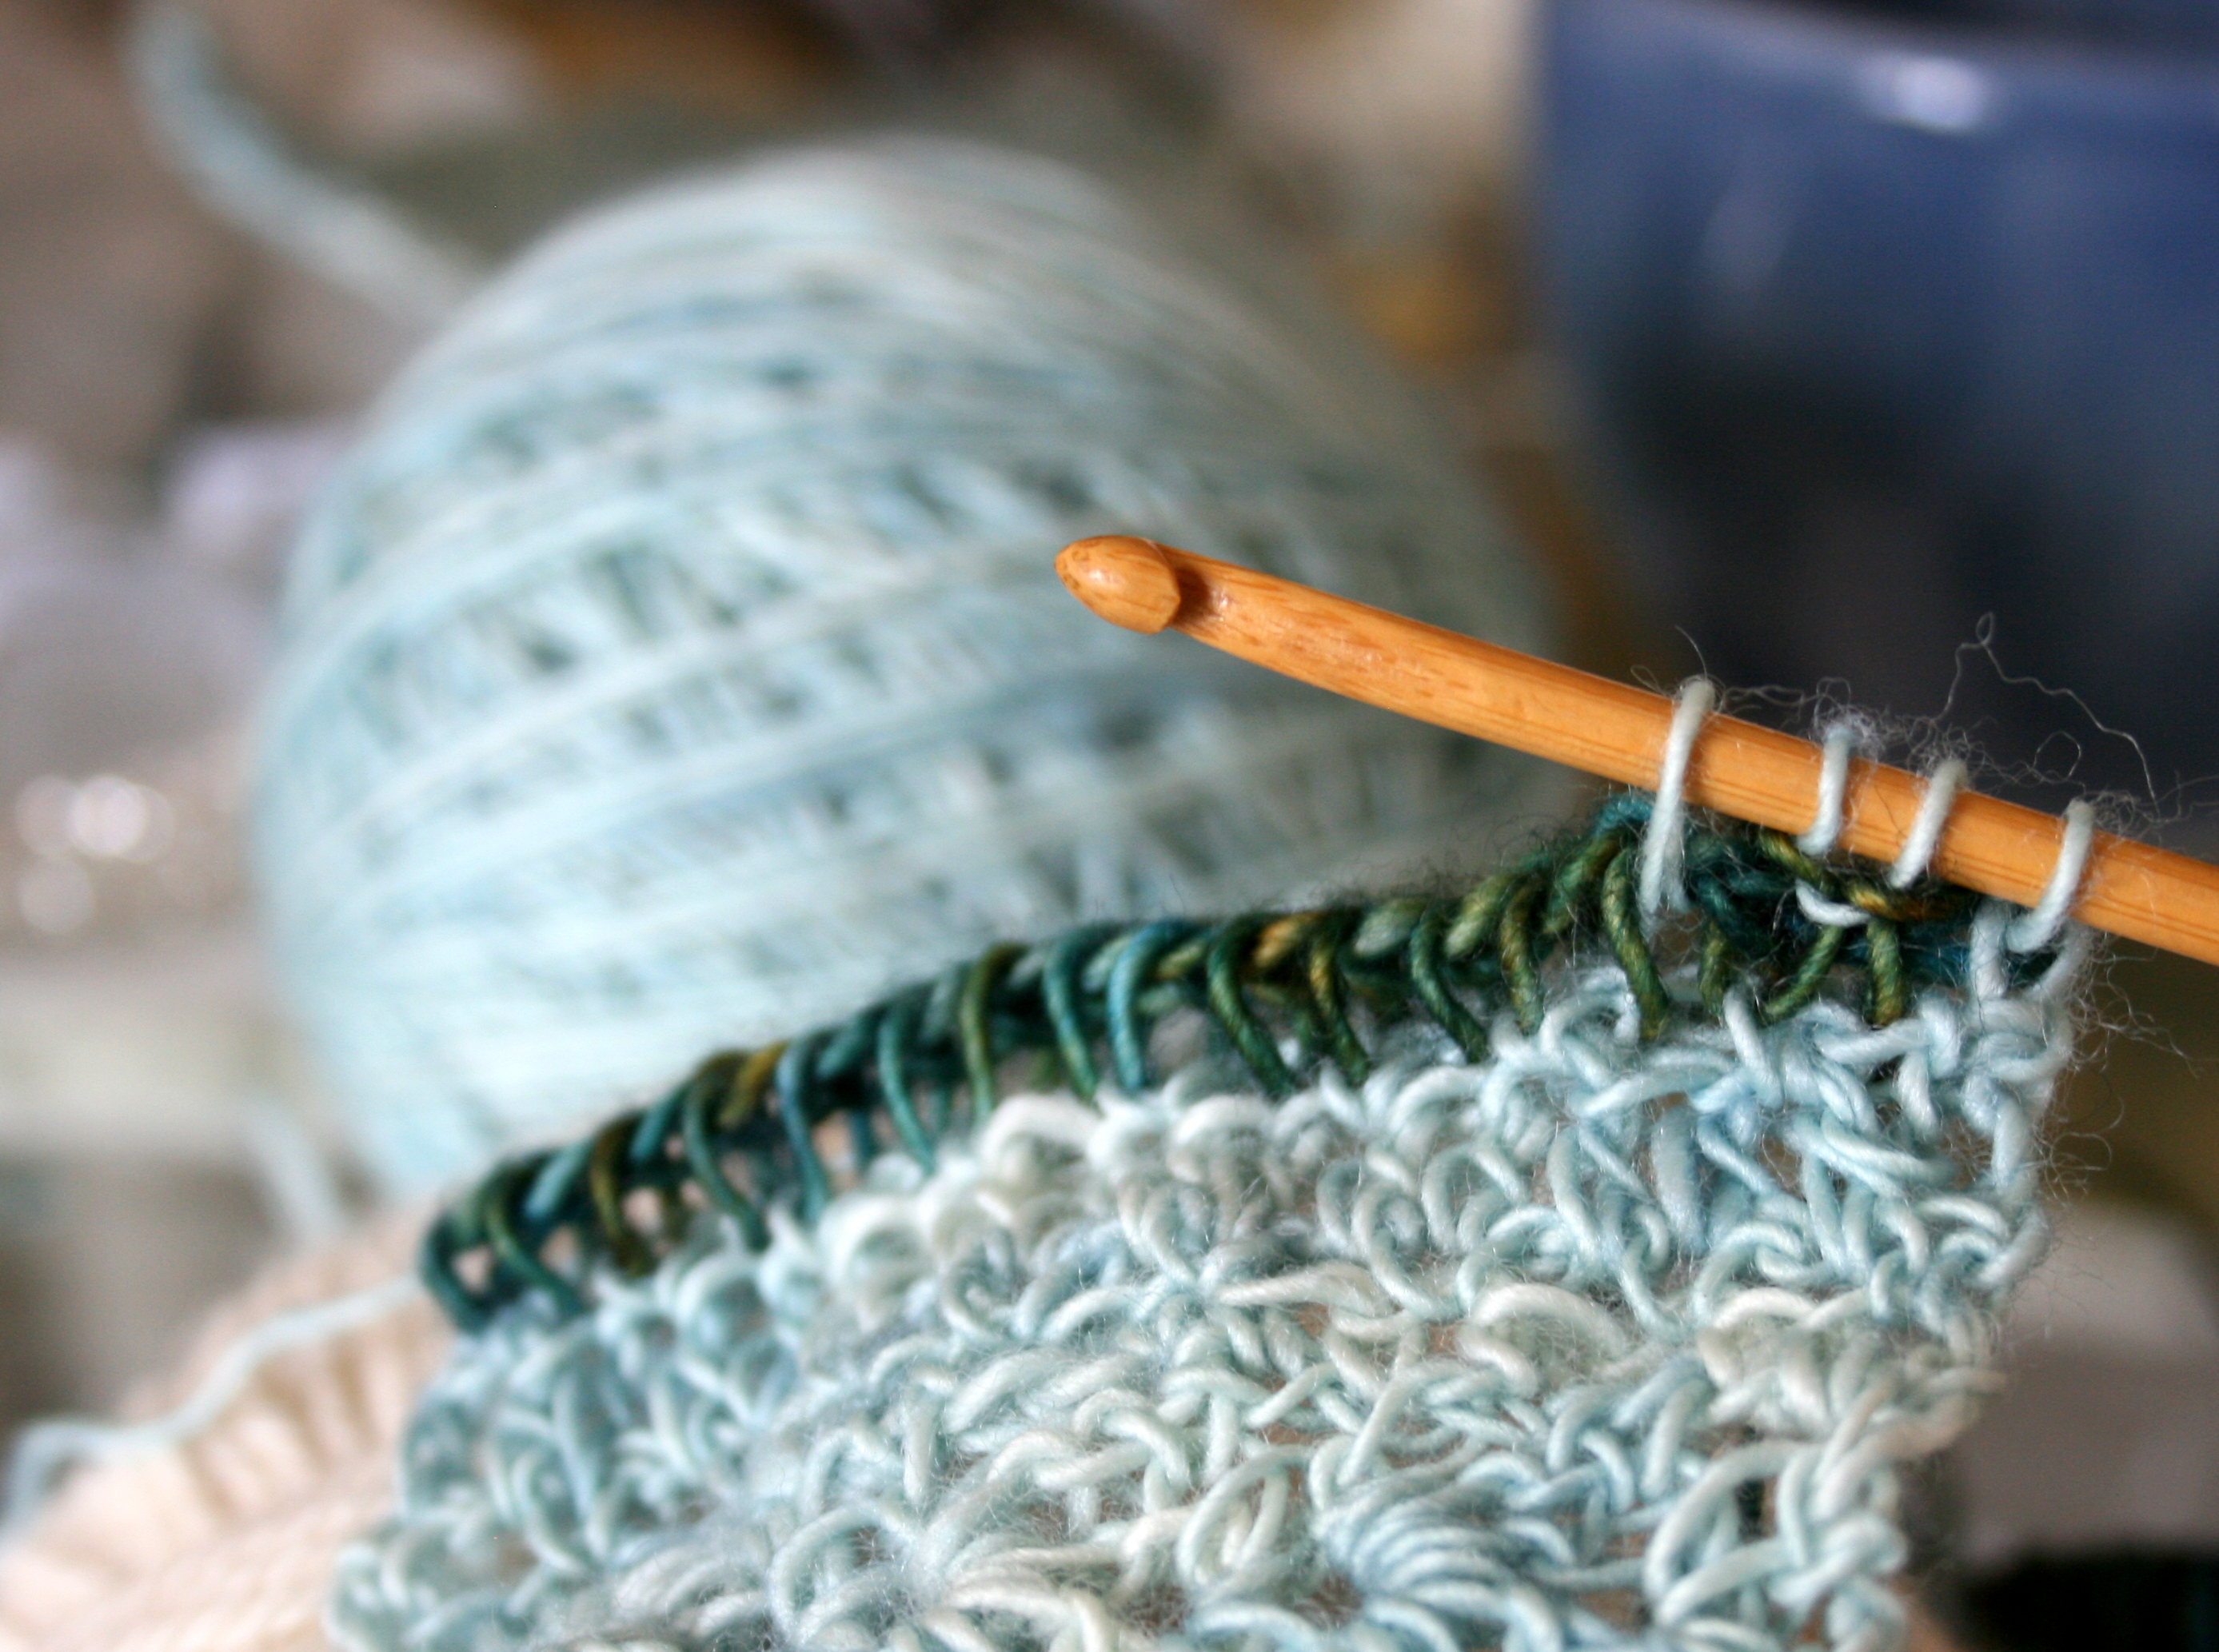
- The requisite number of tunisian crochet rows have been completed, and now it is time to bind off. Again, I am using a contrasting color yarn for viewing ease.
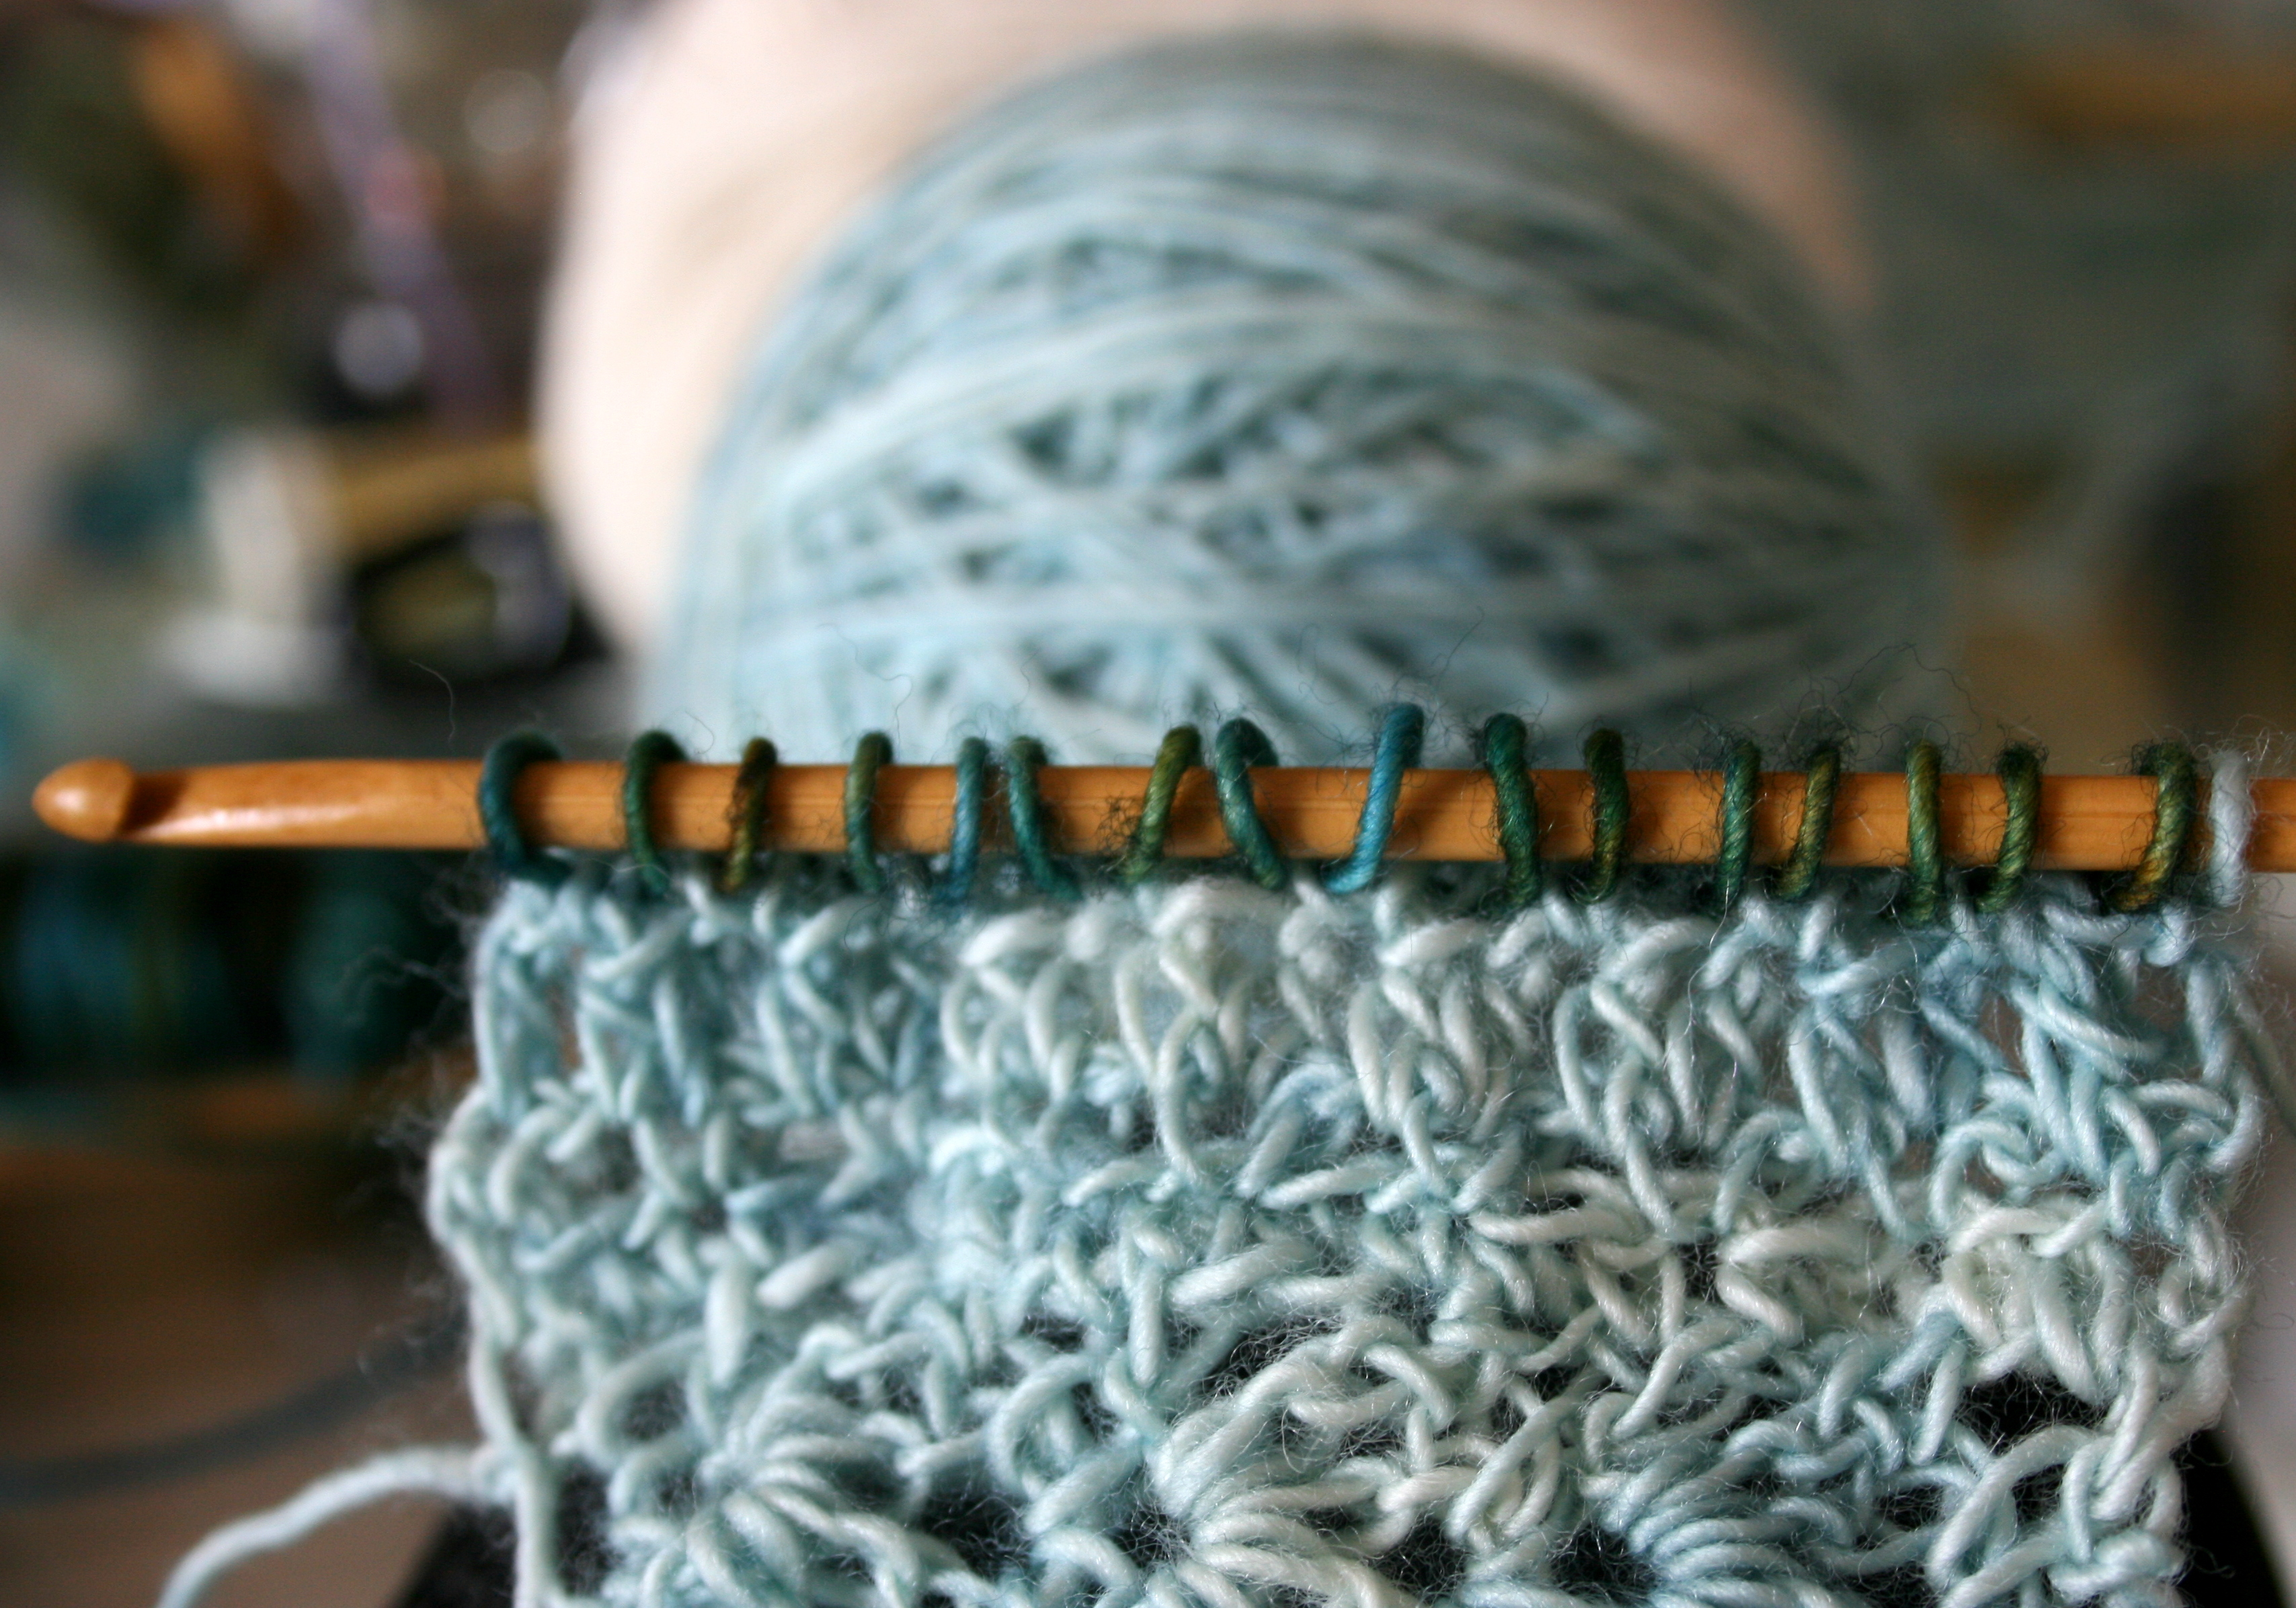
- Work each stitch keeping in the purl 2, knit 2 pattern, but instead of pulling through only one loop on the hook, pull through both loops on the hook during the bind off row, so that there is always only one loop on the hook. Here, I am about to bind off the first purl stitch in the row.


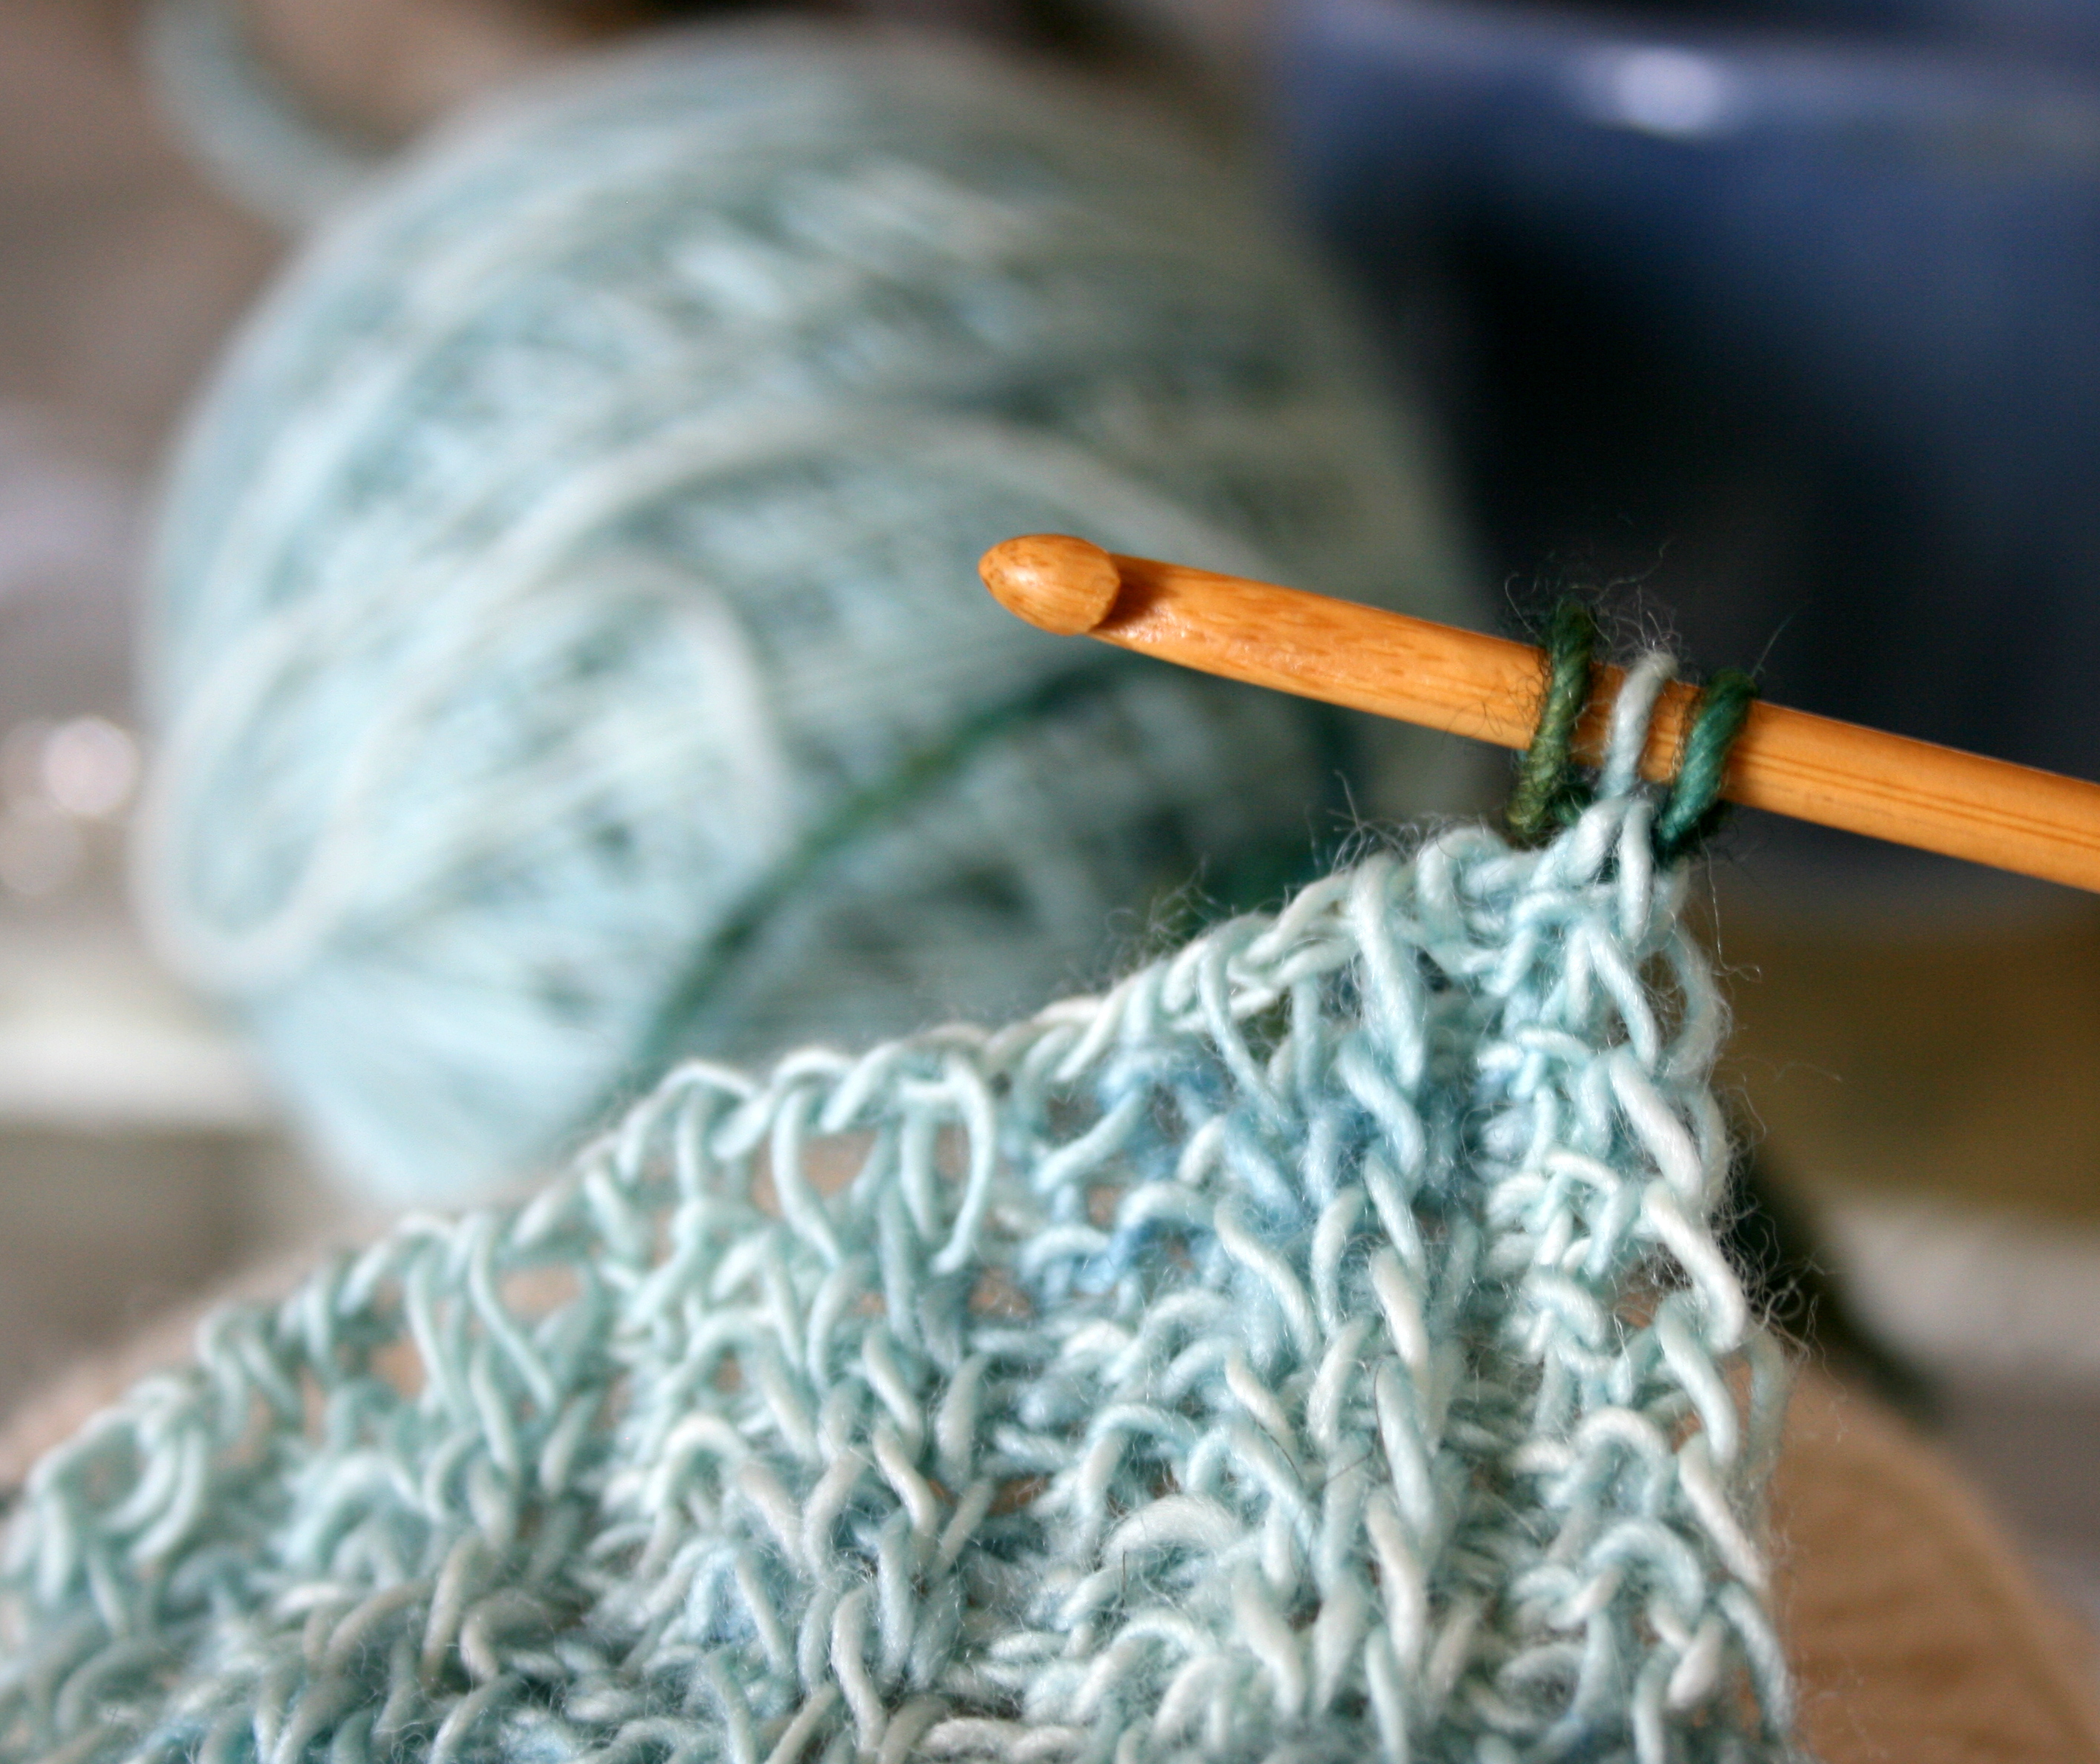
- Approximately two-thirds of the bind-off row is completed here; note that there is only one loop on the hook.


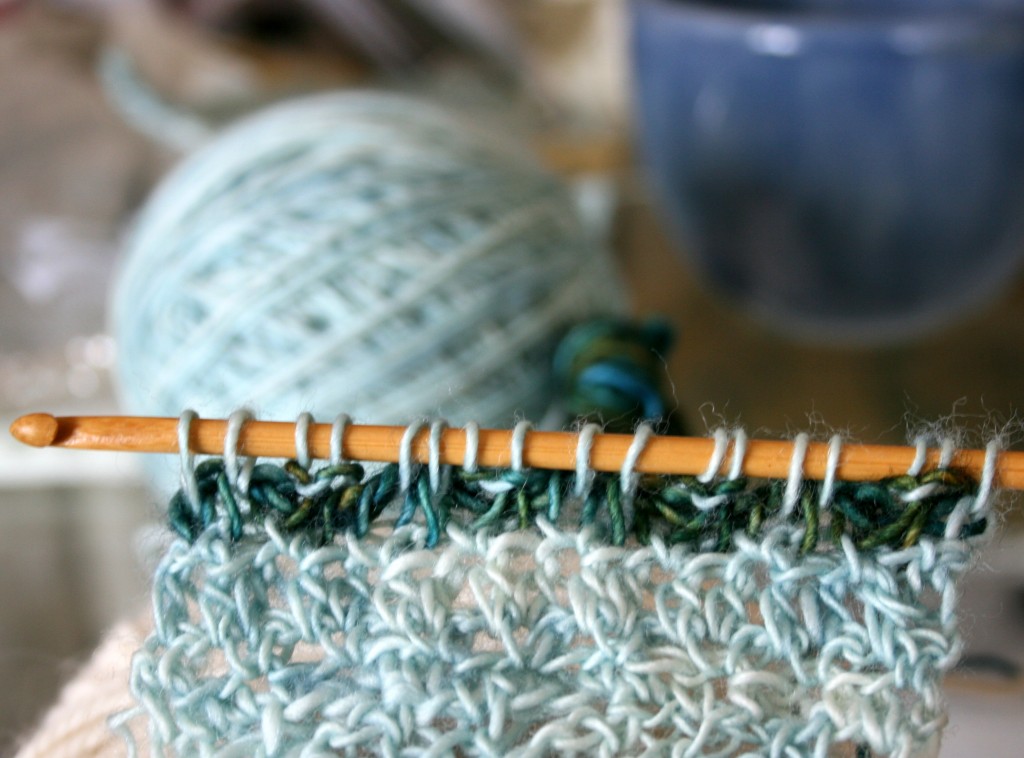
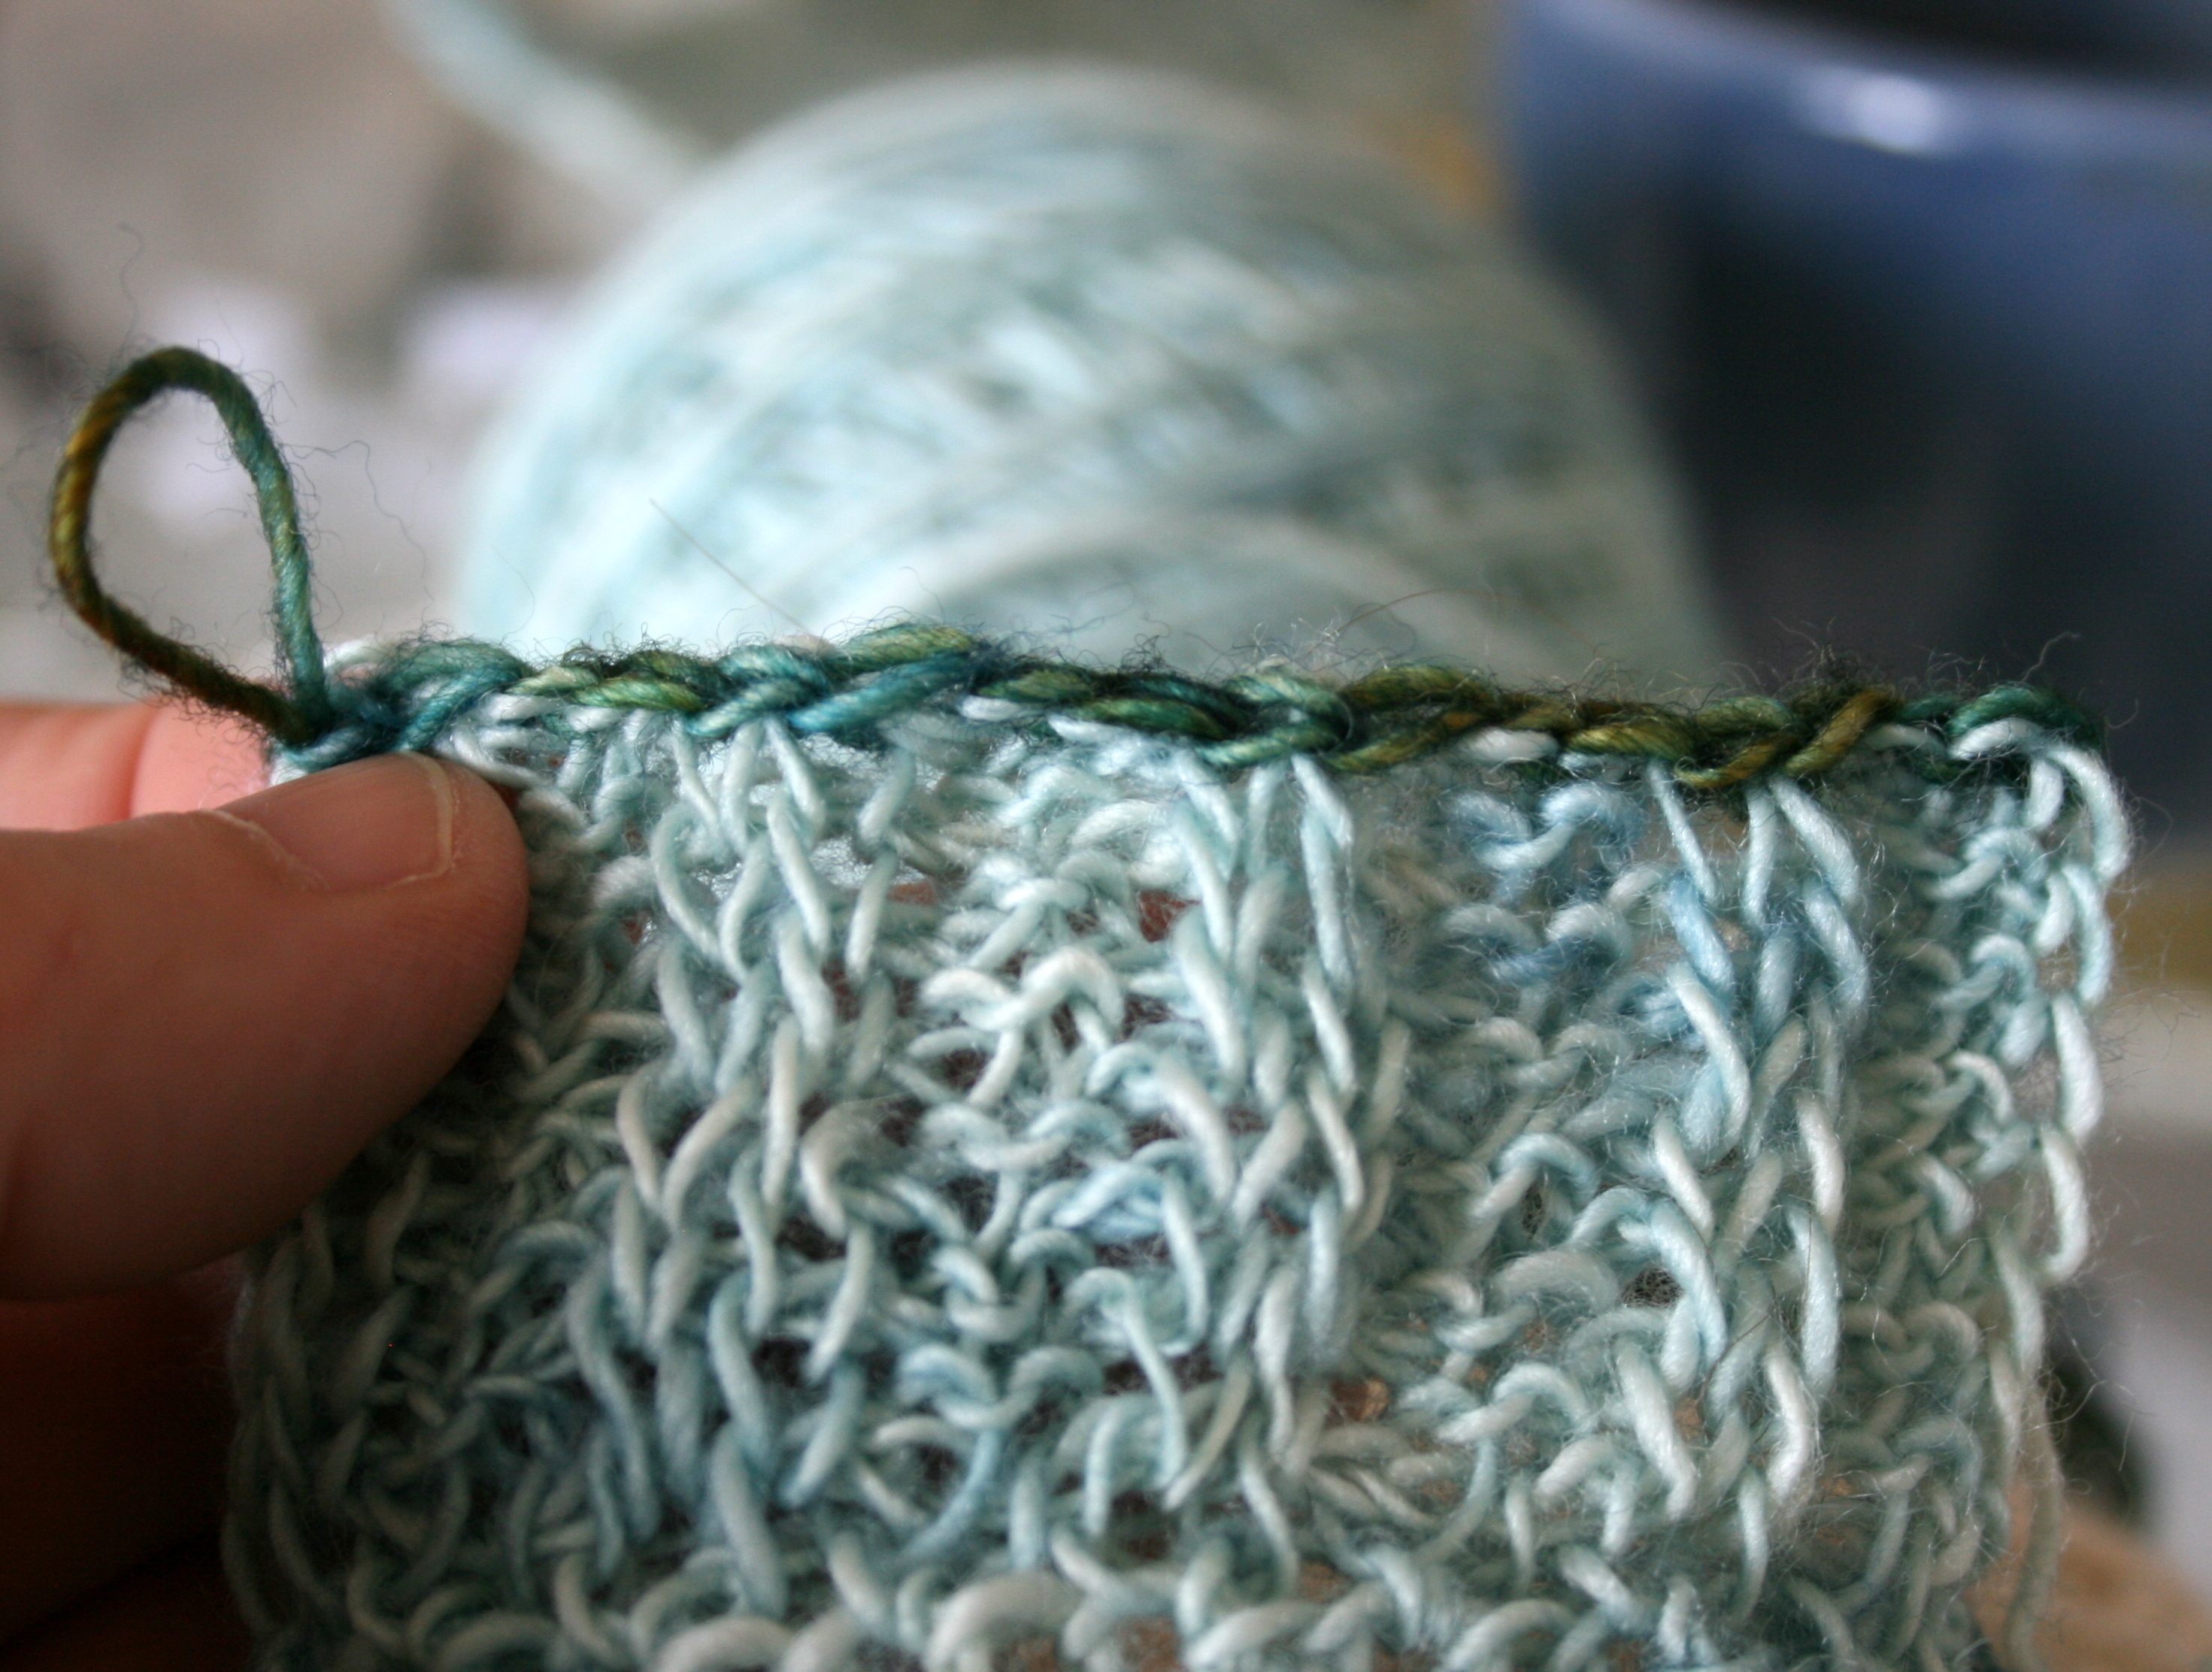
- Here is the completed tunisian crochet edging. You can see the lovely rib pattern .

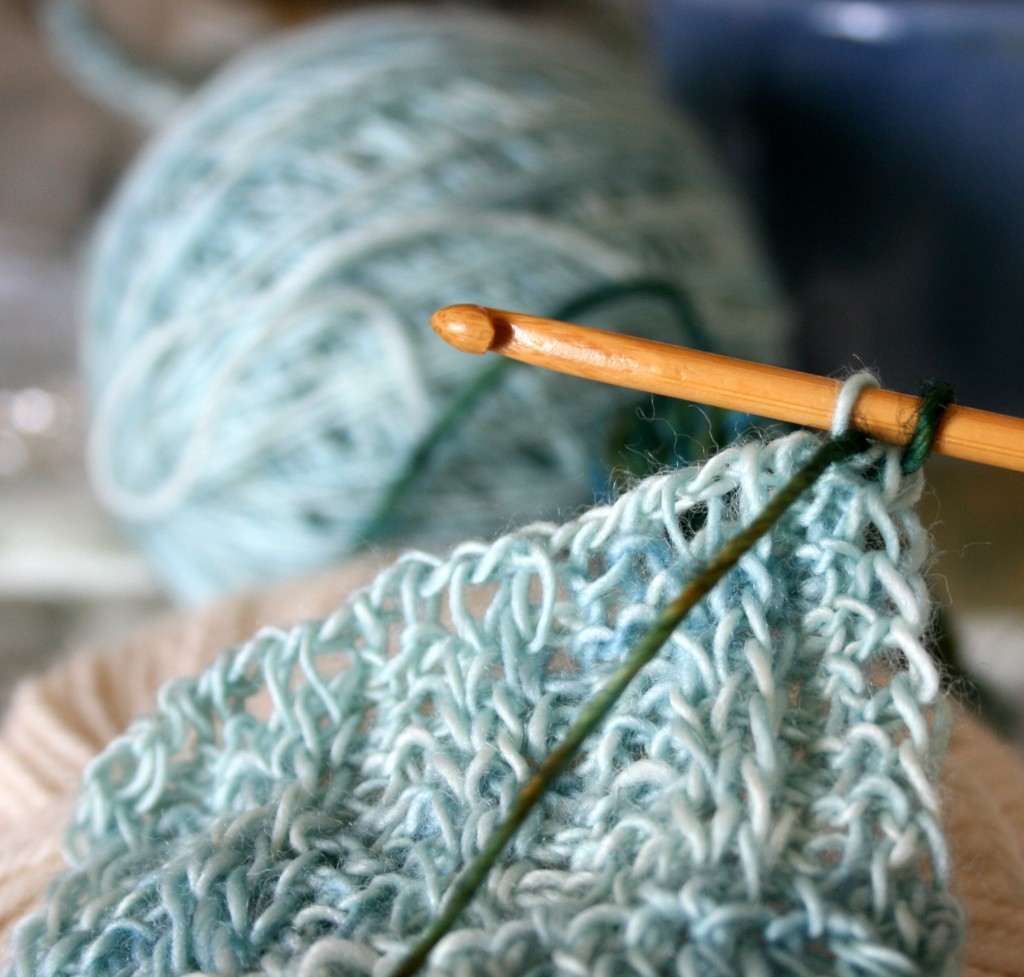
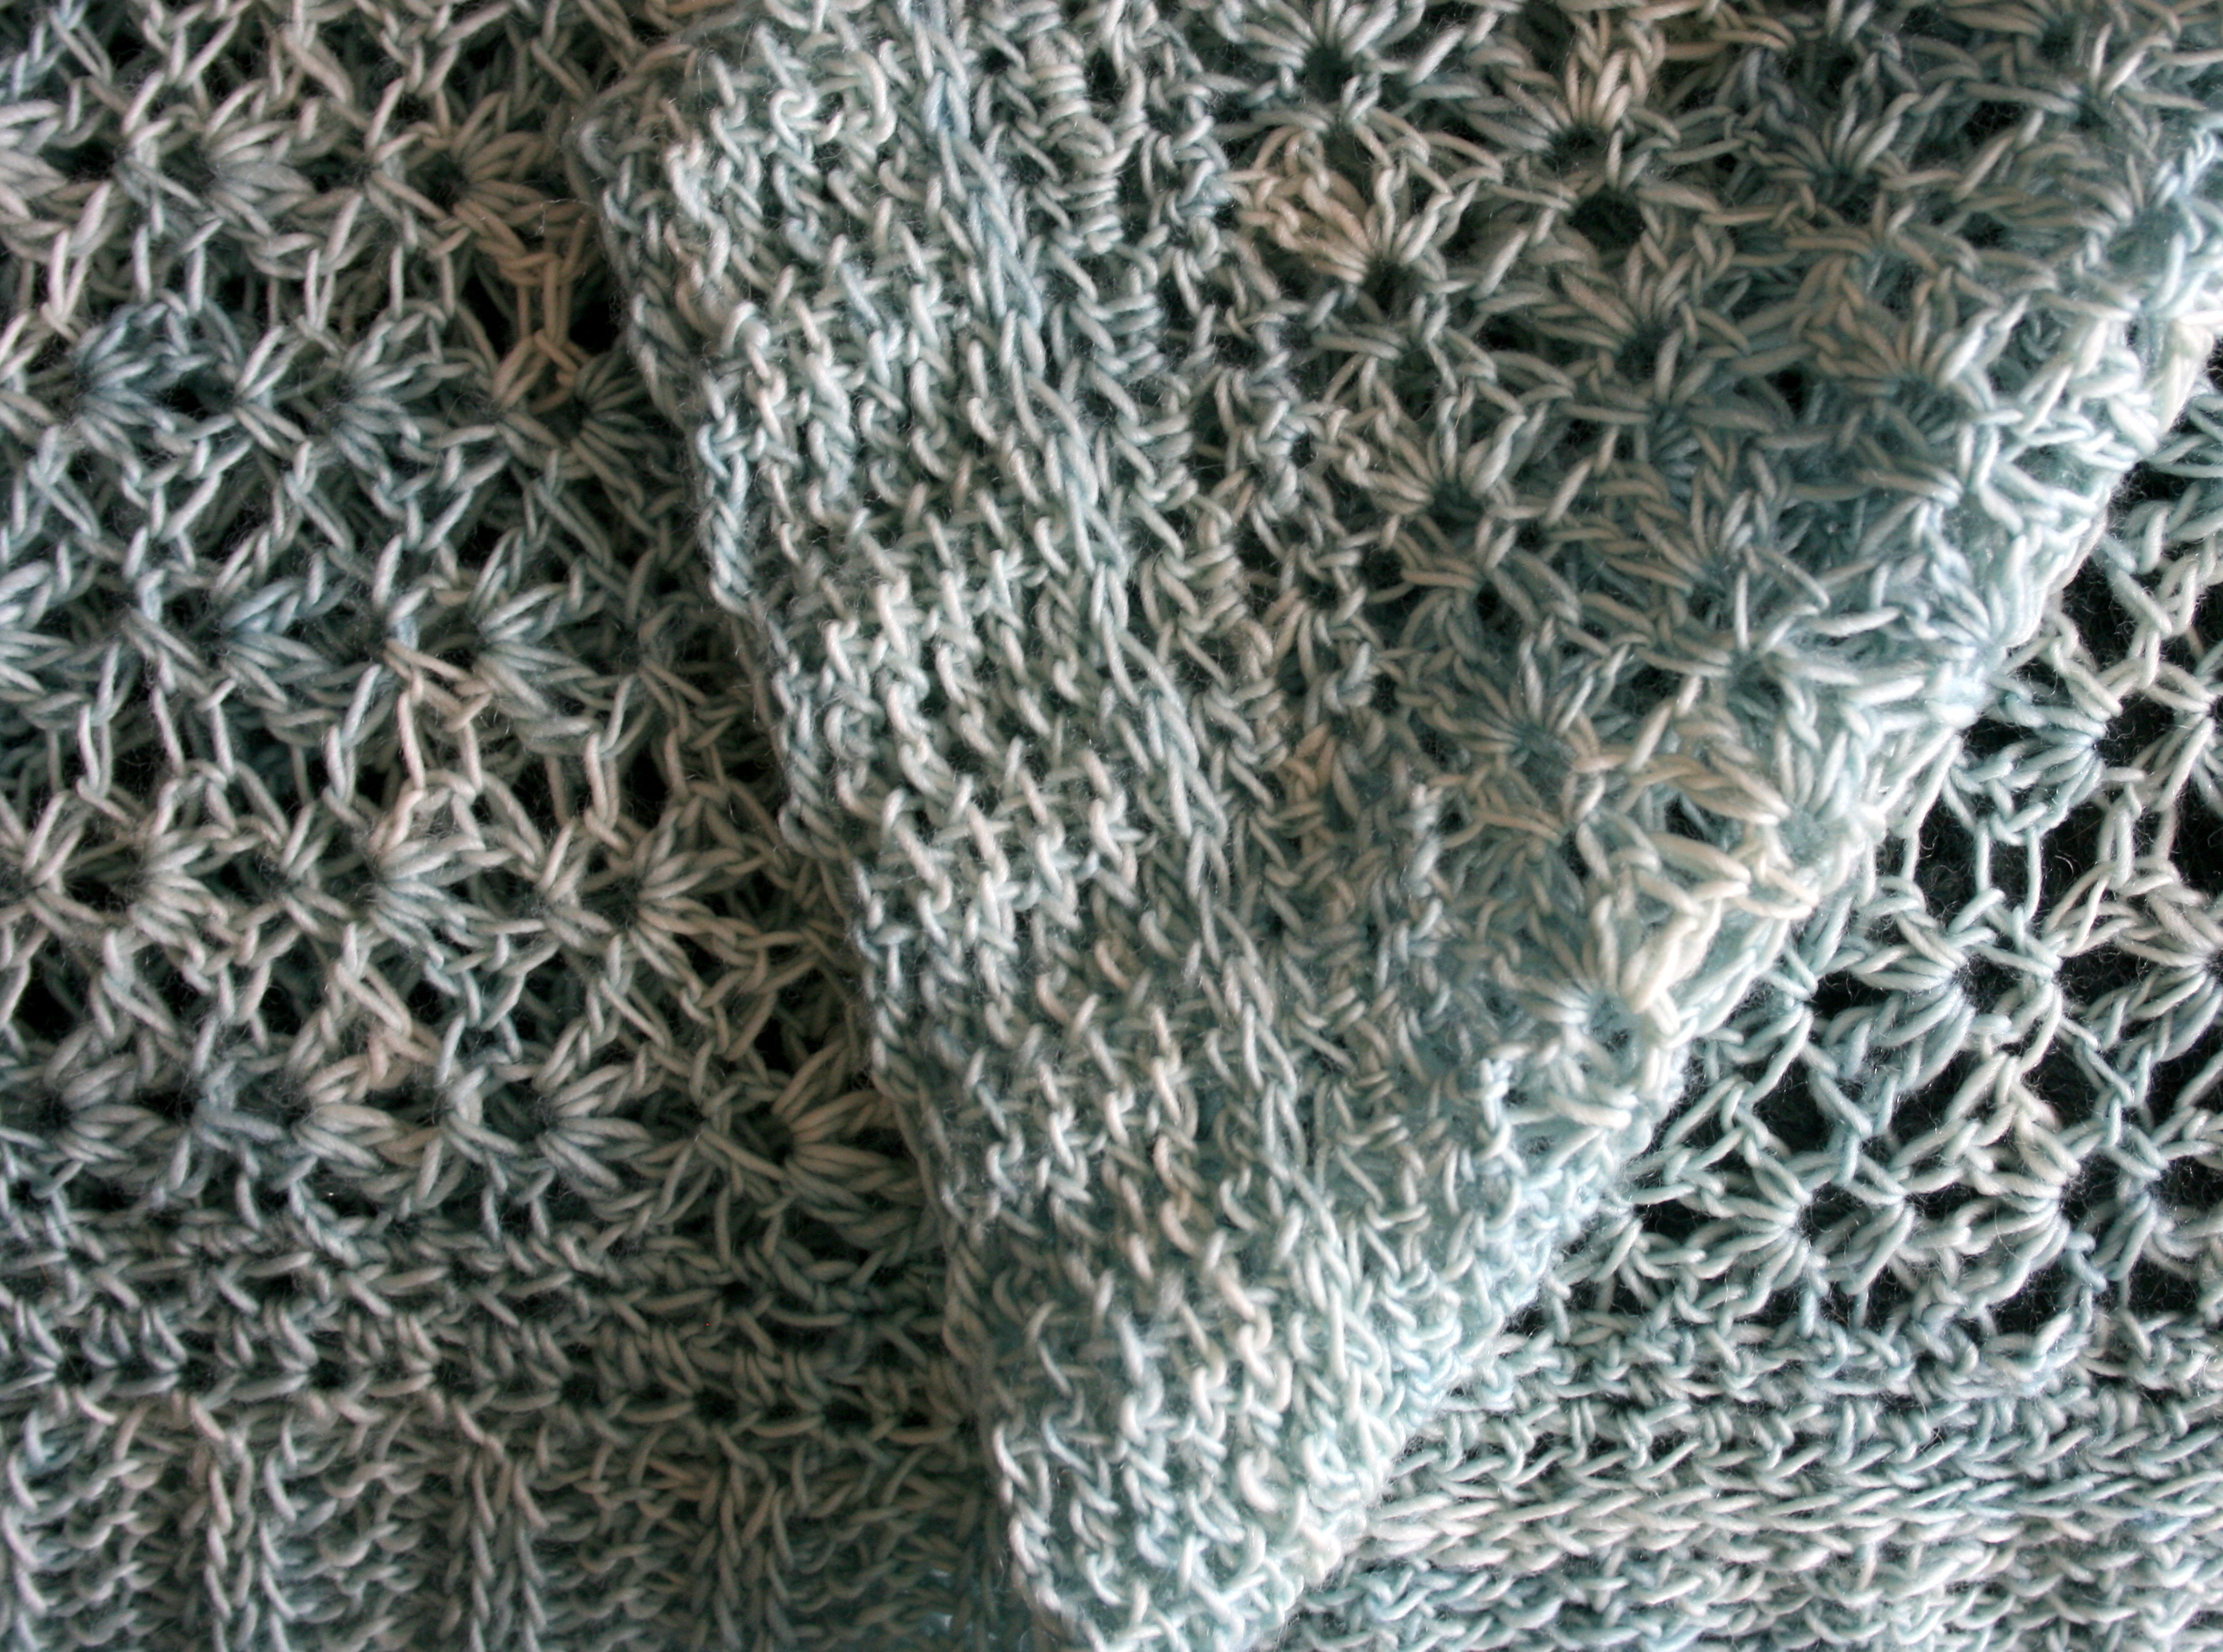
- And, finally, here is what it looks like on the edging of the poncho. The right side of the fabric is at the left, and the back of the fabric is shown folded over.

very nice, love this
The edge of the poncho is long. Did you do the Tunisian crochet for the whole edge on one hook? Or did you break it up in sections?
For a long edge, you can use a Tunisian hook with a cable instead of a straight hook.