


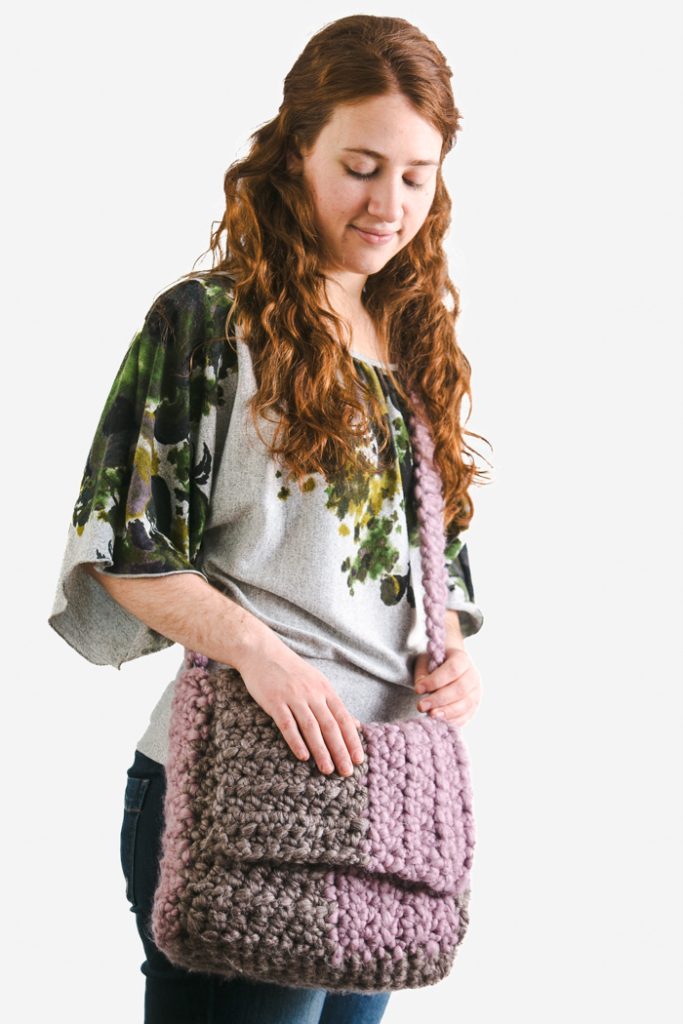
The Purple Haze Messenger Bag is a stylish and practical accessory that combines chunky yarn, durable nylon strapping, and a touch of macramé technique to create a thick, sturdy bag that can handle all your essentials. Whether you’re carrying school books, your laptop, or daily necessities, this bag is up for the task, offering both functionality and flair. Don’t worry if you’re unfamiliar with macramé—our detailed video tutorial at the bottom of the pattern will guide you through the process, making it easy for beginners to master this technique.
Skill Level: Intermediate
Size: Standard messenger bag size
Gauge: Gauge not listed
Materials
 Yarn: Patons Cobbles (49% wool, 49% acrylic, 2% polyester; 41 yards [37 meters]/100 grams): Moon Rock (A, 3 skeins), Frosted Plum (B, 2 skeins)
Hook: US size P/15 (10.0 mm) hook
Notions: 22.5 yards grey nylon strapping, grey (or otherwise coordinating) quilting thread, sewing needle, scissors
Pattern
Using A, ch 13 (foundation chain), turn.
Row 1: Sc in 2nd ch from hook, sc in each ch across.
Row 2: Ch 1, turn, sc 3 in first sc, sc 10, sc 3 in 1, sc 3 in 1 (which is also the last ch of the row), sc 10 in back ridge of foundation chain, sc 3 in 1, sl to join.
Row 3 is worked in the round.
Row 3: Ch 1, sc 1, sc 3 in 1 (which is the center sc of the last rnd’s sc 3 in 1), sc 12, sc 3 in 1, sc 2, sc 3 in 1, sc 12, sc 3 in 1, sc 1, sl to join.
Row 4: Ch 1, sc 39 around, sl to join. (40 sts total)
The base has been formed.
Most of the bag will now be formed in panels of rows, not worked in the rnd.
Panel 1 – Color A
Row 5: Sl 1, ch 2, hdc 8, ch 2, turn.
Rows 6-14: Hdc 8, ch 2, turn.
Row 15: Hdc 8, break yarn and draw tail through to secure, weave ends into clr A panel.
You’ll have ended your work on panel 1 in the middle front of your bag.
Panel 2 – Color B
Note: Panel 2 is worked vertically.
Row 1: At the center of the base rectangle, in the st next to the end of panel 1, ch 1, sc 12 along vertical edge of panel 1. The last sc will be at the top edge of panel 1. Ch 2, turn.
Row 2: Working back toward the base in the 12 scs just formed, hdc 12, sl 2 tog into next 2 base sts, ch 2, turn.
Odd rows 3-7: Hdc 12, ch 2, turn.
Even rows 4-6: Hdc 12, sl 2 tog (to base) ch 2, turn.
Row 8: Hdc 12, sc 1 to base, break yarn, draw tail through to secure and weave ends into panel 2.
Panel 3 – Color A
Note: Panel 3 is worked horizontally.
Row 1: Begin in the base, 4 sts from end of panel 2. Using color A, ch 2, hdc 2, sl 1 in last sc of base. Looking at vertical edge of color B, skip 1 ch and sc 1, ch1, turn.
Even rows 2-12: Hdc 4, ch 2, turn.
Odd rows 3-13: Hdc 4, sl 1 in a clr B st, sc 1, ch 1, turn.
Row 14: Hdc 4, break yarn, draw tail through weave ends into panel 3.
Panel 4 – Color B
Note: Panel 4 is worked vertically and includes part of the bag’s flap.
Row 1: At the edge of the base rectangle, add color B, ch 1, sc 12, ch 16, turn.
Row 2: Starting 2 sts from end of chain, hdc 14 in chain (back toward the base), hdc 12, sl 2 tog with base sts, ch 2, turn.
Odd rows 3-7: Hdc 26, ch 2, turn.
Even rows 4-6: Hdc 26, sl 2 tog, ch 2, turn.
Row 8: Hdc 26, sc 1 to base. Break yarn, draw tail through and weave ends into panel 4.
Panel 5 – Color A
Note: Panel 5 is worked horizontally and includes part of the bag’s flap.
Row 1: Begin 8 sts from panel 4’s edge. Join color A, ch 2, hdc 7 into base, sl 1 in a clr B st, sc 1, ch 1, turn.
Even rows 2-26: Hdc 8, ch 2, turn.
Odd rows 3-25: Hdc 8, sl 1, sc 1, ch 1, turn.
Row 27: Hdc 8, sc 1. Break yarn, draw tail through and weave ends into panel 5.
Panel 6 – Color B
Note: Panel 6 is worked horizontally.
Row 1: Beginning in the slipped stitch right of the last unused base rectangle base st, ch 2 with color B, hdc 4, sl 1, sc 1, ch 1, turn.
Rows 2-15: Hdc 4, sl 1, sc 1, ch 1.
Row 16: Hdc 4, sl to join. Break yarn, draw tail through and weave ends into panel 6.
Strap
Note: The strap is not crocheted; it’s a simple macrame knot.
Macrame a square knot sinnet around half (36 inches) of 2 yards of nylon strapping. You can mix and match your colors however you like on the strap, but pictured is the strap in just clr B.
Hand sew the other yard of nylon strapping all the way around the inside of the messenger bag. The strap should be sewn into a large circle. Sewing it to the whole inside of the bag helps keep the strap and bag itself from getting stretched out.