


This quick tutorial on how to create a bag lining will, I hope, speak your language. If you’ve ever constructed a crocheted garment and seamed it with a backstitch or a whip stitch or put together a motif-based blanket, you’ve already got most of the bag lining basics in your crafty techniques toolbox.
I am the anti-sewist, yet I appreciate the structural and aesthetic value of a well-made and well-placed seam. Additionally, I love to design, make, and use bags, many of which benefit from a fabric lining.
Initially, lining your crochet bag project serves a few important purposes: (1) it will provide additional support and safeguards to the seams in your crochet fabric; (2) depending on the stitch pattern of your crochet fabric, it will allow you the ability to carry small things in your bag without fear of losing them; and (3) it will provide additional aesthetic value to your handiwork.
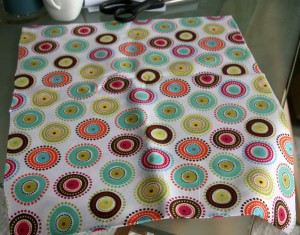
While the Flower Bud Handbag project associated with this article used store-bought fabric, don’t limit yourself to fabric bolts. Bag linings are a great way to re-use/upcycle all kinds of fabric bits around your house: an old fabric pillow covering, silk, cotton, and/or polyester blouses that perhaps have seen better days or no longer fit, pajamas (especially silk or polyester), and of course old jeans (assuming they contain a section big enough for a lining that is hole-free).
Once you’ve identified your fabric source and have complete the crocheted portion of your bag, creating the lining is fairly straightforward. I am using an easy rectangular-shaped bag as my example – if you have a more complicated bag shape then some further effort may be necessary.
Step 1:
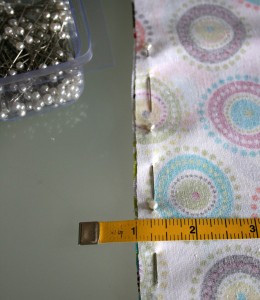
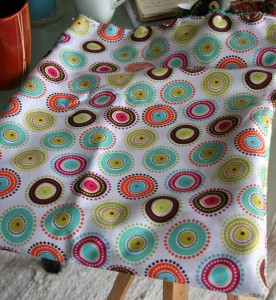
Cut your fabric to your bag’s dimensions, adding an additional ¾” in width and ½” in length. The additional width will allow for ¼” seams on each side plus some additional ease to allow for your crochet fabric to slightly stretch, as well as a generous ½” seam allowance at the top. The fabric lining’s job is to reinforce your crochet bag’s structure, but the crochet fabric is always responsible for the shape of the bag. Items should rest within the shape of the crochet fabric with the lining filling all of the bag’s shape with no gaps. While I measured my fabric with a ruler and pencil, you can also place your bag on the fabric and trace its outline, allowing for the above-mentioned additional width and length.

Left: measuring fabric; far right: the cut fabric. Note the bottom is actually the fabric’s fold line.
Step 2:
Once your lining is cut, turn the wrong side out and pin your side seams ¼” from each side edge.
Step 3:
This is where you’ll need to start sewing – however, think of this as seaming two motifs together because the principle is basically the same. Thread your needle with thread and knot the end; then, start at the bottom of one side and work a backstitch seam, following the line of your pins.
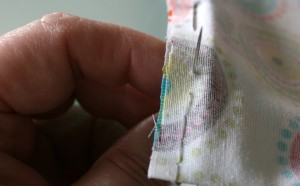
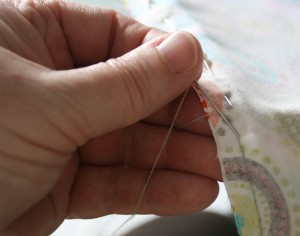
Left: Bring your needle up to the front of the fabric, about 1/4″ above the end of your last stitch.
Right: Place your needle at the top of your last stitch and bring it to the back, creating a backstitch.
Step 4:
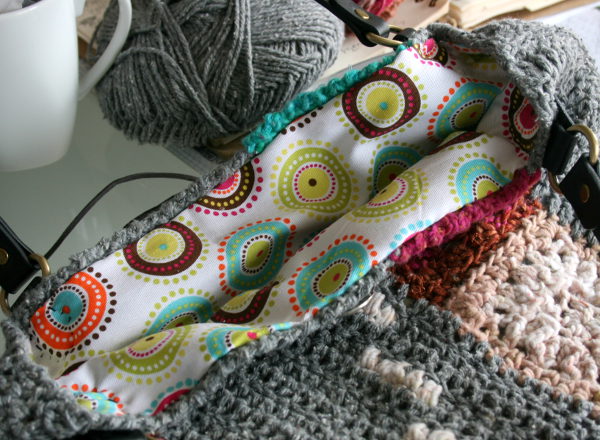
Once you have seamed both sides of your fabric, turn the lining right side out, turn your crochet bag fabric wrong side out, and slip your lining over the crochet fabric.
Step 5:
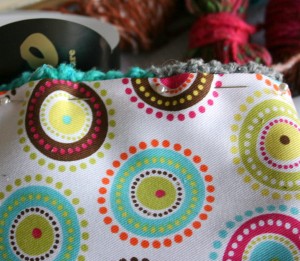
Now, you have just one more bit of sewing to go: the top edge seam. Turn the top of your lining fabric in, between the wrong side of the lining and the crochet bag, aligning it with one of the top rows of your crochet bag. For the Flower Bug Handbag, I lined the fabric up with the bottom of the reverse single crochet edging row.
Step 6:
Thread your needle and seam your lining to the crochet fabric with a stitch whose mechanics are similar to a whip stitch – place your needle from back to front of the crochet row and then back to front of the lining fabric, keeping as close to the top of the lining fabric edge as possible.

Step 7:
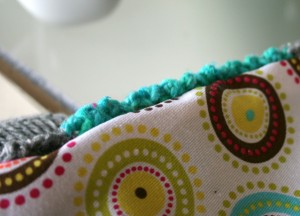
Once you remove the straight pins, you’ll have a seam that is surprisingly invisible.
Step 8:
Turn your bag right side out, add any handles and/or closing notions necessary, and then admire your tremendous handiwork.

What do you think – want to try it yourself? Turn the page and give the Flower Bud Handbag a try! 
If you’re looking for more bag patterns to practice your new skill on, check the Stonewash Bag and the Snowy Afternoon Toat!
Thanks for the lovely instructions on how to line a bag
Thanks for the lovely instructions on how to line a bag.
Not an anti-sewer, but, I do have a crocheted bag that I would like to line. Thanks for these instructions.
I too am an anti-sewer, but I have a bag that needs to be lined. This tutorial will serve me well. Thank you!
Thank you for this. I am also an anti-sewer. Don’t think I’ve ever lined a handbag and will often adapt a seamed pattern so that I can crochet without need for seaming. But you show this to be fairly simple, so I think I’ll make a lining for my next bag. I know it will make it more useful.